

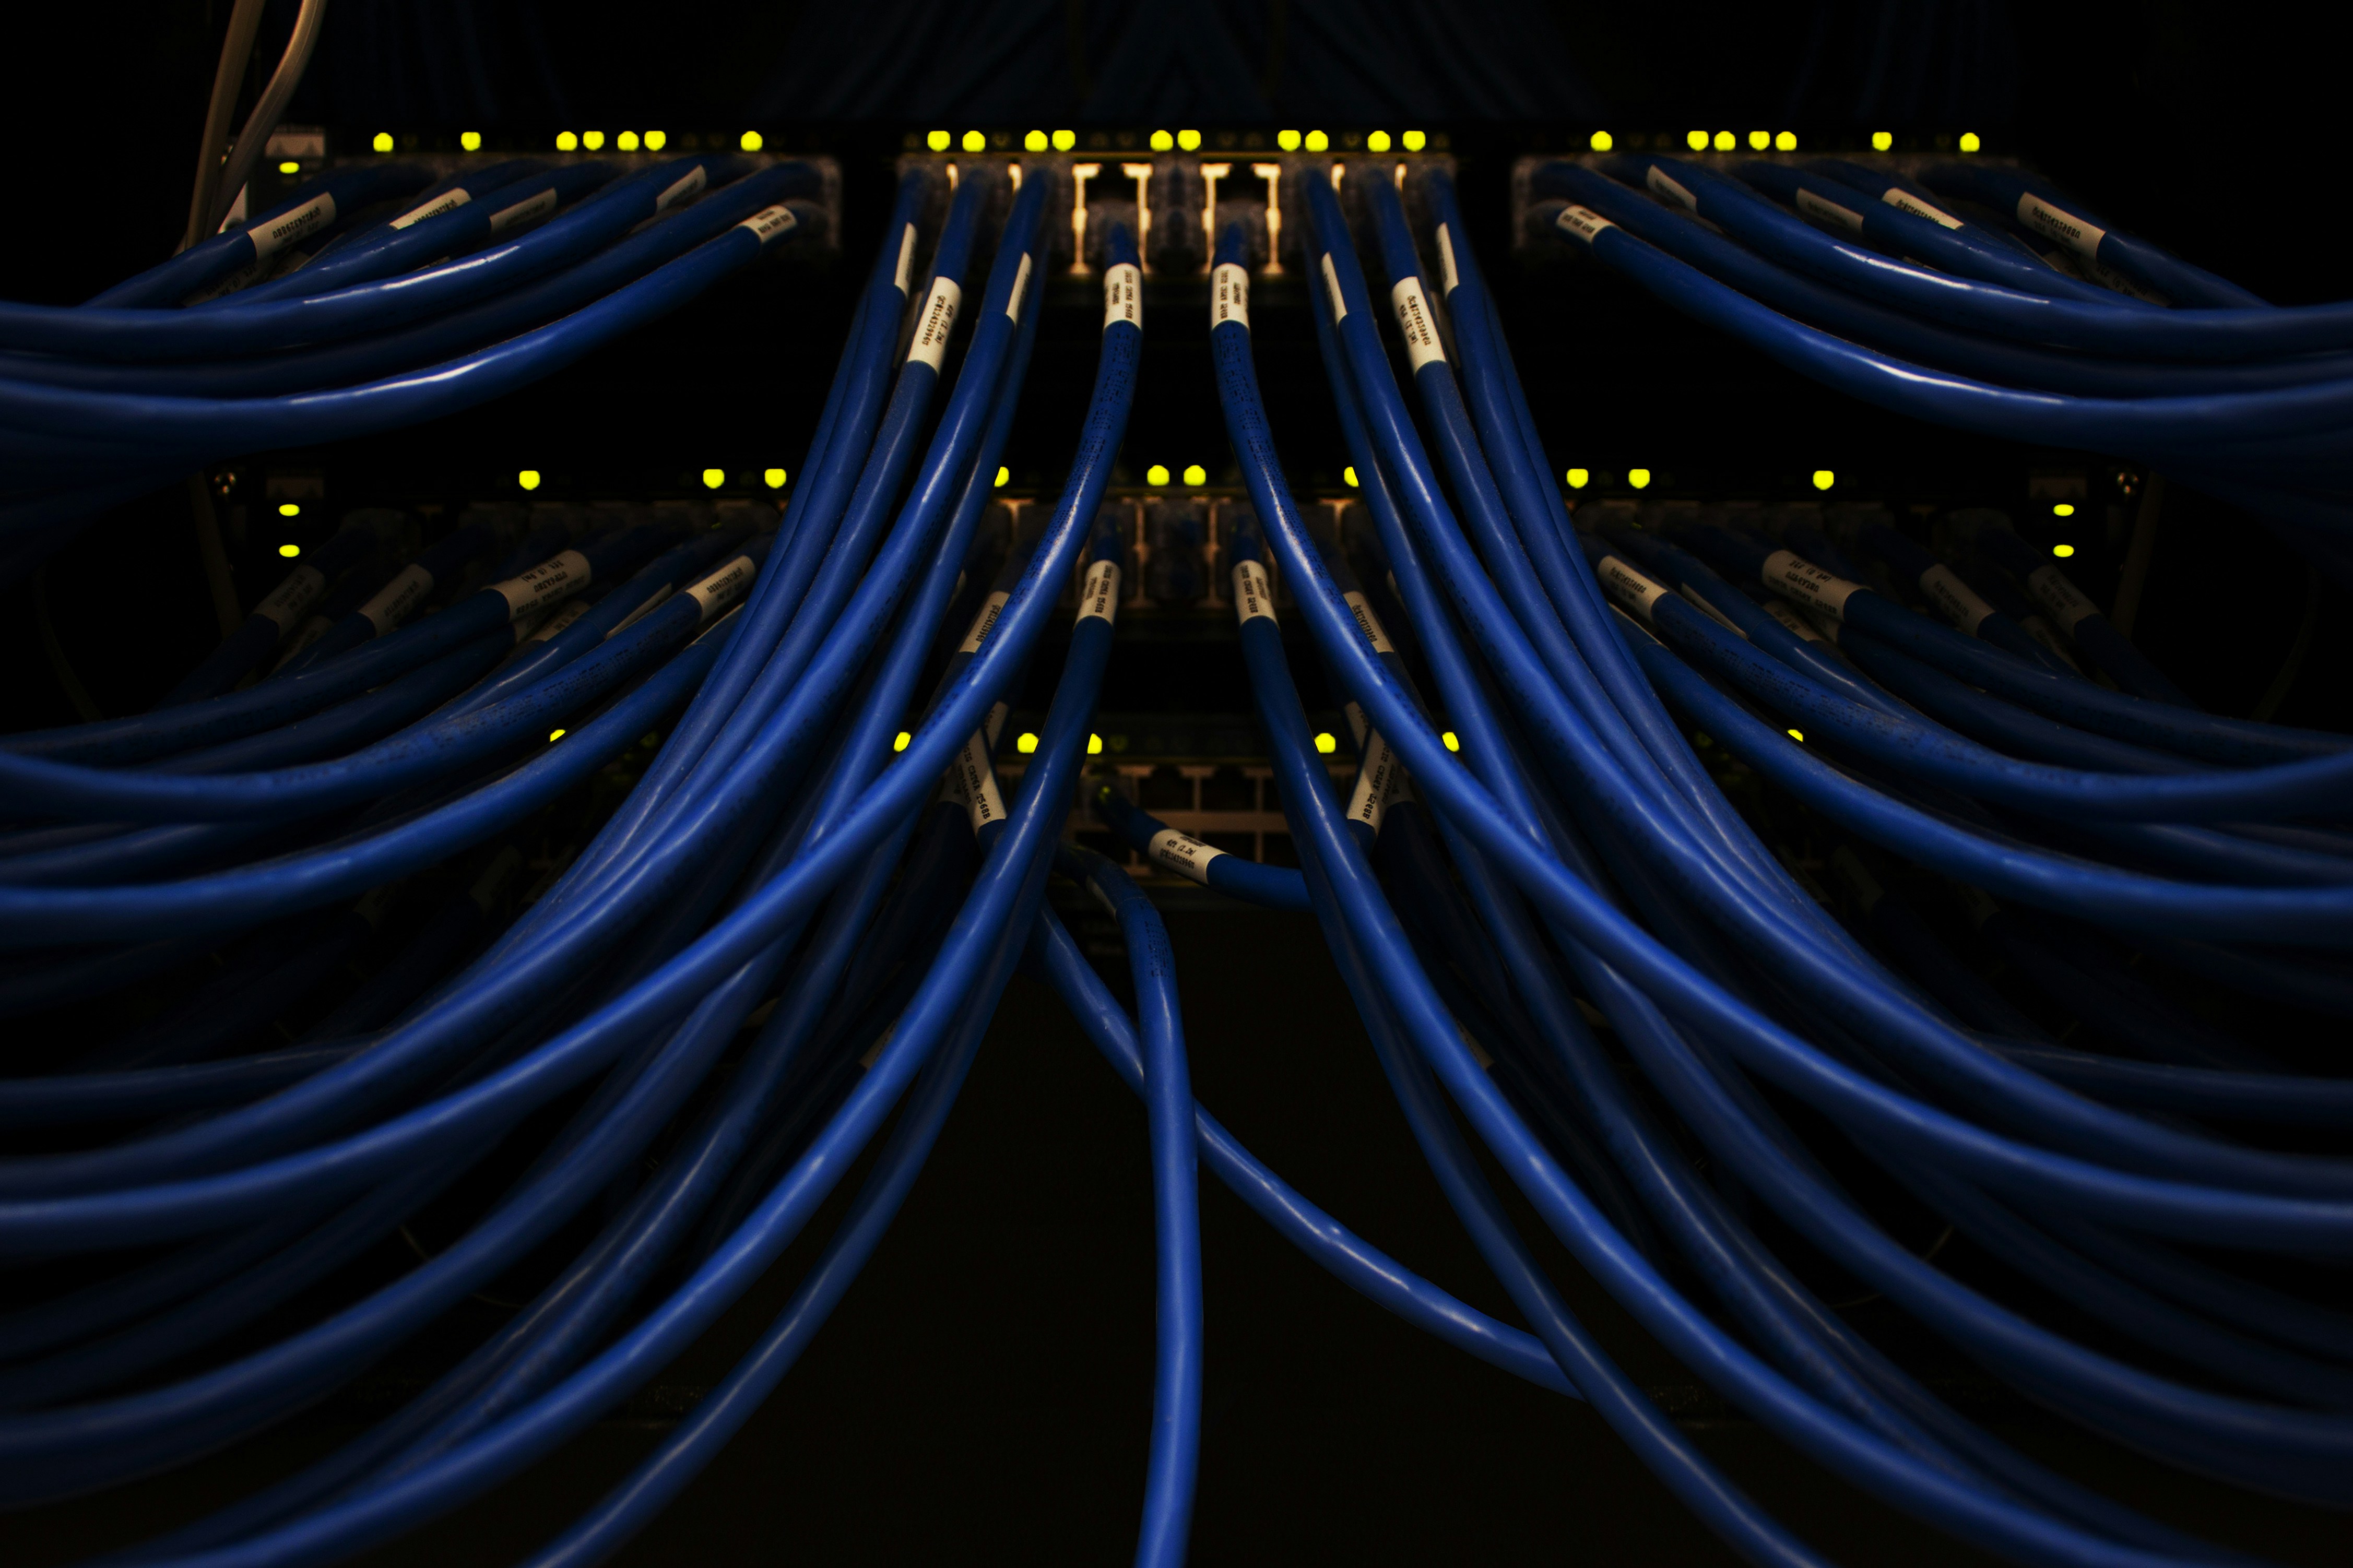

A software developer walks through the priorities, costs, network design, and accumulated hardware behind his evolving homelab—from Synology NAS units and used servers to dual-WAN routing, 10GbE upgrades, and a deliberately modular approach.
***
Editor’s note: A version of this article by dong4j appears on September 11, 2026 on SSPAI with the title “HomeLab 系列(一):入门指南与硬件”. Translated and published by agreement.
As the saying goes inside the Chinese tech scene, the three great hobbies of middle-aged men are phone chargers, NAS boxes, and software routers. This article is about the latter two.
As a software developer, I had always wanted a server of my own. A NAS and a software router were my first steps toward that dream. I bought my first NAS—network-attached storage—in 2019, and it opened up a whole new world: tinkering with Blu-ray movies, backing up family photos and videos, and sharing files, all without relying on someone else’s cloud drive or object storage service.
Then I got two public IP addresses, one each from China Telecom and China Unicom, and became obsessed with networking hardware. Over the next several years, I gradually added software routers, mini PCs, servers, and switches until I had assembled the setup I use today.
There are already plenty of articles about homelabs, but I still wanted to document how I built mine, the problems I encountered, and how I solved them. If it happens to help someone else who wants to start tinkering, all the better.
As the first article in this series, I want to clarify three things: what a homelab is, why I am willing to put so much work into one, and what hardware this setup requires—and roughly how much it costs. You will find the planned contents of the rest of the series at the end.
What Is a Homelab?
A homelab is exactly what the name suggests: a laboratory at home. You can think of it as a domestic version of a cloud server, used to run all kinds of self-hosted services—personal cloud storage, media services, development environments, smart-home systems, private clouds, and more.
Broken down to its essentials, a homelab consists of four things:
- Compute: physical servers or virtual machines that run services.
- Storage: NAS units and drives that manage and store data.
- Networking: software and hardware routers that manage traffic.
- Peripherals: cameras, sensors, development boards, and other hardware for experimentation.
The barrier to entry is lower than you might imagine. An off-the-shelf NAS or a mini PC capable of running Docker is enough to start; failing that, even a laptop will do. You do not need all four categories from day one. I did not buy my current setup in one go, either—it grew one experiment at a time. The complete inventory appears in the hardware section below.
Why I Built My Own Homelab
For me, building a homelab is tinkering with a touch of romance. I have three reasons for doing it, in descending order of importance: data, privacy, and the joy of tinkering itself.
My Data Should Be in My Hands
I care a great deal about data security, so I keep important data on my own servers instead of entrusting it to cloud storage. Years ago, I hosted the images for my blog on Qiniu Cloud’s object storage. I later forgot to renew the service, and every image became inaccessible immediately, with no opportunity to rescue anything. Add the large number of cloud-storage providers that have simply vanished, and I now have no trust at all in services of this kind.
Family Photos Should Not Be Held by a Third Party
I feel much more comfortable keeping things such as family photos and records of my son growing up in private local storage. None of that data needs to be shared with anyone or pass through a third party.
A Laboratory That Is Always Available
I enjoy trying new technologies. Having my own environment means I can quickly find out whether a new approach works instead of waiting for a slot in the company schedule. I suspect this is what draws many people in our profession into homelabbing.
My Rule: Enough Is Enough—Avoid “All in Boom”
First comes the KISS principle: Keep It Simple, Stupid.
Building a homelab takes time and effort. To keep it from consuming too much of my personal time, I favor simple, user-friendly solutions and steer clear of complicated configuration and maintenance. Following the principle that “good enough is enough,” I also avoid unnecessarily elaborate software architectures.
Hardware: Buy a Ready-Made NAS for Important Data; Hunt for Used Bargains Elsewhere
For important data, I buy an off-the-shelf NAS to reduce the risk of data loss. Less critical services can simply run in Docker, which is flexible to manage and keeps costs under control. The entire homelab is therefore built around the NAS. For everything less important, I go bargain-hunting on Xianyu, a Chinese secondhand marketplace.
Software: Docker Is Enough; No Kubernetes Yet
The largest investments in a homelab are hardware and time. To contain the latter, I use Docker and skip more demanding systems such as Kubernetes: the number and nature of my services do not justify it yet. Perhaps I will consider it during the next upgrade.
Because most of my services run in Docker, virtualization support is a nonnegotiable requirement when I choose hardware.
Four Priorities for Choosing Hardware
When selecting a particular machine, I rank four criteria in this order:
- Stability: I favor dependable products so that I do not have to deal with frequent hardware failures, which hurt efficiency and can cause data loss.
- Value: I look for the most cost-effective option that meets my needs. Money is finite and has to be allocated sensibly.
- Expandability: I choose solutions that are easy to expand for future upgrades.
- Compatibility: I prefer widely adopted, broadly compatible components to avoid problems later.
No All-in-One—or “All in Boom”
Stability matters most to me, and I do not want to troubleshoot hardware failures constantly. That rules out an all-in-one machine that crams every function into a single box—what homelab enthusiasts jokingly call “All in Boom,” because one failure can take everything down. Such products look attractive, but they often sacrifice performance and room to upgrade.
Instead, I distribute services across several independent machines. A problem with one does not affect the others, providing better reliability and continuity of data access.
Of course, everyone approaches homelabbing differently and owns different hardware. What matters most is choosing what suits your present circumstances. If you do not want to tinker, a ready-made server is the easiest option. If you do, assembling a system from secondhand hardware offers genuinely excellent value.
My own approach is a compromise. The most important component—the data—goes on a ready-made NAS with redundancy and a cold backup. As long as the data is safe, I can tinker freely with everything else.
Cost: Where the Money Went
The biggest homelab expenses are hardware and time; the software costs virtually nothing. My rule is to spend money on the data first, then save wherever I can:
- Ready-made NAS units and drives: This is the one area where cutting corners is difficult, because it holds data I cannot afford to lose.
- Servers and graphics cards: Most are secondhand. I paid RMB 1,800 (about US$268 at the time of publication) for the RTX 2080 Ti on Xianyu, and the Tesla P40 was used as well.
- Networking equipment: Almost all the switches and software routers were secondhand bargains from Xianyu. Synology’s official 10GbE card for the DS923+ costs roughly one-fifth as much as the NAS itself, so I waited for a compatible card to appear and bought one for a little over RMB 400 (about US$60).
- Cloud server: It costs RMB 99 (about US$15) a year, and I bought two years at once. I mainly use it to host my blog and relay site-to-site network traffic.
Sometimes I paid too much. Years ago, the first 32 GB memory module I bought for the 2018 Mac mini cost nearly RMB 3,000 (about US$447). Three months later, the second cost only a little over RMB 1,000 (about US$149). All I could do was console myself with the thought that buying early meant enjoying it sooner. The greatest hidden costs of used hardware, meanwhile, are time and luck: time spent refreshing listings, time spent testing purchases, and the occasional item that turns out not to suit your needs.
Electricity Is Part of the Bill Too

This is the total power consumption of my study with about 80 percent of the equipment running. It often gives me nightmares in which my wife finishes paying the electricity bill, marches into the study, and starts pulling plugs.
Hardware Inventory

I have divided the inventory into eight categories: computers, NAS units, hardware routers, software routers, switches, audiovisual hardware, a cloud server, and an assortment of development boards and peripherals for experiments.
Computers
| Device | Key configuration | Quantity | Notes |
|---|---|---|---|
| MacBook Pro | 16-inch / M1 Pro Max / 64 GB / 4 TB | 1 | Primary computer |
| Mac mini (2018) | Core i7 / 64 GB RAM / 1 TB / 10GbE RJ45 | 1 | Former primary computer, now a download box and server |
| Mac mini (2023) | M2 / 16 GB RAM / 256 GB / 10GbE RJ45 | 1 | Cache server and test machine for small models |
| ThinkStation M920x Tiny | Core i7 / 64 GB RAM / 4.5 TB / dual 10GbE SFP+ | 1 | Main server and host for most Docker containers and virtual machines |
| Custom desktop | Dual Xeon E5-2680 v4 / 256 GB RAM / 2 TB / 10GbE RJ45 / RTX 2080 Ti + Tesla P40 | 1 | AI training rig |
Work led me to buy my first MacBook Pro in 2015, and from there I could not stop until I had gradually acquired the whole Apple ecosystem. There were two reasons: macOS is excellent for development, and the restrained operating-system and industrial design really appeal to me.
When I began building the homelab, the AI boom led me to buy x86 hardware and graphics cards, then assemble my first home server. Its immense power consumption made running it around the clock impractical, so I bought a bare-bones Lenovo M920x and upgraded it step by step to the present configuration. It runs Ubuntu Server.
Later, I also started tinkering with Proxmox VE, or PVE, mainly to run larger services and disaster-recovery backups of important data.
MacBook Pro

This is my second MacBook Pro. I am glad that, in the year large language models truly took off, I had bought the version with 64 GB of memory. Thanks to frameworks such as llama.cpp, it can run large models relatively smoothly even on the CPU.
My most immediate impression of Apple’s switch from Intel to Apple silicon is that the machine feels even slightly warm only when it is running an LLM; at every other time, it is cold to the touch. LLMs are currently flourishing in every direction, from natural-language interaction to image and speech generation and multimodal applications. For individuals, however, deploying an LLM still requires a substantial hardware investment. Privacy and compute remain particularly difficult problems on edge devices.
The day these models run smoothly on a development board like a Raspberry Pi will be the day everyone can have a private, affordable personal LLM.
Mac mini (2018)
The 2018 Mac mini was my first Mac desktop. I chose it mainly because its memory could be replaced, so I bought the base 8 GB configuration and upgraded it to 64 GB.


Later, I bought another 2018 Mac mini for the office and made it my primary development machine. I also paired it with a Blackmagic eGPU, because the Mac mini struggled a little to drive two 4K displays at the time. The eGPU made IntelliJ IDEA noticeably smoother.

Intel chips ran far too hot. I worked my way through several external cooling systems and even tried a thermoelectric cooler at one point. Without cooling, the machine quickly became too hot to touch. Apple silicon for the win.

When the M1 Mac mini arrived, I held off. After watching a great many test videos, I decided to wait for the M2 model instead, so I sold one of the 2018 Mac minis and passed the Blackmagic eGPU on to a friend. I kept the remaining 2018 Mac mini as a witness to the final generation of Intel Macs—or, to be honest, because Intel Mac mini prices collapsed after the M-series models launched. After hesitating, I simply retained it as a server.
Mac mini M2

My M2 Mac mini has 16 GB of memory, a 256 GB SSD, and 10GbE. It may be the best-value M-series mini computer. Memory matters more than storage to a developer, and there had already been successful attempts to replace the storage chips. I figured that installing a larger drive myself later would cost far less than Apple’s upgrade, so I chose the 256 GB model.
The M2 Mac mini now serves mainly as a cache server and hosts numerous services for my blog. Its unified memory architecture also lets it run small models in GGUF format. The 256 GB SSD is both cramped and bandwidth-limited, so I hardly dare install many apps. Even the model files have to live on the NAS when I run an LLM.
ThinkStation M920x Tiny

The hardware specifications are:
- CPU: Intel Core i7-8700
- Memory: 2 × 32 GB
- Storage: 512 GB M.2 system drive + 4 × 1 TB SSDs
- Networking: Intel X520-DA2 dual-port 10GbE SFP+ card + onboard Intel I219 Gigabit Ethernet + USB 2.5GbE adapter + USB Bluetooth and Wi-Fi module
I chose Ubuntu Server because this M920x Tiny is intended to be a standalone server for my personal needs:
- Almost every service can run in Docker with little overhead.
- Giving containers access to a graphics card is much easier than GPU passthrough to a virtual machine—not that this M920x contains a graphics card.
- Virtualization support is built into the Linux kernel, so any distribution can install KVM/QEMU and run virtual machines.
- After a virtual machine has been in use for a while, its resources invariably need to be adjusted, and resources such as filesystems are cumbersome to resize.
- I do not need to virtualize systems such as OpenWrt or a NAS; I would rather buy purpose-built hardware and run each on its own system.
My current setup is therefore Ubuntu + Docker + KVM/QEMU. More than forty services run in Docker, sharing the filesystem and graphics card. On the occasional day when I need an operating system with a different kernel, I spin up a virtual machine in KVM/QEMU. Simple, but still elegant.

At present I run only four virtual machines. A web application firewall is the second line of defense for all internet traffic. It reverse-proxies the other services on the LAN and lets me cut them off quickly if something goes wrong. But this mini PC was too inexpensive and useful to resist, so I bought two more. Together with my original one and a NUC I acquired later, they form a 40GbE internal network that I built for fun, mainly for Ceph:

Custom Desktop

Warning: serious RGB overload.
The hardware specifications are:
- CPU: 2 × Xeon E5-2680 v4
- Memory: 256 GB of ECC memory—all the slots are populated, which is satisfying in itself
- Storage:
2 × 1 TB SSDs, with HDD expansion under consideration - Graphics: RTX 2080 Ti + Tesla P40
- Networking: onboard dual Gigabit Ethernet + PCIe 10GbE RJ45 card + PCIe 2.5GbE card + USB Bluetooth and Wi-Fi module
At first, I genuinely wanted to assemble a server of my own. I considered a rack server—they really are cheap—but could not accept the noise or size in a home. Instead, I chose a dual-socket HUANANZHI motherboard and paired it with two E5-2680 v4 processors. The value was still quite good.
I continued scavenging used parts until every memory slot was full, and switched the operating system from Windows 11 to Ubuntu Server 22.04. The E5 processors ran Windows 11 so slowly that I began to question my sanity. Storage requirements were modest, so I began with two 1 TB SSDs and left expansion for later.
I could not find a conventional enclosed case that I liked, so I had an open-frame model made through Xianyu. It looks all right, though dust is difficult to manage. With two graphics cards installed, its power consumption is intolerable. I now turn it on only to test the newest models; the rest of the time, it gathers dust.
The RTX 2080 Ti was bought used on Xianyu for RMB 1,800. There are now versions modded with 22 GB of VRAM, which I may try later. Model workloads are ravenous for VRAM, so I subsequently bought a Tesla P40 as well. Its 24 GB of VRAM lets me train LoRA adapters myself.
The machine crashed several times because of cooling problems, so I modified the RTX 2080 Ti with a steel cooling plate and converted it to liquid cooling. It can now keep model workloads under control. The Tesla P40 is a server card without active cooling, so I also bought a modified cooler for it on Xianyu. The result is barely adequate, but I would not especially recommend the card: it is slow, and some models may not support it.
To make the machine easier to turn on and off, I added a Wi-Fi power-on card and connected it to Xiaomi Home, which lets me control the power by voice.

Synology NAS Units
| Device | Key configuration | Quantity | Notes |
|---|---|---|---|
| DS218+ | 10 GB RAM / 2 TB of SSDs in RAID 1 / Gigabit Ethernet + 2.5GbE | 1 | Primarily Synology Drive file synchronization and lightweight Docker containers |
| DS923+ | 36 GB RAM / 2 TB of SSDs in RAID 1 as the system volume / 6 TB + 8 TB + 2 × 10 TB HDDs / 10GbE | 1 | Important-data backup, media services, and Docker host |
DS218+

I bought my first DS218+ in 2019 and promptly fell down the NAS rabbit hole. I had never realized a NAS could be so much fun. One of the six 6 TB HDDs I initially bought was damaged by a power outage, which has made me extremely cautious about choosing hard drives ever since.
The DS218+ is now used mainly to synchronize files through Synology Drive. A public IP address allowed me to build a cross-platform file-synchronization system around Drive, and it has been remarkably trouble-free. To improve synchronization performance—and because I genuinely do not need especially large HDDs—I eventually replaced every drive with an SSD and configured RAID 1 for data protection.
USB 2.5GbE Adapter
I upgraded the DS218+ to 2.5GbE with a USB network adapter; this article provides detailed instructions. It is even easier now using third-party packages:

You need to add a third-party package source in Package Center:[1]

DS923+

The DS923+ is the backup target for my important data. It backs up the entire DS218+ while also running media services and Docker containers. One point worth mentioning is that Synology says the DS923+ supports only 32 GB of memory, while my testing indicates that it can take up to 64 GB. I currently have one 32 GB ECC module plus the original 4 GB, for a total of 36 GB.
The DS923+ supports using SSDs as storage volumes, but frustratingly, Synology permits only its own M.2 drives. The open-source Synology HDD db can bypass this restriction perfectly, though the script has to be run again after every DSM update. If DSM is configured to update automatically, the best approach is to create a scheduled task that runs whenever the Synology starts:

Several other projects are also worth trying:
10GbE Network Card
Synology’s official 10GbE card for the DS923+:

One reason I chose the DS923+ was its support for a 10GbE card, laying the groundwork for eventually upgrading the entire home to 10GbE. The official card was prohibitively expensive—about one-fifth the price of the DS923+ itself. As soon as a compatible card appeared for a little over RMB 400 (about US$60), I bought it:

The DS923+ and 2018 Mac mini are now connected at 10GbE through an HYWS-SGT0204S switch, and I am extremely happy with the transfer speeds. I may eventually upgrade all the main devices in the study to 10GbE. All I still need is an all-10GbE switch and a Thunderbolt 4-to-10GbE dock. I have not yet decided between an all-SFP+ or an all-RJ45 switch. I will probably choose SFP+ because it runs much cooler, but some devices support only RJ45, which adds the cost of SFP+-to-RJ45 transceivers.

The HYWS-SGT0204S has only two 10GbE SFP+ ports. They connect the DS923+ and the 2018 Mac mini through SFP+-to-RJ45 transceivers. Those produce plenty of heat as well, so I added a cooling fan and heatsinks, which work extremely well.
Link Aggregation

Because I installed a separate 10GbE card, I was free to experiment with link aggregation on the two built-in Gigabit Ethernet ports. They are not connected to a managed switch, however, so for now the setup is merely for my own amusement and does not double the available bandwidth.
These links explain the relevant concepts:
- The difference between SMB3 Multichannel and link aggregation
- Enabling link aggregation on a NAS to increase bandwidth for multiple devices
My goal is to improve performance when several devices access the NAS concurrently. In theory, all I need is a managed switch. I already own the hardware, but installing it requires rewiring, so that experiment can wait.
Hardware Routers
| Device | Role | Quantity | Notes |
|---|---|---|---|
| Xiaomi AX9000 | China Telecom PPPoE; primary router | 1 | 1 Gbps internet connection; 2.5GbE port used for the LAN |
| Xiaomi AX1800 | AX9000 mesh node | 2 | One in the study and one in the primary bedroom to extend Wi-Fi coverage |
| Xiaomi Router 6500 Pro | China Unicom PPPoE; primary router | 1 | 1 Gbps internet connection; 2.5GbE port used for the LAN |
| Xiaomi Router R3D | Secondary router behind the 6500 Pro | 1 | Retired from its original role; 1 TB drive used for downloads |
| Xiaomi Router R1D | Secondary router behind the 6500 Pro | 1 | Retired from its original role; 1 TB drive used for downloads |
| AirPort Time Capsule 2 TB | Downstream router behind the AX9000 | 1 | Wi-Fi disabled; used for macOS backups and additional Ethernet ports |
| AirPort Express | Downstream router behind the AX9000 | 1 | Wi-Fi disabled; used only for AirPlay 2 music playback |
My home has two separate 1 Gbps internet connections, one from China Telecom and one from China Unicom. Telecom is the primary network and carries most of the household’s internet traffic. Unicom is the secondary network, used for downloads and IoT devices. The two remain independent and provide redundancy for one another.
AX9000

The AX9000 can run Docker, and it is possible to obtain root access through a container. After trying it, however, I found the setup insufficiently stable and restored the official firmware. Some jobs are best left to purpose-built hardware.

AX1800
The AX1800 units form a wired mesh with the AX9000. One sits in the primary bedroom and the other in the study. Each serves both as a Wi-Fi access point and as a LAN extension, with a downstream switch providing wired connections for development boards.
6500 Pro

I chose the 6500 Pro for its built-in smart-home hub. Most of the smart devices at home are from Xiaomi, so it effectively saved me the cost of a separate gateway. Its performance is underwhelming, however: latency is high, and the thermal design is deeply unreasonable. If you are considering a 6500 Pro, watch this review first. I spent an afternoon drilling ventilation holes, adding a fan, and installing temperature control—the full treatment.

The 6500 Pro mainly connects smart-home devices, so I created a dedicated 2.4 GHz network named ihome.device. I also enabled a guest network for visitors.
Xiaomi Router R3D and R1D

Both are now-classic routers with a built-in 1 TB HDD and SMB support, making them perfectly usable as lightweight NAS devices. I obtained root access at one point, but their hardware is too limited to make tinkering especially rewarding.
At some point, I developed a fondness for modifying cooling systems. No device that can accept extra cooling escapes. These two routers have mediocre thermals and become rather warm in summer. The external cooling helps a little—but only a little.
AirPort Time Capsule 2 TB and AirPort Express

Both products have been discontinued for years. I personally carried the 2 TB AirPort Time Capsule home from The MixC shopping mall many years ago. Its 2 TB of storage is just enough to back up three Macs, and I also use it to add more Gigabit Ethernet ports.
I later bought the AirPort Express on Xianyu. It does nothing except play music over AirPlay 2.

Apple’s routers really are quite easy to configure.
IPv6
Both primary routers support IPv6, and devices at home can be reached normally over IPv6 from outside the network. I currently keep it disabled, however. Some services still lack the security and authentication measures they need, and exposing them directly to the public internet makes me uneasy. The length of an IPv6 address makes it difficult to guess by brute force, but I have bound domain names to mine, so a simple ping reveals a device’s unique address. For now, I am staying with IPv4, where port forwarding at least lets me control which services are exposed.
Why I Do Not Replace the ONT with an SFP ONT
I often see videos recommending an “SFP ONT + 2.5GbE router” in place of the carrier-provided optical network terminal, or ONT, to break through the nominal Gigabit ceiling. I did not adopt this approach, chiefly because:
- SFP ONTs produce tremendous heat, which reduces stability.
- Raising throughput from about 930 Mbps to more than 1,100 Mbps requires buying an SFP ONT and other hardware, offering poor value for money.
Why I Do Not Use Multiple PPPoE Sessions, Load Balancing, or Bonded Connections
Plenty of videos also recommend running multiple PPPoE sessions across multiple WAN links, load balancing them, or bonding broadband connections to turn 1 + 1 into 2. I chose none of these approaches, for several reasons:
- Most carriers either do not support multiple PPPoE sessions or do not increase total throughput when they do. I value stability more.
- A higher connection speed does not necessarily produce a better experience. My China Unicom connection has higher latency than China Telecom, so I prefer to choose between them as needed rather than make latency unpredictable.
- The public IP address would jump around. Both connections have public IPs, and these techniques would inevitably vary the egress address. Configuration could solve that, but only at the cost of additional hardware and complexity.
- I simply do not need that much speed. For me, these solutions would improve only benchmark results, not any real workload.
- They introduce a single point of failure. I do not want one device carrying both internet connections.
What I want instead is active–standby redundancy between two connections, each with its own job. Another important reason is that I use WireGuard for site-to-site networking. Each connection provides a separate path into my home LAN, so I do not want to change the present network architecture.
Software Routers
Here, a “secondary gateway” means a small software router on the LAN that handles selected traffic and services without replacing the primary hardware router.
| Device | Role | Quantity | Notes |
|---|---|---|---|
| R2S | Secondary gateway for China Telecom and China Unicom | 3 | Lightweight Docker containers, ad blocking, and site-to-site networking |
| R5S | Secondary gateway for China Telecom and China Unicom | 1 | Lightweight Docker containers, ad blocking, and site-to-site networking |
| H28K | Secondary gateway for China Telecom and China Unicom | 1 | Lightweight Docker containers, ad blocking, and site-to-site networking |
OpenWrt was another open-source project that opened up a new world for me. I had never imagined that a network could be configured so freely, though I encountered plenty of pitfalls in the process.
Anyone who buys a software router probably already knows what it is for, so I will skip the basics and discuss only the problems I encountered.
R2S
The R2S was my first. I loved its tiny aluminum body from every angle. I later added a fan governed by a temperature-control script.
When I first began using OpenWrt, I did not realize that a LAN port could be reassigned as a WAN port. I therefore used the R2S only as a downstream router for China Telecom. After installing WireGuard, it could reach only the Telecom LAN. I later found another R2S at a bargain price and made that one the WireGuard server for China Unicom.
As I dug deeper, I tried converting the LAN port to WAN. The R2S can now connect to both China Telecom and China Unicom, with one link acting as a backup, so there was no longer any reason to sell the extra unit.

This unit sits on the desk in my study. It is a secondary router on the China Telecom network, with China Unicom as its backup connection.

This one sits in the network cabinet. It is a secondary router on the China Unicom network, with China Telecom as its backup connection.

The third R2S is at the office, where it primarily acts as a WireGuard server that connects the office and home networks.
It is worth noting that the R2S’s WAN port is attached internally over USB 3.0 and tops out at a little over 600 Mbps in my testing. My use case does not depend on that throughput, so I have no need to upgrade.
I use the R2S mainly as a secondary gateway, with no devices connected directly to its LAN port. That spare port can therefore be converted to WAN, allowing simultaneous connections to China Telecom and China Unicom.
This creates a network-interface priority issue, which can be resolved with gateway metrics:

I will explain the exact configuration in the networking article. The firmware I installed also lacks an official temperature-control script, but I achieved temperature-based fan control by following this guide.
curl -o /usr/bin/start-rk3328-pwm-fan.sh https://github.com/friendlyarm/friendlywrt/blob/master-v19.07.1/target/linux/rockchip-rk3328/base-files/usr/bin/start-rk3328-pwm-fan.sh \
curl -o /etc/init.d/fa-rk3328-pwmfan https://github.com/friendlyarm/friendlywrt/blob/master-v19.07.1/target/linux/rockchip-rk3328/base-files/etc/init.d/fa-rk3328-pwmfan \
chmod +x /usr/bin/start-rk3328-pwm-fan.sh  /etc/init.d/fa-rk3328-pwmfan \
/etc/init.d/fa-rk3328-pwmfan enable \
/etc/init.d/fa-rk3328-pwmfan start
R5S

I added a cooling fan, but have not yet set up temperature control. I did expose the PWM connector, so I will not have to dismantle the case the next time I tinker with it. I can power the fan directly over PWM and replace the present USB power supply.
I also added a 256 GB M.2 SSD and use the R5S as a lightweight server. It would be a shame to let its 4 GB of memory go to waste.
H28K

I like these compact aluminum enclosures so much that I could not resist buying the 4 GB H28K as well. At present, however, it serves only as a WireGuard server. I have not even deployed a Docker container on it.

The H28K has no PWM connector, so I soldered in a USB connection to drive the fan. It works reasonably well.
Switches
| Device | Port configuration | Quantity | Notes |
|---|---|---|---|
| TP-Link TL-SH1005 | 5 × 2.5GbE; China Telecom and China Unicom | 2 | Distribution switches in the network cabinet |
| Xike SKS1200-8GPY1XF | 8 × 2.5GbE + 1 × 10GbE; China Telecom | 1 | Main switch for the study |
| DX-1009N | 8 × 2.5GbE + 1 × 10GbE; China Unicom | 1 | Main switch for the study |
| TP-Link TL-SG2008D | 8 × Gigabit Ethernet; China Telecom | 1 | Secondary switch, mainly for development boards |
| TP-Link TL-SG1008D | 8 × Gigabit Ethernet; China Unicom | 1 | Secondary switch, mainly for development boards |
| iKuai IK-J3005D | 5 × Gigabit Ethernet; China Telecom and China Unicom | 2 | Temporary desktop switches in the study |
| HYWS-SGT0204S | 4 × 2.5GbE + 2 × 10GbE; China Unicom | 1 | 10GbE connection between the 2018 Mac mini and DS923+ |
I have gradually replaced my switches several times, moving from Gigabit Ethernet to 2.5GbE and then to the present mixture of 2.5GbE and 10GbE. The two Gigabit models, the TL-SG2008D and TL-SG1008D, now serve as secondary switches dedicated to development boards and other hardware that does not need more than Gigabit bandwidth.
I may later add a 10GbE switch for China Unicom in the study and connect the main devices directly at 10GbE. Those devices are:
- MacBook Pro: through a Thunderbolt 4-to-10GbE SFP+ adapter
- 2018 Mac mini: built-in 10GbE RJ45
- M2 Mac mini: built-in 10GbE RJ45
- DS923+: already upgraded to 10GbE RJ45
- M920x: two built-in 10GbE SFP+ ports
- Custom desktop: one built-in 10GbE RJ45 port
An eight-port SFP+ switch would leave ample room, and I could add SFP+-to-RJ45 transceivers only where needed.
TL-SH1005

On the China Telecom side, fiber enters the home at the ONT in the network cabinet. One in-wall Ethernet cable runs from there to the AX9000 in the TV console opposite, which establishes the internet connection. A second in-wall cable runs back to the TL-SH1005 switch and from there to the other rooms. The China Unicom connection is simpler because its ONT, 6500 Pro, and switch all sit near the network cabinet and can be connected with short cables. Fiber enters the home, and the router establishes the connection in the same way.
Fortunately, I installed several Ethernet cables during the renovation: three to the living-room TV console, two each to the primary bedroom and study, and one to the second bedroom. Had I installed fewer, the homelab would probably have ended up with a very different architecture.
SKS1200-8GPY1XF and DX-1009N

I bought these two switches secondhand on Xianyu at different times without scrutinizing the specifications. In the spirit of scavenging used hardware, I simply bought whatever was cheap.
The two Ethernet jacks in the study connect separately to China Telecom and China Unicom, providing wired access to the other equipment there. Nearly every device has two network ports so that I can take redundancy to its logical extreme. If a device has only one, I add a USB 2.5GbE adapter.
IK-J3005D

I bought two of these at different times. They sit on the desk as temporary switches and take up very little space.

HYWS-SGT0204S

When I ran out of 2.5GbE ports and wanted a direct 10GbE connection between the 2018 Mac mini and DS923+, I added this switch. I may eventually replace it with an all-10GbE model and upgrade every major device to a 10GbE connection.
Audiovisual Hardware
| Device | Specification | Quantity | Notes |
|---|---|---|---|
| Apple TV 4K | 64 GB | 1 | Living-room television |
| HomePod | First generation | 1 | Speaker in the study |
| HomePod mini | Second generation | 2 | Living-room speakers |
| Passive speakers | Self-assembled | 2 | Mounted under the desk for basic listening |
| FiiO K5 Pro | K5 Pro ESS | 1 | Used with headphones |
| Phicomm T1 | 2 GB RAM + 16 GB storage | 1 | Android TV |
Strictly speaking, this category is not part of the homelab’s infrastructure. These devices simply came out of the same long bout of tinkering, so I have recorded them here as well.
Apple TV 4K

I use VidHub to play movies stored on the NAS. It also supports the tvOS version of Surge, and I occasionally watch YouTube. Overall, it does not get especially heavy use.

HomePod and HomePod mini

This is a first-generation HomePod. The second generation was pared back, so I have never planned to replace it. Paired with the passive speakers beneath the desk, it produces sound both above and below me, creating a strong sense of envelopment.

The HomePod mini speakers sit behind the living-room sofa and provide audio for the Apple TV 4K. I also use them occasionally for whole-home AirPlay, and the result is quite pleasant.
Passive Speakers

I bought the entire set through Xianyu and assembled it myself.
FiiO K5 Pro

I went through a hi-fi phase. I later sold the portable gear and kept only this unit, which I use with Sony WH-1000XM4 headphones.
Phicomm T1
The black box in the middle is the T1, running third-party YYF firmware. It shares a display with the M2 Mac mini, with a UGREEN KVM switching the video input.

The catch is that its macOS support has not been adapted for Apple silicon. Because I bought two T1 units, an Intel-based Mac still works well with them. They are gathering dust now, but I may eventually see whether I can flash Armbian onto them.
Cloud Server
| Provider | Specification | Quantity | Notes |
|---|---|---|---|
| Alibaba Cloud | 2 CPU cores / 2 GB RAM | 1 | Static public IP address, blog hosting, and site-to-site networking |
Many of these experiments assume access to a static public IP address. It is now possible to reach services at home through a domain name and DDNS, but the server was simply too cheap to resist: at RMB 99 a year, it looked like a bargain from every angle, so I bought two years at once.
Other Hardware
| Device | Specification | Quantity | Notes |
|---|---|---|---|
| Raspberry Pi Zero 2 W | 512 MB RAM | 1 | Development board |
| Raspberry Pi 4 Model B | 8 GB RAM | 1 | Development board |
| Raspberry Pi 5 | 8 GB RAM | 2 | Development board |
| NanoPi NEO4 | 1 GB RAM / 32 GB eMMC | 2 | Development board |
| HK1 Box | 32 GB storage / 4 GB RAM | 1 | Home Assistant |
| LaCie d2 Professional | 8 TB | 1 | Cold backup |
| UPS | APC Back-UPS 650 | 1 | Backup power for the DS923+ and development boards |
Raspberry Pi

At a certain point, writing software was no longer enough to satisfy my curiosity, so I gradually bought several Raspberry Pi boards to try new things. Controlling hardware through software feels extraordinarily cool. At present, I mainly experiment with work-related subjects such as streaming services.
NanoPi NEO4

The RK3399 really does produce a great deal of heat, so I bought several small Raspberry Pi fans and added heatsinks. NanoPi and Raspberry Pi are the only development-board families I have tried. These days, I prefer Raspberry Pi because the documentation is extensive and the community is active.
You should be able to see a camera connected to one of the boards in the photograph. I have not yet managed to get it working because of gaps in the documentation.
HK1 Box

I bought this on Xianyu, flashed Armbian onto it, and installed Home Assistant through Docker. It used to crash frequently. I later soldered a ribbon cable to the UART header and installed a cooling fan, and it has run reliably ever since.
LaCie d2 Professional

It connects to the 2018 Mac mini over Thunderbolt 3 and uses rsync to back up important data from the DS923+ on a schedule.
UPS

It has been in service for several years and mainly protects the DS923+. I recently replaced its battery and added a voltage display module.
Network Architecture and Upgrade Path

The home network evolved in roughly four stages:
- China Telecom fiber service with a public IP address and Gigabit Ethernet throughout the home.
- 2.5GbE adapters for the main devices and the addition of a 2.5GbE switch.
- A second internet connection from China Unicom, also with a public IP, followed by an upgrade to 2.5GbE throughout the home.
- A 10GbE switch and 10GbE interfaces for the main devices.
There were plenty of pitfalls along the way: how to set gateway metrics after converting a LAN port to WAN, why link aggregation did not work, and how to connect networks in different locations. I will cover those subjects separately in the networking article.
Self-Hosted Services
To me, a dashboard is simply a panel that shows every service. I do not need to monitor the status of every individual server, so a bookmark manager is enough. My current favorite is the Chrome extension Markoob, which is clean and uncomplicated.

I will discuss the specific services I run, how I orchestrate them with Docker, and how I avoid conflicts during upgrades in the services article.
Data Storage and Backup

The data system is built primarily around the NAS units and covers both family-photo backups and important server files. At present, the DS923+ holds a complete synchronized copy of the DS218+. Important data receives another layer of cold backup on the LaCie drive, while the UPS protects against unexpected power loss.
Why I designed it this way, how the backups work, and how I would recover from a real failure are subjects for three later installments: data, data synchronization, and data backup.
Conclusion
The central principle of this homelab is that I would rather have several machines than one all-in-one box. Compute, storage, and networking therefore run on separate hardware, while two independent internet connections provide mutual redundancy. The cost is the time required to design fault-tolerant systems. I rely heavily on the NAS and other services at home, and an outage would have a major impact, so I consider the investment worthwhile. If you are merely experimenting casually, there is no need to make anything this complicated.
Several problems remain:
- I still do not have an all-10GbE switch. I am debating an all-SFP+ model versus all-RJ45: SFP+ produces less heat, but some devices support only RJ45, adding the cost of transceivers.
- Link aggregation is not actually working. The two Gigabit Ethernet ports left free by the 10GbE card are merely entertaining themselves because they are not connected to a managed switch. I have yet to obtain the doubled aggregate bandwidth.
- Temperature control on the R5S remains unfinished. For now, I have simply forced a fan onto it.
- The custom desktop consumes too much power. I turn it on only to test new models, and it gathers dust most of the time.
My next step is to upgrade the main devices in the study to 10GbE. Once the number of services grows, I will reconsider whether Kubernetes is worthwhile. A homelab is a system that evolves over the long term, so I am happy to keep tinkering gradually.
If readers are interested, I plan to continue the Homelab series with:
- Getting Started and Hardware: What a homelab is, why I built one, and the hardware inventory—the present article.
- Networking: The network environment, site-to-site networking, and network security.
- Services: The various services built with Docker.
- Data: Data storage, backups, and recovery.
- Data Synchronization: Building an efficient data-synchronization network.
- Data Backup: Building a robust defense for data.
- Networking Revisited: Upgrading to 10GbE for the next ten years.
- NAT Traversal Explained: The mechanics behind network connections.
References
- How to Build a Homelab: Introduction (icyleaf)
- How to Build a Homelab: Hardware and Architecture (icyleaf)
- How to Build a Homelab: An OpenWrt Software Router (icyleaf)
- How to Build a Homelab: Data Storage (icyleaf)
- Some commonly used package sources:
- spk7:
spk7.imnks.com - SynoCommunity:
https://packages.synocommunity.com/ - Yunmeng:
https://spk.520810.xyz:666 - 4sag:
https://spk.4sag.ru/
- spk7:
Share: