
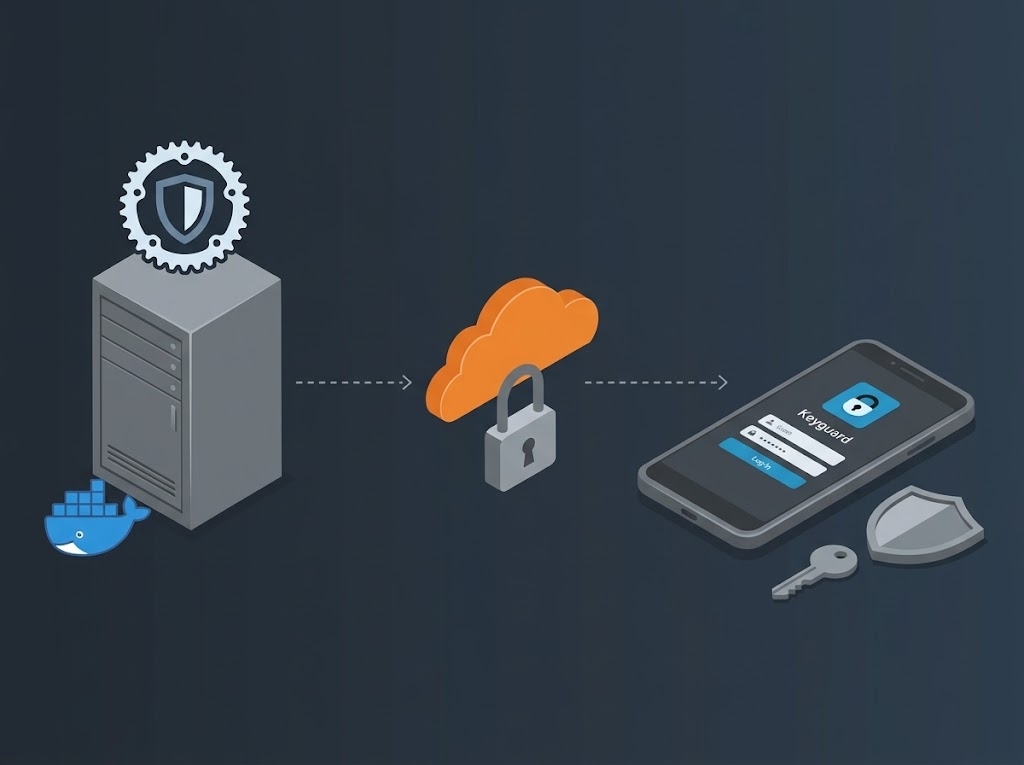


A subscription price hike prompted me to move a few hundred passwords onto my home NAS. The payoff is greater control over my data, but secure remote access and a smooth migration take some setup.
***
Editor’s note: A version of this article by 大大大K appears on October 6, 2026 on SSPAI with the title “基于 Vaultwarden 和 Keyguard 的自托管密码管理实践”. Translated and published by agreement. The cover image was generated with Gemini.
For years, I’ve bounced between the major password managers. The last one I settled on for a while was Enpass. That wasn’t because the experience was particularly good: my subscription-sharing group had Google Play Pass, which included access to Enpass’s premium features. Then the subscription price went up, and we all agreed not to renew. Once again, I needed to find a new home for my three or four hundred passwords.
A fresh look at the alternatives turned up the same frustrations. 1Password is good, but unless you catch a good deal on a shared subscription, it’s expensive. LastPass’s repeated security scandals make it hard to trust. KeePass is powerful and open, but its cross-platform experience is badly fragmented. My eventual return to Bitwarden wasn’t exactly a perfect solution, either: keeping time-based one-time passwords (TOTP) alongside my passwords, without installing a separate two-factor authentication (2FA) app, still costs extra. And its clients have never been among the best of this bunch.
But Bitwarden has another strength. I happen to have a NAS—network-attached storage—running at home around the clock, so self-hosting Vaultwarden quickly became the obvious next step.
Why Vaultwarden?
Vaultwarden is a community-maintained, unofficial, open-source Bitwarden-compatible server. Compared with Bitwarden’s official self-hosted server, which relies on .NET and a heavyweight database, Vaultwarden’s container image is tiny, and its memory use typically stays below 100 MB. It offers the full set of core features and enables premium features such as TOTP management and sharing from the server side. That makes it a good fit for individuals and small teams who want to run their own service.
The Best Way to Deploy It on a NAS
There are several ways to deploy Vaultwarden, but on a NAS, Docker is the clear first choice. The container image is small and straightforward to deploy, whether or not you have much experience. Once you’ve mapped the data directory, you can also use your NAS’s own file-sync or backup features to protect your data.
Docker deployment doesn’t involve many settings, and the community’s Docker Compose template is easy to follow. If, like me, you use an off-the-shelf NAS from a brand such as ZSPACE or UGREEN, you don’t even need to look at the Compose file. You can do it all through the system’s graphical Docker interface.

Here are the settings I think deserve particular attention:
- Container image: Use the
latesttag ofvaultwarden/server. To update the container, pull the image again. As long as you’ve taken care of item 2, your saved passwords won’t be affected. - Directory mapping: To keep your vault data across container replacements, map the container’s
/datadirectory to a real folder on the NAS. If you later need to make a manual backup or move to another device, you can copy that folder. - Directory mapping in Docker Compose: Under
volumes, find the entry containing:/dataand replace the path before the colon with the actual path of the folder you’ve created on your NAS—for example,/mnt/nvme16/bigk/Docker/vw/data:/data. - Port mapping: The container uses port
80by default. Using the host’s network directly makes port conflicts very likely, so you’ll need to change theROCKET_PORTenvironment variable. My recommendation is to use bridge networking and map the container’s port80to a different port on the NAS. - Port mapping in Docker Compose: Make sure
network_modeis set to"bridge", or leave that field out altogether. Underports, find the entry containing:80and change the number before the colon to the port you want to use on the NAS—for example,8808:80. - Access and connections: Vaultwarden requires a trusted connection. Outside
localhost, you’ll need HTTPS, so prepare for that in advance: obtain a certificate, set up a reverse proxy, or find a reliable tunneling tool to expose the service from your private network.
Whether you use the graphical interface or Docker Compose, I strongly recommend setting DOMAIN in your environment variables (environment in Compose) to the domain you’ll use to connect from the internet.
With a graphical deployment, you may need to recreate the container after changing its environment variables. With Docker Compose, I recommend putting those variables in a .env file and referencing it from the Compose file. That makes ongoing maintenance and permission management easier.

Once Docker deployment is complete, enter the IP address and port number in a browser to open Vaultwarden. If its page appears, the deployment has worked. That doesn’t mean you can start using it yet, though.
HTTPS and Internet Access
As mentioned earlier, unless you’re accessing the service through localhost on the NAS itself, opening it directly through a local-network IP address will only bring up a warning that prevents access.

This happens because modern browsers enforce a requirement for secure contexts. The Web Crypto API, which the web vault relies on for encryption, is only available in a trusted context. The plain HTTP connections common on home networks don’t qualify. When Vaultwarden finds that it can’t call the API, it displays the warning.
Likewise, if you want to access your vault wherever you are—for example, through Bitwarden’s autofill extension on a work computer—you’ll need a trusted HTTPS connection.
Vaultwarden has built-in HTTPS support, but its wiki explicitly describes that implementation as immature. It recommends handling HTTPS through a reverse proxy and obtaining SSL/TLS certificates through Let’s Encrypt or Cloudflare. A reverse proxy does, however, need the right network conditions. Most residential broadband connections in mainland China sit behind carrier-grade NAT (CGNAT). With a more permissive setup such as NAT 1, you can use a STUN service for hole punching and get reasonably stable access from the internet. Other NAT types tend to take more work.
If you’ve made it this far, I’m assuming you already understand how reverse proxies work and how to use the available tools, so I won’t go into those here.

If your home connection has a more restrictive NAT setup like mine, or you just want to save yourself the trouble, I strongly recommend the Tunnel feature from Cloudflare, “the internet’s patron saint.” It securely exposes services on your private network, takes care of SSL/TLS certificates, and gives you free DDoS protection, access controls, and other security features. Setting up Cloudflare Tunnel is straightforward, too:

- Sign in to Cloudflare and open the dashboard. Choose Zero Trust in the left sidebar. On the new page, expand the network section and open the connectors page.
- On the page for tunnels and mesh networks, choose the option to create a tunnel, select
cloudflared, and follow the instructions. - When you reach the installation instructions, choose the appropriate operating system and install the cloudflared client. For a NAS, I still recommend Docker.
- From this point, the steps depend on your setup.
- If you own a domain and already manage it through Cloudflare, run the command shown on the page to establish the connection. Then open the published application routes page and add a route for your subdomain.
- Otherwise, use
cloudflared tunnel --url http://[IP]:[Port]to expose your local Vaultwarden address through a temporary domain in the formhttps://*.trycloudflare.com. - Try opening Vaultwarden through the domain. If the browser indicates an HTTPS connection and the login page loads normally, the whole connection is working.

You can create a tunnel without owning a domain, but the address Cloudflare supplies is temporary. It’s long and hard to remember, and it changes every time you restart the service. I’d recommend buying an inexpensive domain and managing it through Cloudflare instead. That gives you a lasting solution: you can assign subdomains to all your home services, not just Vaultwarden, and use Cloudflare Tunnel to expose them more securely. Even if those services run on different devices in different locations, you can install a cloudflared client on each device and put them under the same domain, without paying any extra fees.
Essential Access Controls
With internet access working, you can create an account, save passwords, and sync across devices. So can your partner. So can your aunt’s neighbor—and the basketball teammate of that neighbor’s son’s classmate.
By default, Vaultwarden lets anyone register. Someone who lands on your domain after mistyping an address, or discovers it through an automated scan, can create an account on your service and start using it. They can even upload attachments.
That’s unlikely to affect the security of the data in your own account, but you probably don’t want your private service turning into free public file storage.
As soon as you’ve registered your own account, set the SIGNUPS_ALLOWED environment variable to false, creating the variable if it doesn’t exist, and redeploy the container. Anyone else who visits the service will then be unable to register.

Another setting that matters for vault security is Vaultwarden’s administration interface, at /admin. This interface controls the entire service and its database. It’s disabled by default, and leaving it disabled doesn’t affect normal use. If you need more extensive customization, you can enable it by setting the ADMIN_TOKEN environment variable to an extremely complex token.
A password manager isn’t something you need to reconfigure often, so I recommend removing ADMIN_TOKEN once you’ve finished configuring the service. That shuts off access to the administration interface entirely, and you won’t have to worry about protecting the token with an Argon2 PHC hash.

Vaultwarden also supports 2FA when you sign in to your vault account. Options include TOTP codes, passkeys, and verification codes generated by Duo Security. When setting up 2FA, make sure you keep the recovery code Vaultwarden provides somewhere safe.
Migration and Everyday Use
The rest is much simpler. After signing in, open the tools section and choose the import option to move your vault over. Vaultwarden accepts the export formats of most mainstream password managers. Choosing the Enpass JSON format imported my three or four hundred passwords without a hitch. Until you’re sure all your ways of signing in have made it across, I recommend keeping your old password manager installed and leaving its vault intact. It’s worth running both tools for a while.

For browser extensions, security and ecosystem considerations mean that Bitwarden’s official extension is still the only option. Install it, select a self-hosted server, enter the subdomain you just published through Cloudflare, and sign in to get full autofill support.
On mobile, Bitwarden’s official app feels like a port, shaped by the need to reuse code across platforms. By 2026 standards, the experience is hardly outstanding. When I used Bitwarden a few years ago, I often ran into frustrating problems such as autofill failing to recognize fields or the app not responding when I tried to unlock it.
On the recommendation of @克莱德, I switched to the third-party client Keyguard. This open-source password manager frontend runs on Windows, macOS, Linux, Android, and Wear OS, and works with Bitwarden and KeePass vault data. Its interface, interactions, and animations are all better than those of the official client.

More importantly, major password managers have been gradually adding passkey migration support since early September. In Keyguard’s settings, tap your username and choose the option to import from another app. You can then transfer passkeys directly from other password services that support the feature, saving yourself a lot of setup work.

Keyguard can also act as Chrome’s third-party autofill provider on Android. This feature, available from Android 14 onward, lets third-party password managers match a webpage’s DOM elements for more accurate autofill. Together with Keyguard’s reliable local vault storage, that means it remains usable even when a disruption on Cloudflare’s network prevents it from connecting to your self-hosted server.

Keyguard is also an option if you use Bitwarden’s hosted service and want TOTP support. Bitwarden doesn’t actually block free users from storing TOTP data on its servers—end-to-end encryption means it can’t see what’s stored inside. Instead, its clients don’t give free users access to the feature. Keyguard gets around that restriction, although when using a browser you may need to open Keyguard and copy the verification code manually.
I previously gave Keyguard a brief introduction in “App Reviews: Recent Apps Worth a Look”. Take a look there if you’re interested.
Closing Thoughts
This setup has been running reliably for a while now. Over the past few days, I’ve also tidied up my vault’s categories and created hot and cold backups—small improvements that make it feel more complete. It’s a bit like moving into a new home and finding yourself unable to resist putting everything in order.
Building your own service and connecting the frontend to the backend may sound complicated. But once you’ve done it successfully, setting up other services follows much the same pattern. Open-source products are also becoming more versatile, with better supporting tools, so self-hosting can give you more control and freedom than ready-made commercial services.
And now there’s AI to help, too. If something doesn’t make sense, take a screenshot and ask a couple of questions. You can learn quite a bit about the underlying technology as you work through the configuration. If you’re looking for a password manager, or want an alternative that puts your data under your own control, I hope this setup gives you a useful place to start.
Share: