
A Xiaomi TV remote that costs under $10 can double as a handheld push-to-talk and navigation pad for terminal AI agents. Here is the macOS and Windows setup, the fixes for common snags, and the key mappings.
***
Editor’s note: A version of this article by neyham appears on September 22, 2026 on SSPAI with the title “60 元打造你的 vibe coding 神器:小米蓝牙遥控器 2 Pro”. Translated and published by agreement.
A handheld remote for AI coding?
I’ve been running AI coding in the terminal more and more lately (OpenAI Codex, Claude Code, WorkBuddy, or any of the various CLI agents). After a while, the biggest change in my workflow became obvious: I type less, but I talk and confirm more.
Writing code used to mean typing for most of the day. Now much of it looks like this:
- Organizing my thoughts and describing a requirement to the agent in natural language;
- Watching it output code and diffs;
- Hitting Enter to approve a command, or interrupting midway;
- Switching between terminal windows or workspaces to check whether each agent has finished.
At this pace, voice input is a real efficiency gain—speaking is often much faster than typing out a long prompt. But if the only way to trigger dictation is a key on the keyboard, you still have to sit squarely at the desk with your hands on the keys.
After OpenAI’s hardware prototype, Codex Micro, became public, a wave of copycat “vibe coding buttons” and gadgets of every description appeared in the community. Looking at them, though, many DIY peripherals are either crudely made with wobbly keys, or early-stage experimental toys whose stability and connectivity vary widely.
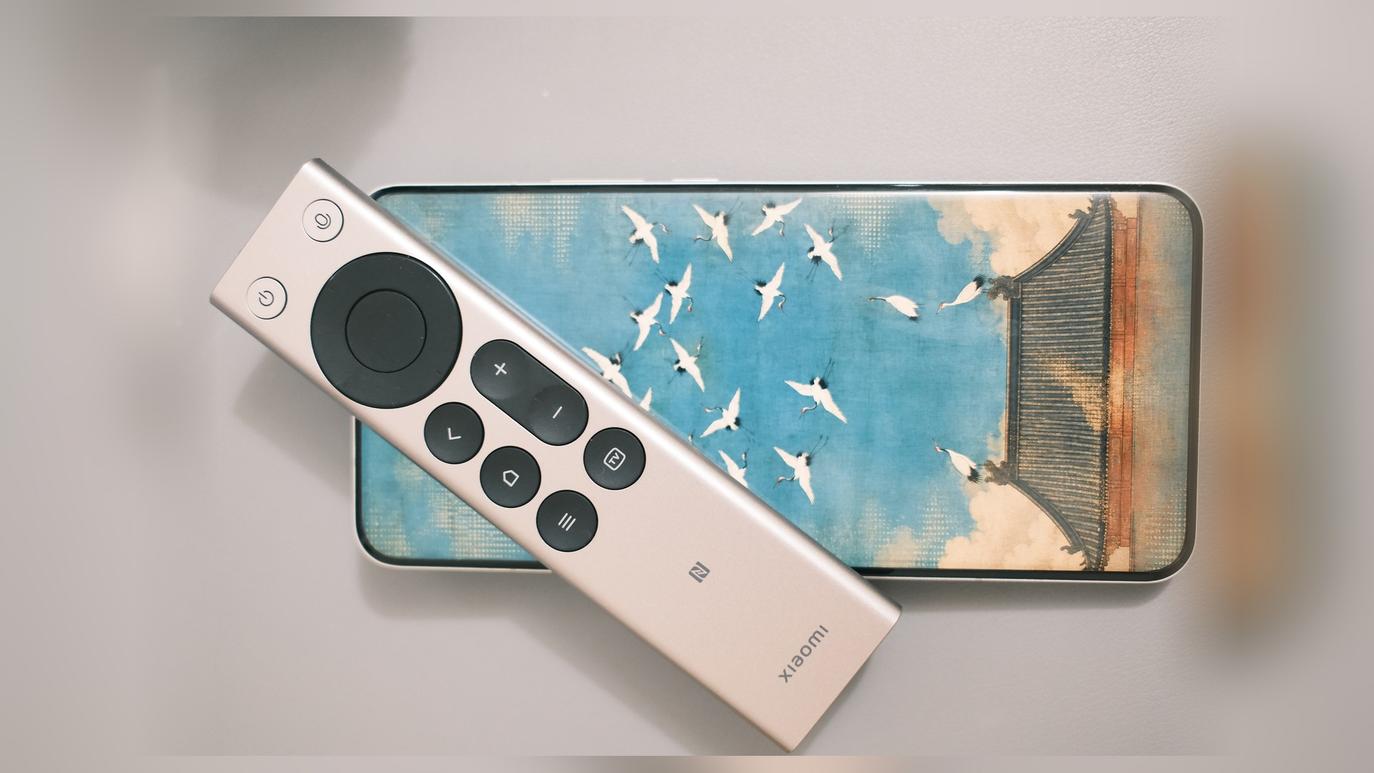
You don’t actually need to buy an overpriced peripheral or fuss with 3D printing. An everyday item—the Xiaomi TV Bluetooth Voice Remote 2 Pro (model RC003)—costs under $10 (about 50–60 yuan in China) and is a finished, mass-produced product from a major manufacturer: mature tooling, Bluetooth LE, and a built-in voice microphone.
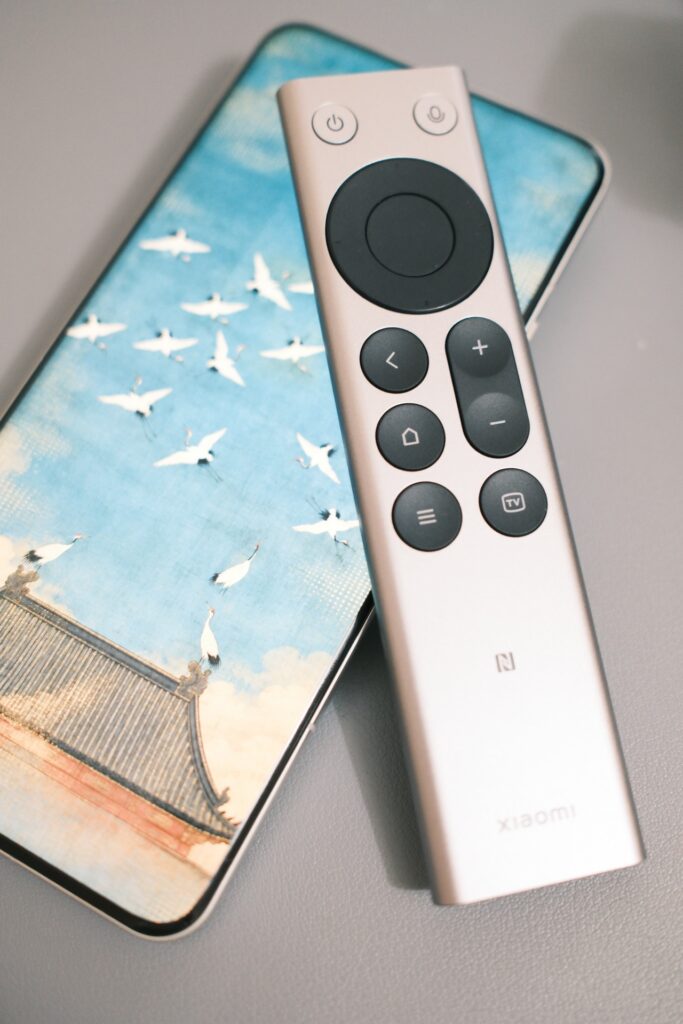
What I want from it as a handheld controller is quite simple:
- Push-to-talk: hold the voice key with one hand to dictate a prompt, and release to have the text appear at the cursor;
- Eyes-free, keyboard-free switching: leaning back in your chair, use the arrow keys with one hand to switch terminal tabs and workspaces, press the center OK key to approve, and press Back to interrupt.
This setup works not only on macOS, which I use every day, but also on Windows, where the community now offers a way to run it. What follows are the configuration steps and the troubleshooting details.
Hardware details: why the RC003?
This Xiaomi remote usually sells for under $10 (around 50 to 60 yuan) on secondhand marketplaces or online stores. A few hardware details drew me to it:
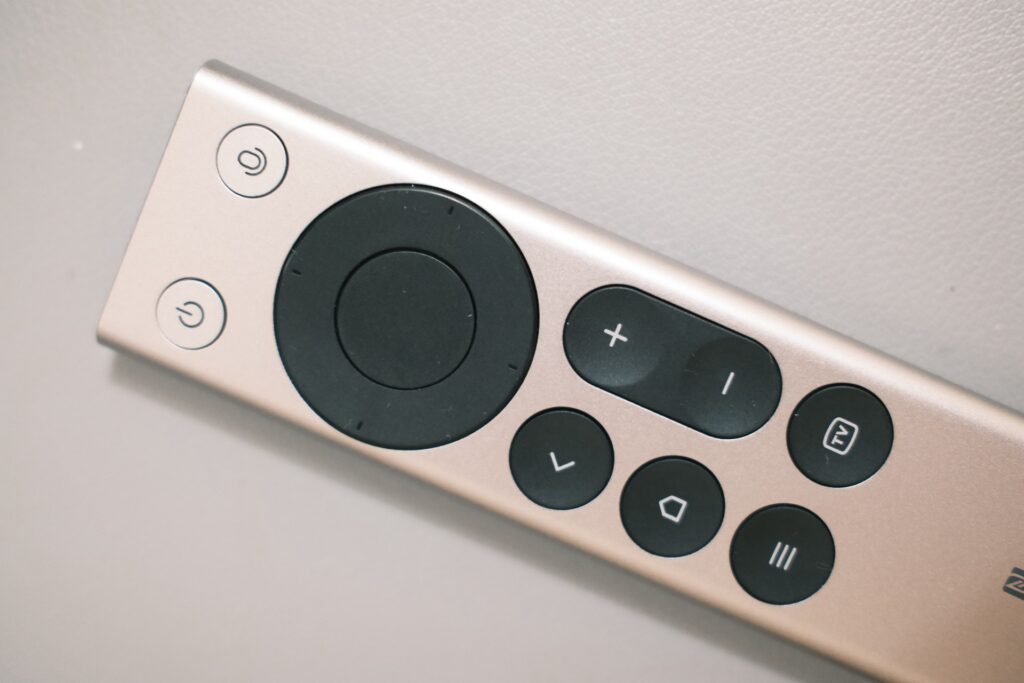
- Direct native Bluetooth LE: it uses the standard Bluetooth protocol, so there’s no USB receiver to plug in—your computer’s built-in Bluetooth can pair with it directly;
- A metal feel far beyond its price: the biggest complaint about many cheap gadgets and DIY buttons is a flimsy, plasticky shell, or even obvious burrs from 3D printing. The RC003, as the bundled remote for Xiaomi’s high-end TVs, is solidly built:
- A unibody, metal-feeling housing: the champagne-gold surface has a fine frosted finish that feels smooth and slightly cool, resists fingerprints, and has some heft and good balance in the hand—nothing like thin, lightweight plastic;
- Crisp, distinct key travel: the keys don’t have the mushy feel of conductive rubber. They give a clean, microswitch-like click on actuation, with moderate travel and a snappy return, so when you’re operating by feel you know exactly whether a press registered;
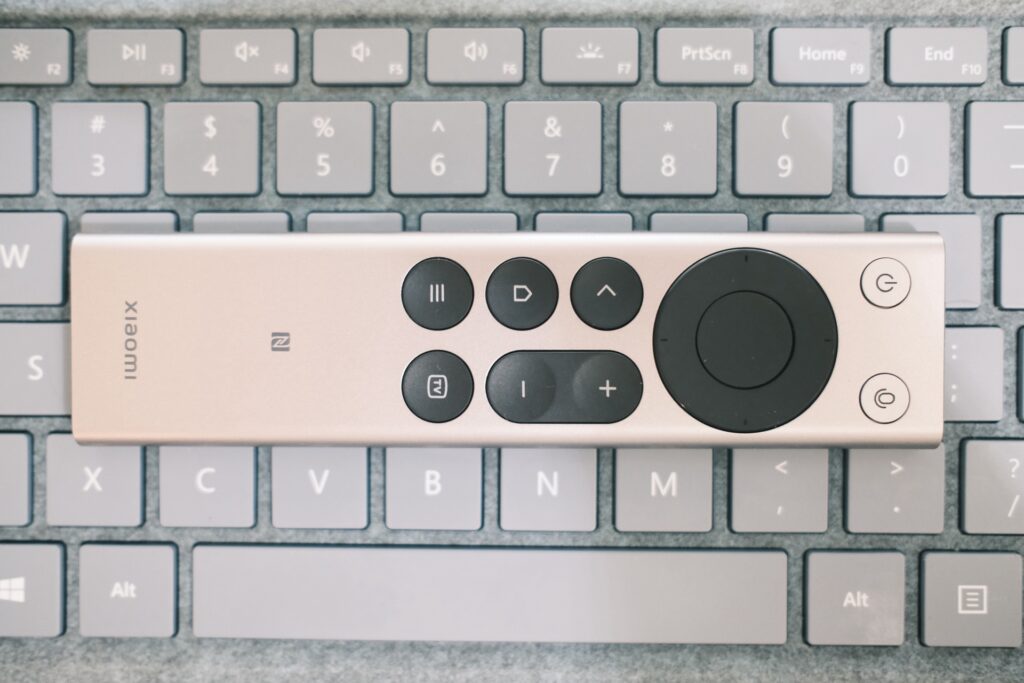
- Looks that don’t clash on a desk: its minimalist black-and-gold design, resting on a keyboard wrist rest, a wooden desktop, or a desk mat, looks like a purpose-built handheld accessory and never seems out of place;
- A layout suited to operating by feel:
- The center OK key has a clear concave dip, so your thumb finds it instantly;
- The outer direction ring has tiny raised markings at up, down, left, and right, so you can tell which way you’re pressing without looking;
- The microphone key sits alone at the top center; when you hold the remote one-handed, your index finger supports the base and your thumb falls naturally on the voice key;
- Close-range voice pickup: the microphone in a TV remote is tuned for near-field speech, with relatively little ambient noise, which suits dictating prompts day to day.
Software setup: connecting the system and voice input
Once paired over Bluetooth, the remote’s arrow keys work as an ordinary input device. The voice key, however, sends dedicated voice data packets, which the operating system doesn’t recognize as a normal microphone by default.
The open-source community project HD838A/remote-mic-app (SayAll) solves two problems:
- It creates a virtual audio input device in the system (named
MiRemoteV 2chon macOS); - It listens for the remote’s voice events, receives audio while the voice key is held and streams it to the virtual microphone in real time, and stops when you release.
Pair that with a voice input method that supports push-to-talk (PTT), such as WeType (WeChat’s input method), and you can hold to speak and release to insert the text.
macOS setup
- Pair the remote: in the Bluetooth list in your Mac’s System Settings, press and hold the remote’s Home key (the house icon) and Menu key (the three horizontal lines) together until the indicator light blinks, then click to pair on the Mac;
- Install SayAll and the audio driver:
- Download and install
SayAll.appfrom GitHub Releases; - When prompted after launch, install the audio driver plug-in (located at
/Library/Audio/Plug-Ins/HAL/MiRemoteV2ch.driver); - Open System Settings → Sound → Input, and you should now see an input device named
MiRemoteV 2ch; - Set up WeType:
- WeType’s speech recognition and punctuation are accurate, and it supports holding a shortcut key to talk;
- In WeType’s settings, turn on “hold shortcut to speak” and set the shortcut to
Fn(or a key combination of your choice); - For the sound input source, choose
MiRemoteV 2ch.
Windows setup
If you’re on Windows (for example, running your terminal, Codex, or WorkBuddy there):
- Likewise, pair the remote by holding the same keys, this time from “Bluetooth & devices” in Windows Settings;
- Run the Windows preview build of SayAll (or a community Windows solution for the RC003, such as
zhaozhuque/MIC-RC003-Windows); - The Windows preview maps the voice shortcut to
Ctrl + Winby default; - In WeType on Windows, set the voice input shortcut to the same
Ctrl + Win, and select the audio device exposed by the remote as the microphone.
Quick fixes for a few key snags
A few things tend to trip people up during setup. Dealing with them in advance can save a lot of time:
Tip 1: What if SayAll’s onboarding screen gets stuck? (macOS)
On a fresh install of SayAll, on some macOS versions the onboarding screen may stay stuck on its last step after the remote connects, and the button to finish can’t be clicked.
You don’t need to reinstall. Just run these commands in the terminal to write the completion flags:
defaults write com.hd838a.RemoteMic "onboarding.completedVersion" -int 1
defaults write com.hd838a.RemoteMic "onboarding.step" -string "complete"
Restart SayAll and it will take you straight to the full key-mapping settings screen.
Tip 2: WeType for Mac won’t record a standalone Fn key?
On macOS, if you want to trigger voice input with the Fn key alone, WeType’s settings screen sometimes fails to capture it. I recommend setting an uncommon key combination (such as Control + Option + V) in WeType’s shortcut settings and mapping the same combination in SayAll. It’s hassle-free and guaranteed not to conflict.
If you insist on the single Fn key: WeType’s configuration is stored in MMKV with a CRC32 checksum, and recalculating the checksum with the short script below will make it take effect:
# WeType MMKV config fix (recalculate the CRC32 checksum)
import os, zlib, struct
path = os.path.expanduser("~/Library/Application Support/WeType/mmkv/wetype.settings")
data = bytearray(open(path, "rb").read())
open(path + ".crc", "wb").write(struct.pack("<I", zlib.crc32(data)))
Then set SayAll’s voice mode to fn, and the two will work together seamlessly.
Tip 3: Rapid presses on the arrow keys get ignored? Turn on “Allow Rapid Repeated Presses”
Many users who map the D-pad to custom shortcuts in SayAll find that “one press switches, but a quick second press does nothing.”
Causes:
- SayAll enables debounce protection on custom shortcuts by default, filtering out consecutive input until the key settles;
- If you’ve configured a “double press” in the interface, the system waits an extra few dozen milliseconds on every single press to see whether it’s a double press, which adds noticeable lag.
Settings to improve the feel:
- In SayAll’s arrow-key settings, clear all “double press” bindings;
- Check the “Allow Rapid Repeated Presses” option under the corresponding key.
With that, the double-press wait window is gone: a single press fires with no delay, and every press in a quick series registers instantly.
Terminal and agent workflow setup: Herdr / Codex / WorkBuddy
Once you have the remote, its real value is in using it with a terminal multiplexer in your development workflow.
Here I’ll use Herdr as the example—a terminal manager I use often, designed for multi-agent collaboration, which runs inside Ghostty or any terminal. It also works with common agent tools such as OpenAI Codex, Tencent’s WorkBuddy (CodeBuddy), and Claude Code.
Spatially intuitive key mappings
In a multi-agent setup, the interface usually has a natural spatial logic:
- Across the top are Tabs, laid out horizontally (usually different tasks or views within the same project);
- Down the left side are Workspaces, stacked vertically (for example, one each running Codex, WorkBuddy, and a test environment).
We map the remote to intuitive shortcuts that need no prefix key:
| Remote key | Shortcut sent | Action | Practical use |
|---|---|---|---|
| Left ◀ | Ctrl + Alt + Left | Previous tab | Thumb left to go back to the previous code or output window |
| Right ▶ | Ctrl + Alt + Right | Next tab | Thumb right to check the terminal output running in parallel on the right |
| Up ▲ | Ctrl + Alt + Up | Previous workspace | Switch workspaces upward (for example, to the project where Codex is running) |
| Down ▼ | Ctrl + Alt + Down | Next workspace | Switch workspaces downward (for example, to the pane where WorkBuddy is executing) |
| Center OK | Enter | Confirm | When the agent asks for confirmation, one press approves it |
| Back ⮌ | Ctrl + C / Esc | Interrupt / cancel | When the agent veers off course, one press interrupts the current turn |
| Voice 🎙 | Fn (hold for PTT) | Voice input | Hold to dictate a prompt; release and the text lands on the command line |
Keeping your keyboard habits: Herdr’s multi-binding arrays
If you still like the tmux-style habit of pressing Ctrl+B and then p / n on the keyboard to switch tabs, Herdr’s configuration file (~/.config/herdr/config.toml) lets you declare both sets of keys at once with an array:
[keys]
previous_tab       = ["prefix+p", "ctrl+alt+left"]   # left/right keys: switch tabs
next_tab           = ["prefix+n", "ctrl+alt+right"]
previous_workspace = ["prefix+up", "ctrl+alt+up"]    # up/down keys: switch workspaces
next_workspace     = ["prefix+down", "ctrl+alt+down"]
After editing, run herdr server reload-config to hot-reload it. That way your keyboard shortcuts work as usual when you’re typing at the desk, and when you lean back with the remote in hand, you can switch with one hand and no prefix.
Using it in practice with Codex / WorkBuddy
When you’re running different agents in parallel across several workspaces:
- In Codex: you often have to confirm generated changes several times. Hold the voice key with your thumb and say, “Don’t refactor this part—just add a null check inside the original function.” Release, and the text appears; press OK once to submit. If Codex asks whether it may run a bash script, press OK once more to allow it;
- In WorkBuddy / CodeBuddy: when several agents are dividing up the work, your left hand can leave the keyboard entirely while your right hand holds the remote and issues tasks: “Turn the API docs we just wrote into Markdown.” Then use the up and down keys to hop to other workspaces and check the build logs.
How it feels in daily use
After using this setup for a while, the most real change isn’t some radical transformation of how I work—it’s that it’s physically more comfortable:
- I’m clearly more willing to speak long prompts: I used to be too lazy to type out three or four sentences of requirements or edge conditions and would cut them down to half a thought, so the agent misunderstood. Now I hold the remote and naturally say a full one or two hundred characters of context. Recognition is very accurate, and the cost of communicating has actually gone down;
- Checking on multiple terminals is smoother: when several agents are running tasks, pressing the arrow keys a couple of times with the remote in hand to glance at their status is much easier than moving a hand to the trackpad or mouse to switch screens;
- The hardware cost carries almost no mental burden: compared with dedicated gadgets that run to a hundred dollars or more, a Xiaomi remote that costs under $10 is nothing to feel bad about if it breaks, and the build quality is fully up to the job.
If you use AI coding tools heavily, and you happen to have an idle Xiaomi Bluetooth remote on hand—or can pick one up for under $10—setting it up in a dozen or so minutes makes for a low-cost peripheral upgrade with a solid payoff.
Share: