Category: Photography

  • From Aesthetic “Mysticism” to Modding Craze: A Brief Look at the Past and Present of Instant Cameras

    From Aesthetic “Mysticism” to Modding Craze: A Brief Look at the Past and Present of Instant Cameras

    In today’s fashion and photography circles, the retro trend is sweeping through with unstoppable momentum. Among them, CCD cameras have gone viral for their distinctive vintage image quality, and standing alongside them at the top of the trend are instant cameras. Compact and portable, with a press of the shutter, a warm sheet of film slowly slides out, and within minutes, light and shadow are fixed into a tangible form—this unique sense of ritual has captivated countless young people.

    Yet instant cameras are also something people both love and hate. Their operation appears extremely simple—no complicated parameter settings, no need for professional post-editing—yet it’s difficult to guarantee consistent results. A failed shot can be caused by lighting that’s just a bit off, or an angle that’s slightly wrong. As a result, the internet is flooded with countless “tutorials” and “tips” for instant photography. Some tools, like “exposure helpers,” have a bit of scientific basis, but advice such as “preheating metering for one minute” or “not moving the photo at all before it fully develops” carries more than a hint of mysticism.

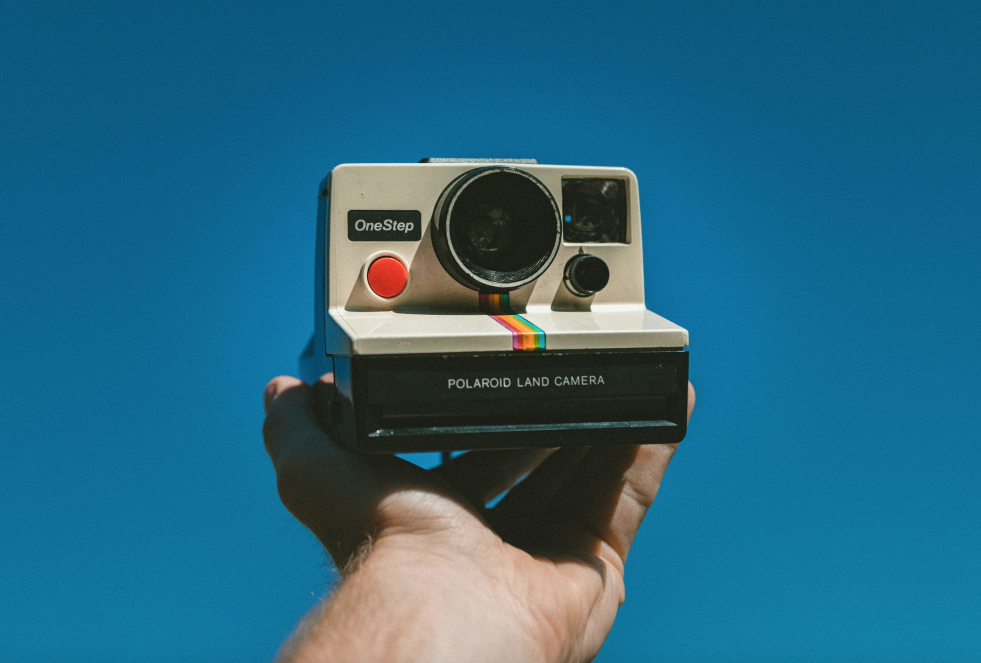
    Polaroid’s classic design and rainbow color scheme are many people’s first impression of instant camera products. Image from Unsplash

    In fact, these so-called “mystical” practices largely reflect a lack of photographic fundamentals among instant camera users, as well as a limited understanding of how instant imaging actually works. As the saying goes, it’s not enough to know that something works—you should also know why it works. To truly master an instant camera and escape the curse of wasted shots, it’s worth starting from the beginning, lifting the veil on its mysteries, and exploring the technological evolution and historical story behind this small device.

    The Birth of Instant Imaging: Breaking the “Delayed Gratification” of Film

    Instant cameras did not appear out of thin air; they are essentially an important branch of film photography. The core motivation behind their invention was to break the “delayed gratification” inherent in traditional film photography.

    Looking back to the early 20th century, film photography was still in its infancy, and cameras at the time were effectively “disposable.” After finishing a roll of film, users couldn’t remove it themselves—they had to mail the entire camera, along with the film, back to Kodak. Skilled technicians at the factory would process the film in darkrooms, develop and print the photos, and then send both the pictures and the camera back to the user. This process could take anywhere from a few days to several weeks.

    Early cameras were essentially simple boxes that reproduced the pinhole imaging principle. Image from the internet

    Later, the invention of the film cartridge changed this situation. By sealing the light-sensitive film inside a cartridge, it allowed individual users to set up simple darkrooms at home and handle development themselves. But no matter how the technology evolved, the core workflow of traditional film photography remained unchanged: exposure, development, fixing, and washing—each step indispensable. The wait for images to appear still demanded considerable patience.

    The birth of Leica cameras greatly simplified the process of taking photos. Image from the internet

    For those who valued efficiency, this long wait was undoubtedly frustrating. So was it possible to package developer and fixer—essential darkroom chemicals—directly into the film itself, allowing shooting and imaging to happen simultaneously? This seemingly bold idea was eventually brought to life by the American company Polaroid.

    In 1948, Polaroid introduced the Model 95 camera, paired with TYPE 40 peel-apart film, officially ushering in the era of instant imaging. Though simple in structure, this camera leveraged the core advantage of instant photography to completely transform the industry—people no longer had to wait for darkroom processing. After pressing the shutter, they could manually peel apart the film and see the image appear within seconds. Photography thus moved beyond “delayed gratification” and entered a brand-new era of instant results.

    Early Polaroid instant cameras. Image from the internet

    Giants in Rivalry: Kodak’s Defeat and Fujifilm’s “Overtaking on the Curve”

    The enormous potential of instant imaging quickly caught the attention of film industry giants, setting the stage for a battle over patents and market dominance.

    As the undisputed leader of the film industry at the time, Kodak was naturally unwilling to miss out on this opportunity. In 1976, Kodak launched its own instant imaging products, attempting to enter Polaroid’s core market directly. However, from core technologies to product design, these offerings overlapped heavily with Polaroid’s patents, and Polaroid soon filed a lawsuit for patent infringement.

    Kodak EK4 instant camera. Image from the internet
    Kodak film pack. Image from the internet

    This legal battle dragged on for a full decade, with both sides locked in relentless disputes in court. In 1986, a final ruling was delivered: Kodak lost the case. Not only was it required to pay massive damages, but it was also ordered to immediately cease all production and sales of its instant imaging products. After this defeat, Kodak completely withdrew from the instant imaging field and never returned.

    At the same time, Fujifilm was still a minor player in the film industry, largely following Kodak’s lead. Half a century ago, Fujifilm had relied on Kodak’s technical licensing to release its first instant imaging product, the Fotorama. Interestingly, while Polaroid was fully engaged in its lawsuit with Kodak, it took a relatively hands-off approach toward Fujifilm in the Asia-Pacific market, giving Fujifilm valuable breathing room to grow.

    Fotorama camera. Image from the internet

    When news of Kodak’s defeat broke, Fujifilm quickly demonstrated keen strategic awareness. It decisively distanced itself from Kodak and instead extended an olive branch to Polaroid. The two eventually reached a crucial cross-licensing agreement: Fujifilm traded its advanced magnetic recording media manufacturing technology in exchange for Polaroid’s core instant imaging development technology.

    In the following decade, Fujifilm became Polaroid’s “partner” in the Asia-Pacific region, producing and selling instant imaging products under license and enjoying steady growth. It wasn’t until 1998, when Polaroid’s core patents expired, that Fujifilm’s true comeback began. That same year, Fujifilm went independent and launched the brand-new instax series of instant cameras. With designs better suited to Asian markets and more accessible pricing, it officially entered direct competition with Polaroid.

    The instax series has become the dominant force in today’s instant camera market. Image from the internet

    Meanwhile, Polaroid’s fortunes took a sharp downturn. In 2001, due to the rise of digital photography and poor business performance, the once-dominant instant imaging giant filed for bankruptcy protection. After seven years of struggle, Polaroid ceased its core operations entirely in 2008. Although the brand was later revived through fan-backed investment, today’s Polaroid is legally distinct from the original company that once held its core technologies—only the name remains as a vessel for retro nostalgia.

    Holding Polaroid’s licensed technology while completing its own R&D, Fujifilm naturally became the sole inheritor of instant imaging technology, taking up the mantle of instant photography as its most legitimate successor.

    instax promotional posters on e-commerce platforms. Image from the internet

    From Luxury Toy to Mass Trend: The Democratization of Instant Cameras

    Having explored the competition over film and technology, let’s now turn to the cameras themselves. Before the digital era, photography was always an “expensive hobby,” and instant imaging was even more so.

    In its early days, Polaroid’s customer base consisted almost entirely of affluent elites. On one hand, the cost of instant film was extremely high, making it unaffordable for ordinary households; on the other, Polaroid positioned its cameras as “high-end luxury products,” with meticulous attention to design and performance. The Polaroid SX-70 featured in Jay Chou’s Greatest Works of Art music video is a perfect example of that era’s pinnacle.

    MV screenshot

    Released in 1972, the SX-70 is often regarded as a miracle of industrial design. It featured a folding SLR structure, measuring only a few centimeters thick when closed and easily fitting into a pocket; when opened, its four-element glass lens delivered sharp, clear images. Later versions even introduced sonar autofocus technology—considered “black magic” in the 1970s—capable of completing distance measurement and focusing in just 0.07 seconds, achieving precise focus even in low-light conditions. Combining aesthetics, performance, and portability, the SX-70 earned its status as a legendary camera.

    Fujifilm’s early Fotorama series, developed under competitive pressure from Polaroid, was equally refined. Folding SLR structures, glass lenses, and autofocus features were all standard. The 500AF model released in 1999 was widely regarded as a “flagship king,” matching Polaroid’s top models in performance. At the time, many believed instant cameras would continue evolving toward greater professionalism and higher performance.

    Early instant cameras were closer in form to traditional cameras. Image from the internet

    However, Polaroid’s dramatic collapse served as a stark warning to Fujifilm. After 2000, digital photography rapidly took over the market with its advantages of “zero shooting cost” and “instant preview,” while traditional film photography became increasingly marginalized due to its high cost and steep learning curve. Fujifilm understood that continuing down a high-end path might lead to the same fate as Polaroid.

    As a result, Fujifilm decisively adjusted its strategy, ushering in the “democratization” of instant cameras. It introduced smaller, more affordable mini film formats, along with a series of simple point-and-shoot automatic cameras. These models eliminated complex manual controls, adopted fully automatic exposure, and featured compact, colorful, and approachable designs—all at prices accessible to ordinary consumers.

    This transformation allowed instant cameras to shed their label as “luxury toys” and become widely embraced cultural products. From students on campus, to street fashion enthusiasts, to newlyweds at weddings, instant cameras—with their portability and ritualistic charm—found their way into everyday life. Over the past two decades, they have carved out a unique path of survival within the overwhelming tide of digital photography.

    Compared to the 500AF, Fujifilm’s newer WIDE400 may seem extremely “stripped-down,” but it likely better meets the needs of the mass market. Image from the internet

    “Only the young fail to appreciate film, mistaking digital for treasure.” Fifteen years ago, when I first encountered instant cameras, I was full of disdain. At the time, my Nikon digital camera could shoot endlessly and display images instantly, while each sheet of instant film cost several dollars, and a failed shot meant irreversible loss. For a young man in his early twenties, full of energy and ambition, the so-called “ritual” of instant photography seemed utterly worthless.

    Today, times have changed. With the widespread adoption of smartphones, “everyone is a photographer,” and photography has shifted from a simple tool for documentation to a medium for personal expression and emotion. But along with this shift comes the overabundance of automation and AI: one-click AI retouching smooths skin and enhances beauty, algorithms optimize composition automatically, and an overwhelming flood of digital images fills our lives, blurring the line between real and artificial.

    In this context, people have begun to long for the “warmth” of film photography—the irreplicable grain, the anticipation during development, and the tangible weight of a physical photograph. Instant cameras, once forgotten in the corner, have thus returned to the public eye, even sparking a new wave of popularity.

    The Pain Points of Instant Cameras: The Origin of the Modding Craze

    For a long time, instant imaging had a more professional product line known as peel-apart film, with both cameras and image quality far surpassing today’s instant cameras. Because of the existence of peel-apart film, modifying instax cameras was once seen as a thankless effort, and thus remained a niche practice. It wasn’t until 2016, when Fujifilm announced the discontinuation of FP-100C peel-apart film, that the market was left with only instax and a barely surviving Polaroid.

    At the time, digital cameras were at their peak, while smartphone photography was rapidly advancing. Even instax itself began embracing digital technology, launching instant photo printers. The discontinuation of peel-apart film alone did not cause much of a stir in the industry.

    Discontinued FP-100C peel-apart film. Image from the internet

    Users may start as beginners, but they don’t remain beginners forever. As users’ photography skills improved, the shortcomings of Fujifilm’s stock instant cameras gradually became apparent—the “democratized” design was a double-edged sword. On one hand, it lowered the barrier to entry; on the other, it severely limited the ceiling of what these cameras could achieve.

    For advanced users, three major pain points of stock cameras had long become the “ceiling” of image quality. First is the limitation of focusing. Almost all stock instant cameras use a fixed hyperfocal design, lacking true focusing capabilities. They can only adjust depth of field through lens extension, with a minimum focusing distance of no less than 0.6 meters, making macro photography nearly impossible. In contrast, Polaroid and Fotorama models from half a century ago were often equipped with manual or autofocus systems—by modifying the film pack mechanism to adapt modern film, precise focusing can be restored.

    Many instant cameras in history were equipped with focusing systems. Image from Unsplash

    Second is rigid exposure control. Current stock instant cameras use fixed apertures, relying solely on built-in metering components to adjust shutter speed. Once the metering system ages or fails, or when facing complex lighting conditions, overexposure or underexposure becomes common, with no way to manually correct it. The so-called “mystical tutorials” online are essentially users’ desperate attempts to compensate for unreliable metering.

    Later instant camera products often rely on fixed focus and simplified exposure systems—when aperture falls short, flash steps in. Image from Unsplash

    Finally, there is framing inaccuracy. Most stock instant cameras use a rangefinder-style structure, which introduces noticeable parallax errors in close-range shooting, making true “what you see is what you get” impossible. SLR structures solve this perfectly—medium format SLRs like Bronica, Mamiya, and Hasselblad can achieve seamless adaptation simply by attaching an instant film back. However, such equipment is bulky and heavy, significantly reducing portability.

    It is precisely these insurmountable limitations that gave rise to the “modding craze” within the instant camera community. For advanced users, modification is not only the only way to overcome hardware limitations, but also a statement of individuality and technical mastery.

    Modding an instant camera is far from simple tinkering—it is a precise craft that integrates mechanical engineering, optics, and electronics. Today, the modding community can generally be divided into three major approaches, each with its own philosophy and use cases.

    The first is the revival of vintage models. The core idea is to modify classic cameras like Polaroid and Fotorama, whose original film has been discontinued, by redesigning film compartments and replacing mechanisms to adapt them to modern Fujifilm instax film. These classic models already feature professional capabilities such as manual focusing and adjustable exposure, but were abandoned due to film discontinuation. After modification, they not only bring “obsolete plastic” back to life, but also allow users to experience the professional feel of instant imaging from half a century ago. Modified Fujifilm SLIMACE models are representative of this approach.

    The second is hybridization with film cameras. This is a more “hardcore” method, where users completely disassemble the internals of stock instant cameras and integrate them with traditional film cameras through cutting, welding, and bonding, enabling film cameras to shoot instant photos. However, this process permanently alters the original structure, making it irreversible. As a result, users typically experiment with affordable domestic film cameras like the Seagull 4B or Seagull 203, while modifications involving high-end models like Mamiya or Rolleiflex are extremely rare.

    A Seagull camera modified into an instant camera—this approach significantly alters the original structure

    The third is modular upgrades. This is the most flexible and favored approach among professional users, centered on leveraging modular camera systems to create interchangeable instant film backs. Medium format SLRs like the Mamiya RB/RZ67, which already support interchangeable backs, can easily switch between film and instant photography by using a custom instant back. Some users take the opposite approach, mounting medium format lenses from Mamiya or Schneider directly onto stock instant camera bodies. Popular setups like pairing a WIDE400 with a Mamiya lens preserve portability while significantly enhancing image quality.

    Medium format interchangeable backs can greatly improve instant imaging performance

    Regardless of the method, instant camera modding demands high technical skill and a steep learning curve, far beyond the reach of casual users. In an era dominated by “one-click shooting” and AI-generated images, many find it hard to understand why anyone would invest time, money, and effort into building a camera that runs counter to mainstream trends. The true appeal of instant camera modding has never been about recreating nostalgic aesthetics—it lies in using precise, rational engineering to break free from the “mysticism” of stock cameras.

    Repeatedly calibrated focus parameters, meticulously tuned aperture and shutter combinations, and manually calculated exposure values—all represent a deliberate battle against unpredictable lighting and the randomness of failed shots. Modding enthusiasts are not chasing luck or surprise; what they seek is complete control over the final image with every press of the shutter—to transform “possibly good” into “consistently excellent,” turning uncertainty into clarity.

    This persistence is not about romantic nostalgia, but about the triumph of technology. It frees instant photography from the label of “luck-based shooting” and, in the age of digital precision, continues to sustain the vitality of instant imaging in a more professional and hardcore way.
  • vivo X300 Ultra Review: A Major Leap in Mobile Imaging and Color Science

    vivo X300 Ultra Review: A Major Leap in Mobile Imaging and Color Science

    After the vivo X300 Ultra launch event, I attended a media group interview. When asked why the presentation didn’t highlight the “first dual 200MP” feature, vivo’s Vice President of Products, Huang Tao, said it wasn’t important—the team chose this solution for the best experience, not for the sake of impressive numbers.

    Looking back at the entire event, there were no comparisons with competitors. Over the course of more than an hour, the information density was extremely high, focusing on clearly explaining every highlight of the product. It felt more like attending a fast-paced technical briefing than a typical product launch. In today’s market environment, that’s quite rare.

    Over the past few years, I’ve worked on several commercial collaborations with vivo. In every brief, there’s always a serious emphasis on “no mention of competitors, no comparisons.” Few brands write “staying grounded” into their core principles, and vivo is one of the best at putting it into practice.

    In stark contrast, especially after using the device for some time, it’s clear that vivo has poured tremendous effort into many details. This kind of freedom in execution likely comes from strong confidence. And since this isn’t a sponsored piece, I’d like to take a more subjective approach and talk about my experience and impressions of the vivo X300 Ultra’s imaging.

    Less Stubborn Now

    Since the X100 Ultra, vivo has made it clear how important imaging is to the Ultra series. Especially when competing products often seem “self-conscious” about their oversized camera modules—trying to soften the visual impact through various transitional designs—the X200 Ultra’s unapologetically bold “fully exposed” look left a strong impression on many.

    The advantages of this approach are obvious. The highly recognizable “V-shaped module” design subconsciously reinforces its identity as a powerful creative tool. Combined with its widely praised imaging performance, the idea that “vivo phones take great photos” has become so ingrained that even older family members far removed from the tech world—who have never used the product—can confidently make that claim. But from a user perspective, “professional creation” often implies a higher barrier to entry, which can be intimidating. vivo inevitably has to carefully balance the exclusivity of a professional label with broader, everyday image expression.

    vivo X300 Ultra “Film Green”

    From the very start, the X300 Ultra abandons its highly recognizable “hardcore” aesthetic. Instead, it introduces “Film Green” as a flagship color—fresh, approachable, and visually appealing—likely in an effort to draw in potential users who were previously hesitant. In various online discussions and surveys, it’s easy to see that the X300 Ultra has attracted more young users, especially women, compared to its predecessors.

    This was also my first impression of the X300 Ultra: it no longer relies on a stubbornly hardcore design to signal professionalism, but instead seeks a more universal form of expression. Looking deeper, however, I believe this restraint and approachability in design are only surface-level changes—behind them lies vivo’s attempt to rebalance the relationship between “mass-market imaging” and the “barrier of professional tools.”

    “Refinement” Matters More Than Extremes

    When I discuss the imaging characteristics of different brands with other photography enthusiasts, there’s a surprisingly consistent impression of vivo—“the Sony of smartphones: powerful, but boring.” This seemingly neutral comment might be perfectly acceptable in the world of cameras, where productivity is the core—if it’s powerful enough, that’s all that matters. But smartphones are different.

    The meaning of mobile photography lies in capturing fleeting highlights in everyday life, anytime and anywhere. A truly great “camera phone” should also support emotional expression when we seek it, offering a personalized aesthetic to match our intent. Being able to shoot far or capture sharp detail is certainly a plus, but if it fails to deliver emotional value, its appeal will always have a ceiling.

    I believe vivo has realized this, and the newly introduced “vivo Color Science” seems to be their answer. The “BluePrint True Color Camera,” debuting on the X300 Ultra, marks the starting point of this new color system. As the industry’s most advanced multispectral camera to date, it features 12 channels and 5 million pixels, allowing it to more accurately simulate how human vision perceives light across the spectrum and capture subtle environmental color variations. Combined with real-time light environment sensing and algorithmic adjustments, vivo builds upon “faithful reproduction” as a foundation, evolving toward a more stylistically distinct tonal aesthetic.

    In official technical materials, there’s an important concept mentioned in the discussion of color—simulating the film density curve. If the BluePrint True Color Camera provides the “bones” of realism through accurate reproduction, then the “film density curve” acts like flesh and blood, adding warmth and texture to that structure, giving digital imaging a sense of life.

    Looking back, today’s film revival largely emerged alongside the maturity of mobile internet and the rise of social media—ironically, at a time when displays and digital imaging have become more advanced than ever. I don’t believe this is purely driven by nostalgia. Rather, when the “precision” of digital imaging is amplified to the point where it erases the imperfections that should naturally exist in the real world, our instinct for authenticity begins to resist it.

    Based on the Weber–Fechner law, human perception of external stimuli is not linear but logarithmic. This leads to a commonly misunderstood fact: in the real world, our eyes are far more sensitive to subtle changes in darkness than in brightness. In an extreme example, in complete darkness, lighting a single candle can dramatically improve our perception; yet in a brightly lit outdoor setting, even adding numerous lights has minimal impact.

    However, digital imaging follows an entirely opposite and strictly linear logic. It measures the physical world purely by the intensity of light signals—delivering extreme detail in highlights while letting shadows fall into obscurity. Traditional computational photography, on the other hand, operates on the principle of “compensation”—fabricating details in overexposed areas while aggressively smoothing noise in darker regions.

    As a result, when images become increasingly sharp, clean, and saturated through algorithmic stacking, we paradoxically begin to long for film-based imaging—grounded in physical and chemical processes. The slight imperfections in highlights, the subtle ambiguity in shadows—these are what our minds recognize as a deeper, more authentic form of “reality.”

    The so-called “film density curve” is characterized by shadows that do not abruptly clip but instead retain rich gradation—even in deep blacks, there is a certain base density. In highlights, there is a gentle roll-off, where some information is naturally lost without avoiding the perception of overexposure, while still preserving faint tones and details—rather than the binary, all-or-nothing handling typical of digital processing.

    During my time with the X300 Ultra, I visited snowy mountains, walked past towering prayer flags and rain-soaked sports fields, and wandered through dim, chaotic markets—capturing images using the “True Color” tone that best represents vivo’s color science. Perhaps these photos offer a glimpse into its new tonal style and underlying logic.

    It’s difficult for me to objectively and quantitatively describe just how transformative the X300 Ultra is in terms of imaging—whether in sharpness, dynamic range, processing, depth of field, or color. But emotionally, it feels like it has resolved the last remaining regret I had about vivo’s imaging style. So compared to the previous generation’s pursuit of hardware extremes, I believe the X300 Ultra is vivo’s most refined product in terms of imaging expression to date. And now that it stands as a new milestone, I’m genuinely excited to see what kind of breakthroughs vivo will deliver next.

    In the Name of Freedom

    Built upon an entirely new color science system across both hardware and software, vivo has not only reconstructed its existing tonal styles—such as Negative, Positive, and Texture—but also introduced new ones including True Color, Luminous, Vivid, and Cool White. Among them, True Color represents the most faithful reproduction enabled by the BluePrint True Color Camera and needs little further explanation; Cool White is mainly designed for portrait photography, which I haven’t had much chance to explore yet. So far, I’ve mostly been using Vivid and Luminous.

    “Vivid” Tone
    “Vivid” Tone
    “Vivid” Tone

    The Vivid style increases saturation while lowering overall brightness. In particular, the new film density curve brings a strong sense of depth to shadow areas—colors are bold without feeling artificial or cheap. In my view, it’s the style that best conveys texture and weight in an image.

    “Luminous” Tone
    “Luminous” Tone
    “Luminous” Tone

    As for Luminous, it was initially the one I dismissed the most. At first glance, it seemed like nothing more than the soft, trendy aesthetic favored by social media. But there’s a lot of light in Lijiang, and on a whim, I gave it a try—only to realize it was the most quietly impressive of them all. With a strong warm color shift combined with aggressive desaturation, along with subtle soft glow and grain, as long as there’s light, even the most ordinary subjects can take on a fascinating character. It has now become my second favorite.

    In previous mobile imaging experiences, when we talked about tonal styles, we were usually choosing from a set of predefined “correct answers” provided by manufacturers. Another major shift with the X300 Ultra is that it gives users the freedom to define their own aesthetic. Whether before shooting or during post-editing in the gallery, you can use the intuitive “BluePrint Palette” to personalize tonal styles. In addition, new adjustments for soft glow, bloom, and grain have been added, alongside standard controls for highlights, shadows, and color shifts. Altogether, the number of possible combinations is almost impossible to count.

    Beyond the expanded color grading options, what makes it especially fun is the ability to save any current adjustment as a completely new style. Not only can you reuse it later, but you can also generate a code or QR to share it with others for replication—something truly unique in the industry. At the moment, the device hasn’t officially launched yet, and these new styles are temporarily exclusive to the new model. Although the official statement promises a future rollout, it’s still unclear which models will receive it and when. Still, I’m very excited to see what kind of impact this could have once it becomes more widely available, in terms of how vivo imaging is shared, adopted, and created.

    Finally, here are a few small tips (based on the current system version at the time of writing; future updates may change things) that you might want to know in advance:

    • Custom tonal styles—whether self-created or shared by others—can only be selected before shooting; post-capture editing supports only manual parameter adjustments;
    • Although the BluePrint Palette can be used in post-editing, other tonal styles can only be layered rather than replaced. For example, if I shoot a photo using the “Luminous” style, I can overlay “Vivid” in post, but I cannot fully replace it—meaning the final result will retain soft glow, grain, and some degree of desaturation from the original “Luminous” effect;
    • Even after saving an edited photo as a new image, adjustments can still be reversed back to the original.

    After experiencing the full workflow, I find that the best results come from setting the desired tonal style before shooting and capturing the image directly. While post-editing is powerful, there is still a subtle gap in how deeply the algorithms intervene—it feels a bit like eating leftovers: still satisfying, but lacking the freshness and impact of a dish just out of the kitchen.

    That said, I see this purely as a software-level limitation, one that will certainly improve over time. I mention it here simply to set expectations—post-editing can enhance, but it cannot yet serve as a fully reversible “undo everything” solution. If you’re unsure about your final tonal direction, I’d recommend using “True Color” more often; it offers the greatest flexibility and leaves more room for post-processing.

    Ultimately, when vivo stops trying to decide what constitutes a “good” image for the user and instead provides a near-infinite “color laboratory,” photography finally returns to its essence—the freedom to create based on one’s own perception, without constraints.

    In this context, it’s also worth mentioning that the X300 Ultra offers a highly flexible post-production space for video as well. We’ve put together a guide on how to restore footage shot in Log format—if you’re into video creation, feel free to check it out.

    A Fixation on Telephoto, Giving Rise to a New “V-Cam” Species

    When the concept of the “V-Cam” was first introduced with the X200 Ultra, I mostly saw it as a marketing gimmick—perhaps even an attempt to piggyback on traditional cameras. Although the add-on telephoto lens did push the limits of mobile long-range photography beyond what had been possible for years, the experience still fell short due to limitations in algorithms and compatibility. At best, it felt like an “emergency” accessory—useful for occasions like concerts, but not something I expected much more from.

    The X300 Ultra’s slogan is “Shoot Cinematic with V-Cam,” mainly highlighting its unmatched video capabilities within the Android ecosystem. But what I personally prefer is a phrase tucked away in the middle of the product page—“a new species of imaging.” The add-on telephoto lens is no longer just a functional accessory, and the X300 Ultra itself has evolved into something that truly transcends the boundary between smartphones and cameras.

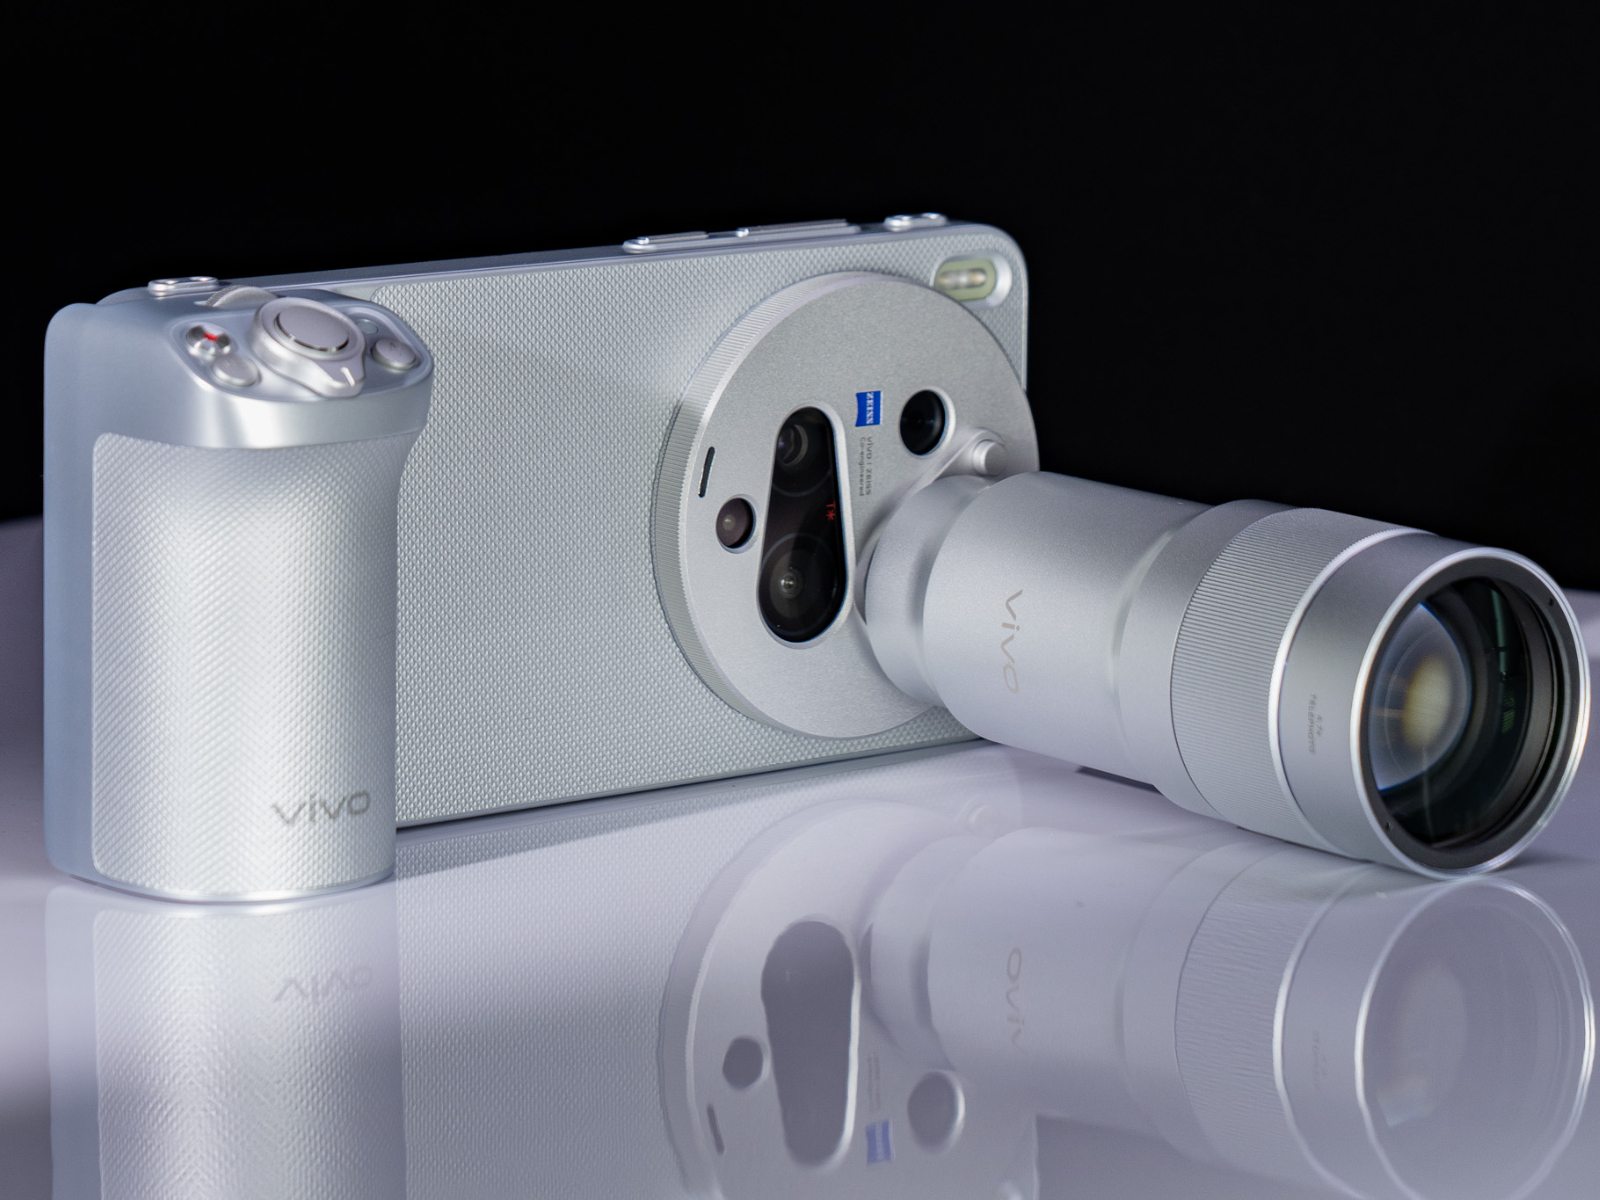
    The case, grip, and lenses designed for the X300 Ultra have all been redesigned. Beyond the unified color scheme, they visually shed the impression of being mere “accessories,” instead feeling like parts of a cohesive whole. And these design changes are just the beginning.

    This time, two telephoto lenses were introduced alongside the new device: the G2 with an equivalent focal length of 200mm, and the G2 Ultra at 400mm. The G2, as an upgrade to the previous generation, significantly reduces weight and size while maintaining image quality—optimistically speaking, it’s now “more portable.”

    As officially stated, these lenses are no longer limited to specific shooting modes as mere “attachments.” Instead, they function just like the native lenses of the device—fully compatible with new tonal styles and 200MP high-resolution imaging, as well as top-tier video recording capabilities. Combined with the native telephoto lens’s 3° physical stabilization compensation and CIPA 7.0-level stabilization, even the G2 Ultra achieves up to CIPA 4.5 stabilization, making handheld shooting entirely feasible.

    Though only a few sentences can describe it, if you’ve ever used a traditional 400mm telephoto lens on a camera, it’s hard not to marvel at what this compact setup can achieve—modern technology is truly remarkable.

    I used the G2 Ultra to photograph a family of monkeys, shooting in “True Color” mode straight out of the camera. It should give you a clear sense of its image quality, color performance, and stability.

    After many years of using cameras, I’ve come to believe that the real barrier to entry isn’t price or learning curve—it’s time. From being willing to carry a bulky device to instinctively anticipating the exact moment to press the shutter, it takes a long period of adaptation. Most people don’t abandon cameras because they’re complicated, but because they never develop the habit of using them. Instead of becoming the tool they hoped for, the camera turns into a burden that’s hard to justify but difficult to let go.

    The gap between smartphones and cameras also can’t simply be summed up by the vague statement that “cameras take better photos.” In fact, even some mid-range smartphones today are not far behind (non-top-tier professional) cameras in terms of color and image quality. What smartphones truly lack is a sense of “ritual” tied to a dedicated creative perspective—and the flexibility to adapt seamlessly across all scenarios while maintaining consistent quality.

    Against this backdrop, the X300 Ultra bridges much of the gap between smartphones and professional cameras. Through a highly refined photography kit, telephoto lenses that closely match the experience of native lenses, and its commitment to a “triple main camera” system—especially with both the primary and telephoto cameras reaching 200MP—it ensures consistent high-resolution quality across all focal lengths, along with ample room for cropping in post.

    At the same time, the irreplaceable advantage of smartphones lies in something cameras take years to cultivate: instinctive usability. The ability to always be ready, to shoot instantly, to rely on muscle memory—this is something smartphones inherently possess.

    That said, I don’t believe the X300 Ultra replaces cameras—nor does it need to. But why can’t it become a camera? This idea of a “new species” resonates deeply with me. From making telephoto usable, to making all focal lengths usable, and now extending usability even into extended focal ranges, vivo has spent two years of persistence to create something genuinely new in imaging. And perhaps the “single” in “V-Cam” can move beyond the traditional association with DSLRs, and instead be understood as a tool dedicated to a single purpose—imaging. It is no longer a multi-purpose device with a camera added on, but a new form of camera that incorporates smartphone capabilities.

    During the media interview, Huang Tao mentioned that vivo did not limit itself to the framework of an “imaging smartphone” when creating the Ultra series. Future Ultra models may diverge even further from our current understanding of what a “phone” is, evolving entirely in form. As users, perhaps we can also step beyond that conventional perception and see it as a category of camera—one that happens to make calls, connect to the internet, and play games. In that light, everything starts to make much more sense.

    Conclusion

    In fact, there’s still much left unsaid—the improvements in the 200MP large-sensor 35mm lens, the high-spec video capabilities across all focal lengths, and refinements to the native camera interface and watermark system. But compared to hardware upgrades and imaging performance, what stands out most to me about the X300 Ultra is “change”—its willingness to challenge itself, and its transformation in a more fundamental sense. I didn’t want to dilute this perspective with too much focus on specifications.

    Unlike previous products, I would especially recommend that users who have already used vivo devices—particularly previous Ultra models—try the X300 Ultra. You’ll truly feel the excitement when a product you’ve followed for so long finally takes that big step toward what you’ve been hoping for, and the renewed sense of anticipation that comes with it.

  • Beyond a “Budget Alternative”: Young Photographers’ First 50mm F/1.4 Lens

    Beyond a “Budget Alternative”: Young Photographers’ First 50mm F/1.4 Lens

    50mm is one of the most classic—and most frequently discussed—focal lengths in photography. It doesn’t have the wide-angle tension of 35mm, nor the spatial compression of 75mm and above. Its perspective is straightforward and close to what the human eye sees, making it adaptable to a wide range of shooting scenarios. For many photography enthusiasts, it’s an indispensable lens.

    My 50mm Journey

    I’ve always had a soft spot for 50mm lenses. In 2018, I bought the much-talked-about Sigma 50mm F1.4 DG HSM. With its excellent optical design, it significantly improved image quality at wide open apertures, challenging the then-common belief that “large apertures must be stopped down to be usable.” That experience left a deep impression on me.

    After that, however, I went a long time without buying any new lenses. Despite a steady stream of new releases, as an ordinary consumer I didn’t feel that my choices had really increased. The 50mm market seemed to have settled into a fixed pattern: if you wanted top-tier image quality, you had to choose a Japanese-brand original lens priced above 5,000 RMB; if your budget was limited, your only options were lenses around the 1,000 RMB range—lightweight, but requiring compromises in handling and build quality, typically domestic F1.8 lenses. For users with a 2,000–3,000 RMB budget who wanted a well-balanced lens in terms of image quality, handling, and build, the middle ground was almost completely empty. That changed with the arrival of the Viltrox AF 50mm F1.4 Pro FE. It gave me the same eye-opening feeling I had seven years ago when I first used that Sigma lens, to the point where I started to think that this lens really could be young photographers’ first 50mm F1.4.

    Differentiated Competition

    To explain why this lens stands out, it helps to start by comparing it with original-brand lenses. A few years ago, domestic autofocus lenses were often seen as mere “budget alternatives.” They lagged noticeably behind originals in autofocus performance, coatings, and overall experience, and were chosen only out of necessity. The Viltrox 50mm F1.4 Pro represents a different approach: instead of focusing solely on low price, it aims to match Sony’s mid-to-high-end original lenses in key areas like image quality and build.

    Its competitive strategy is quite clear. In terms of handling, for example, it features a metal barrel, a physical aperture ring, and customizable buttons—configurations usually reserved for high-end original lenses. This clearly sets it apart from entry-level lenses that use plastic bodies and simplified controls (such as Sony’s own FE 50mm F1.8 or some domestic lenses). In hand, it feels solid, with precise and reassuring operational feedback. Its self-developed dual HyperVCM autofocus motors also deliver noticeably better quietness, speed, and decisiveness than the FE 50mm F1.8.

    When it comes to the most important aspect—image quality—especially background blur at large apertures, it performs very well. The out-of-focus transitions are smooth, highlights are clean, and I didn’t notice obvious “double-line” bokeh or “cat’s eye” shapes. This places it ahead of some early domestic fast lenses, and even certain original-brand entry-level lenses, bringing it closer to high-end performance. These aspects of the shooting experience and image rendering will be discussed in more detail later.

    Of course, compared with the Sony FE 50mm F1.4 GM, it still falls short in autofocus speed and overall system integration—but it also costs less than one-third of the price. It has found its position with remarkable precision: offering a compromise for users who are dissatisfied with the image quality and feel of entry-level F1.8 lenses, yet find flagship original F1.4 lenses too expensive. It proves that domestic lenses can win photographers’ active choice through solid performance and accurate positioning—not merely through low prices.

    Lens Design Language

    Opening the box, its design language feels very similar to that of Japanese manufacturers: clean and restrained, with no unnecessary information. Three sides of the box are printed with the English brand logo, while the other two display illustrations of this Viltrox 50 Pro lens, along with the specific model and corresponding mount information. A serial number label and the manufacturer’s contact details are affixed to the bottom.

    The lens itself is tightly secured in thick foam. The package also includes a lens pouch with a pleasantly solid feel, as well as a lens hood.

    In the hand, the lens barrel feels smooth, yet after being tested by someone like me who tends to have sweaty hands, it doesn’t easily retain fingerprints. A closer look reveals a finely textured surface that enhances grip stability while reducing the risk of slipping. The lens features an aperture ring near the base, with clear, well-defined clicks when rotated. There is also an orange weather-sealing gasket around the mount, further improving protection and reliability. For users who value operational efficiency, the lens is equipped with customizable buttons that can be assigned according to personal shooting habits.

    Mounted on a Sony camera body, the lens gives a strong sense of cohesion. From the materials used to the overall shape and even the logo design, everything feels well integrated. Without prior knowledge, it would be hard to tell it apart in overall build quality from products made by major international brands.

    The lens uses a 77mm filter thread. For a 50mm F1.4 lens, it is indeed slightly on the larger side. That said, considering the image quality and autofocus performance it delivers, I find this compromise in size acceptable. After all, for many users, this will be their “first F1.4 autofocus standard prime,” and such a minor inconvenience is easy to live with.

    That said, the aforementioned sense of “slight imbalance” mainly applies to compact bodies without a pronounced viewfinder hump, such as the A7C. When mounted on models like the A7M4 or A7R5, the overall proportions are likely to feel much more balanced.

    Optical Design

    ItemSpecification
    Focal Length & Format50mm, full-frame
    Maximum ApertureF1.4
    Optical Construction15 elements in 11 groups, including 3 ED (Extra-low Dispersion) elements, 1 UA (Ultra-high-precision Aspherical) element, and 8 HR (High Refractive Index) elements
    AutofocusEquipped with a self-developed dual HyperVCM motor, supporting face/eye detection and tracking
    Minimum Focusing Distance0.45 m
    Filter Thread77mm
    WeightApprox. 800 g (E-mount version)
    Professional FeaturesDust- and splash-resistant construction, customizable Fn button, clicked/de-clicked aperture ring, and a Type-C port for firmware updates

    According to the official MTF charts, this lens performs exceptionally well at its maximum aperture of F1.4. The field curves are relatively flat, and overall performance remains stable. In particular, at the center of the frame, the MTF values approach the theoretical limit of 1, in some cases even outperforming the results at F8, demonstrating outstanding resolving power.

    As the image field transitions toward the edges, from the center to roughly the mid-frame area, the MTF values at maximum aperture remain above 0.8. Even at the extreme edges of the frame, overall MTF values largely stay above 0.6, indicating that edge performance degradation is well controlled.

    It is also worth noting that at maximum aperture, the solid lines representing contrast and the dashed lines representing resolution closely track each other and follow similar curves. This suggests that the lens is capable of delivering smooth transitions and pleasing bokeh with good texture. Its real-world image rendering will be demonstrated in detail in the upcoming shooting samples section.

    Q&A Before You Start Shooting

    Q1: Why does the lens often hesitate after pressing the shutter, or sometimes not respond at all?

    A1: Follow the instructions in the manual to check whether the latest firmware is installed. I encountered this issue as well. After updating to the newest firmware, it was largely resolved. Autofocus responsiveness can reach about 80–85% of original-brand lenses. There is still slight lag, but since I don’t mainly shoot sports or other scenarios that demand extremely low latency, the overall experience is acceptable to me.

    Q2: Why can I hear a slight sound inside the lens barrel when slowly shaking the lens?

    A2: This lens uses Viltrox’s self-developed HyperVCM floating focus structure. When the lens is not powered on, the internal lens group is not locked in place and may produce a slight sound when the lens is moved. This is a normal physical phenomenon, similar in principle to the loose sound of a camera’s in-body stabilization mechanism when the camera is powered off. Once the lens is powered on, the sound disappears. If you still hear obvious abnormal motor noise during normal powered-on shooting, it is recommended to contact Viltrox customer support for inspection.

    Real-World Shooting Experience

    I tested this lens in both portrait and documentary-style shooting scenarios, hoping to provide some useful reference for everyone.

    Portrait photography: Even at maximum aperture, images remain sharp with clear detail, fully meeting the sensor demands of bodies like the A7C. I believe it can also handle high-resolution sensors such as the A7R5 with ease. When placing the subject at one-third of the frame (for example, using a golden ratio composition), the lens’s excellent field flatness still delivers solid image quality, with no need to worry about edge degradation.

    The lens also performs consistently across different focusing distances. Some lenses look fine at around one meter but start to show weaknesses at very close or very distant focusing ranges. This is mainly because their optical designs are optimized for common shooting distances; at extreme close-up or long-distance focus, the balance of aberration correction (such as spherical aberration and field curvature) can be disrupted, leading to a drop in sharpness. With this lens, however, whether shooting close-up facial portraits or distant full-body shots, the subject remains consistently clear.

    Soft out-of-focus rendering: In actual shooting, I could clearly feel that the out-of-focus highlights are round, with smooth edge transitions and almost no harsh “double-line” bokeh. This is thanks to the ultra-high-precision UA aspherical element, which effectively suppresses spherical aberration and “onion ring” artifacts. At the same time, the inclusion of three ED elements ensures clean, color-pure bokeh, while the 11 rounded aperture blades allow highlights to remain nicely circular even when stopped down. Even in complex scenarios such as rows of figurines, the lens is able to deliver smooth and pleasing background transitions. It can be said that Viltrox’s comprehensive balancing of aberrations in its optical design allows the F1.4 aperture to represent not just light-gathering capability, but a high-quality expression of bokeh.

    Night scenes and low light: The F1.4 aperture shows a significant advantage at night. I can lower ISO for cleaner images, or increase shutter speed to capture motion while keeping noise under control, giving me much greater creative freedom. I strongly agree with the view of a certain Bilibili creator: in creative work, the only thing that should limit you is your imagination. This lens gives me a tool to explore more possibilities.

    Humanistic and Landscape Photography:50mm is a true “sweet spot” focal length. In real-world shooting, I’ve noticed that when something catches my attention and I raise the camera, the distance is usually around 2–3 meters. At this range, photographing people allows for half-body compositions that include environmental context; photographing architecture lets you focus on specific structural details. When using a 50mm lens for landscapes or architecture, I find myself less obsessed with capturing the entire scene (since it’s often impossible anyway), and more focused on the relationships between lines and structures, and between structure and light and shadow—often resulting in unexpected perspectives.

    Backlit Performance:In backlit situations, thanks to excellent coating technology, the lens controls chromatic aberration very well. Image contrast and detail remain strong, and even when the light source enters the frame directly, there is no obvious purple fringing or color dispersion at the edges. Overall performance is impressive.

    Expectations and Conclusion

    Looking back on the time spent with the Viltrox AF 50mm F1.4 Pro FE, what it brought me was far more than just satisfying images—it was a long-missed sense of things being “just right.”

    At the 3,000 RMB price point, it precisely enters a market segment that had been vacant for a long time. It does not compromise the core experience because of labels like “domestic” or “high value for money.” Instead, with Pro-level optical performance, professional-grade handling and protection, and a mature design language, it convincingly demonstrates that domestic lenses are fully capable of breaking free from the stereotype of being merely “cheap substitutes,” and can become creative tools that photography enthusiasts actively choose—and take pride in using.

    Of course, I have no intention of putting it on a pedestal. After using it for some time, I do hope that its size can be further reduced without sacrificing image quality, and that firmware tuning can continue to mature. But no matter how much one talks about performance, ignoring the reality of budget may be theoretically correct, yet practically unhelpful. For a beginner photographer who wants to step into the world of large apertures and explore the layers of dreamlike beauty hidden behind glass elements, it is hard to avoid considering this “first 50mm F1.4 for young photographers.”

    This lens opens a door to a much broader creative space for enthusiasts on a limited budget. When evaluating whether a lens is worth buying, the meaning of “budget” goes far beyond the number itself. When you own a lens that offers strong performance at a reasonable price, you naturally feel more at ease—you don’t have to constantly worry about whether the oils on your hands might seep into the barrel through tiny gaps every time you hold it, nor imagine that every accidental bump could cause hidden internal damage. Instead, you can devote yourself fully to creating, confidently leveraging its strengths: creamy bokeh, richly detailed subject rendering… everything serving the single purpose of capturing that precious moment in your mind.

    Within a limited investment, it delivers an almost complete professional-level experience and performance. For users searching for a versatile standard prime—whether newcomers looking to move beyond a kit lens, or experienced photographers in need of a high-quality backup—this Viltrox lens offers an option that is hard to ignore and highly persuasive. Its release clearly shows that the path forward for domestic lenses lies not in blindly piling on specifications or racing to the bottom on price, but in directly competing on key aspects of the user experience while maintaining sincerity in pricing.

    For me, this lens feels more like a clear signpost, marking the moment when domestic lenses have finally crossed the difficult exploratory stage of “the long road as hard as iron,” and truly stepped onto a new starting point of renewal and progress. From the Sigma 50mm F1.4 DG HSM | Art a decade ago to this AF 50mm F1.4 Pro FE today, I’m glad to witness the continuous growth of domestic lenses—gradually shedding the labels of “cheap” and “imitative,” and earning their place in the market through genuine competitiveness and quality. The road ahead is still long, but with this solid first step, we have good reason to believe that the future will bring more products with distinctive character, excellent performance, and reasonable prices—offering users truly rich choices. For the future of Made in China, we can hold even higher expectations.

  • SSPAI Review | Apps Worth Watching Recently

    SSPAI Review | Apps Worth Watching Recently

    Welcome to this edition of Pi Review. You can use the table of contents to quickly jump to the sections you’re interested in. If you’ve discovered other interesting apps or topics you’d like us to cover, feel free to join the discussion in the comments.

    New Apps Worth Paying Attention To

    While SSPAI has long been committed to discovering and introducing high-quality apps across platforms, there are still many excellent apps—impressive in design, functionality, interaction, and overall experience—that we haven’t yet covered. Some may be long-standing apps, others newly released. We’ll be introducing them to you here.

    Powo: Hang a Photo Wall on Your iPhone Home Screen

    • Platform: iOS
    • Keywords: photo wall, widgets

    @ElijahLee: Powo lets you turn a curated collection of photos into a desktop-style photo wall and place it directly on your iPhone Home Screen, so you can revisit your favorite memories without even opening the app.

    Creating a photo wall with Powo is very straightforward. The app offers five photo wall templates to choose from. Simply go to the Photos tab, select the images you want to “hang” on the wall, and you’re done. Each photo is framed with a Polaroid-style border, creating a realistic, skeuomorphic look.

    The photo wall also comes with a wide range of decorative tools. Beyond photos, you can freely add figurines, stickers, posters, captions, holiday elements, ticket stubs, and more. If you want to add your own custom decorations, that’s easy too. The customization feature allows you to select images from your system library and instantly turn full-size photos into stickers, vinyl records, CDs, and other decorative elements, all with impressively realistic results.

    Powo also offers powerful freeform editing and layout options. You can customize the background, colors, and border styles of your photo wall—whether you’re aiming for a felt-board look to suit close relationships, or a dark-toned style better suited for photography showcases. Photos themselves come in multiple styles, with mounting options like push pins or small wooden clips. Any photo or decorative element on the wall can be tapped to adjust its size and hanging angle, making the overall effect feel even more lifelike. If you’re not satisfied with how photos overlap, the app even provides layer-order controls.

    Once your photo wall is complete, you can add it to your iPhone Home Screen via a Powo widget and enjoy your memories without opening the app. Of course, you can also export the photo wall within the app to save it locally or share it on social media.

    Powo is available for free on the App Store. Most features are usable at no cost, but the free version is limited to creating one photo wall, with up to five photos per wall, and does not support customization features. Upgrading removes these restrictions, with pricing at CNY 3 per month, CNY 18 per year, or a one-time purchase of CNY 38.

    Mental Math: Practice Calculations Anytime, Anywhere

    • Platform: Android
    • Keywords: calculation, mathematics

    @Peggy_: After starting work, aside from routine lesson reviews, I’ve found myself using my brain far less than before. For a while, I turned to sudoku to pass the time and keep my mind active. The app I’m introducing today—Mental Math—can serve as another simple tool for mental exercise. Mental Math is a puzzle-style app whose core function is to generate arithmetic problems. Because the types of calculations, difficulty levels, and even the number of questions can all be freely customized, it works both as a brain-training game for adults and as a practical tool for elementary school students to practice their calculation skills.

    After opening the app, the first step is to set the practice mode. There are two options: a fixed number of questions or a timed session. The number of questions can be set from a minimum of 10 to a maximum of 50, while timed sessions range from 1 to 5 minutes. Once the mode is selected, you can further design the calculation types. Available operations include addition, subtraction, multiplication, and division. Tapping an operator selects it, and dragging the slider on the right adjusts the difficulty—the larger the number, the more challenging the problems become. Perhaps in order to keep the app lightweight and the difficulty manageable, Mental Math does not offer mixed-operation questions.

    After completing the initial setup, you can enter the quiz interface. Once all questions are finished, Mental Math provides feedback on the session, including total time spent, accuracy rate, and a list of questions with their answers. As you complete more exercises, the app aggregates your results and assigns an overall star rating.

    Of course, if you’re just looking to do a few quick exercises out of boredom, you can choose Random Mode. The app will automatically generate 20 questions for you. However, since the difficulty in this mode is unpredictable, it’s not well suited for younger students.

    So the next time you’re bored and about to open TikTok out of habit, you might consider doing a few calculations instead to keep your mind active. Or if you have children in the lower or middle grades of elementary school who need regular arithmetic practice, Mental Math is also a solid option. For kids, short sessions during spare moments—paired with instant feedback—can be an effective way to train.

    You can download and try Mental Math via F-Droid. The app is completely free.

    TranscribeX: A Local-First Power Tool for Speech Transcription

    • Platform: macOS
    • Keywords: text extraction, speech transcription

    @化学心情下2: TranscribeX is a speech-to-text transcription tool for macOS. Compared with many transcription apps that rely on online AI models, TranscribeX’s biggest advantage lies in its fully local AI–based approach. All transcription is performed locally, meaning data is stored entirely on your device—ensuring a much higher level of data security and privacy.

    In terms of functionality, TranscribeX offers multiple ways to capture audio, including importing audio and video files, recording directly, hooking into recording-type applications, and importing from sources like YouTube. On the model side, it supports Apple’s built-in intelligence models as well as locally downloaded large models. Supported transcription models include Whisper, NVIDIA Parakeet, and others.

    To get started, you first need to set the default model and default transcription language under Transcription in the settings. Then return to the main screen and click Import to bring in the audio or video file you want to transcribe. In my case, I selected a two-hour YouTube video. From there, you simply wait in the transcription workspace until the progress bar completes.

    TranscribeX splits the audio into multiple time segments and displays the transcribed text by segment. This allows you to start organizing and reviewing the completed portions immediately while the rest of the transcription is still running, significantly improving overall processing efficiency.

    Once the transcription is finished, you can export the text in multiple formats, making it easy to continue working with it in other apps. You can also translate the transcribed text into other languages directly within the app.

    In testing, transcribing a two-hour audio file took nearly one hour. This may partly be due to the limited performance of my M1 MacBook Air. Even so, overall accuracy was quite high, and the results were well suited for further editing, organization, and summarization.

    You can download and use the basic features of TranscribeX for free from the official website. Purchasing the Pro version unlocks additional local models and a range of advanced features. Setapp users can access the paid version of TranscribeX directly.

    Artwall: Turn Your Favorite Album Covers into Wallpapers

    • Platform: HarmonyOS
    • Keywords: wallpapers, music albums

    @侧脸君: Artwall is a distinctive wallpaper app on the HarmonyOS platform, built around a clever idea—combining album artwork with wallpapers. With its unique image-processing algorithms, virtually any album cover can be transformed into a stunning phone wallpaper.

    The interface and features are extremely simple. Just enter a song title or artist name, tap to view the album-cover wallpapers, and download them. At the moment, Artwall does not support setting wallpapers directly within the app—you’ll need to manually go to your gallery to set the image as your wallpaper.

    Although Artwall doesn’t offer an option to choose wallpaper resolution, the resolution is tightly bound to the device being used. If you’re on a Huawei foldable device, the wallpaper resolution and layout saved for folded and unfolded states will differ accordingly.

    A good idea naturally sparks the urge to share—especially when it satisfies both “showing off your wallpaper” and “sharing your music taste” at the same time. Just five days after its first release, more and more screenshots of wallpapers generated by Artwall have already begun circulating on social media, highlighting users’ distinctive musical preferences.

    You can download Artwall from the HarmonyOS App Gallery. The app is completely free.

    Summary Expressive: An AI Summarization Tool with Bilibili Support

    • Platform: Android
    • Keywords: video summarization

    @大大大K: One of the most common uses of AI tools is solving the “TL;DR” problem. Whether it’s a text running thousands of words or images packed with information, AI can easily extract the key points. For video content, however, the mainstream approach still relies on subtitles or transcripts provided by video platforms, converting them into structured text for analysis. This is where a third-party tool like Summary Expressive comes in, feeding platform-generated transcripts to AI models.

    Summary Expressive supports multiple content formats, including plain text, web links, images, Word documents, and PDFs. Simply select a file within the app and the AI can quickly generate a summary—tasks that are trivial for modern AI models and don’t even require separate conversion tools. Video summarization is different, though: subtitles and transcripts embedded by video platforms aren’t always standardized like documents or images, which is why Summary Expressive is particularly useful here.

    Summary Expressive supports video links from YouTube and Bilibili. After pasting a video link, you can choose the desired length of the summary. In practice, longer summaries aren’t dramatically longer in word count, but they do provide more comprehensive coverage. Medium and short summaries tend to omit some details. The app also offers a text-to-speech feature for summaries, making it ideal for quickly reviewing video content while commuting.

    Summary Expressive supports major AI model APIs both domestic and international, including OpenAI, Gemini, and DeepSeek. If you want to summarize Bilibili videos, you’ll need to log in to your Bilibili account in the settings beforehand.

    You can now download Summary Expressive for free from GitHub and Google Play. The GMS version requires Google Play Services and downloads image-recognition models online, while the standalone version includes built-in models—choose whichever best suits your needs.

    App Updates You Shouldn’t Miss

    Beyond brand-new releases, many familiar faces on the App Store continue to iterate and evolve, adding features that are both interesting and genuinely useful. At SSPAI, we aim to help you filter through the updates that are truly worth your attention, so you can quickly stay up to date with the latest moves from apps and their developers.

    PhotonCam 1.30 Update: A More Refined Editing Experience for Pro-Level iPhone Photography

    • Platform: iOS / iPadOS
    • Keywords: mobile photography

    @Vanilla: iPhone photography enthusiasts may already be familiar with PhotonCam. While it’s not a household name, this third-party camera app stands out for its rich feature set, polished design, and well-thought-out interactions. At the same time, the developer actively embraces new system features and keeps pace with advances in imaging technology, allowing users to enjoy a more professional photography experience on the iPhone. Recently, PhotonCam rolled out version 1.30—its final major update of 2025—focused primarily on improving the photo-editing experience. Let’s take a look.

    First, PhotonCam has updated the HDR display behavior of the focus indicator. More specifically, when adjusting depth-of-field effects on HDR photos within PhotonCam, you can tap the screen to position the focus indicator. In the new version, the area covered by the focus indicator is now rendered with HDR effects as well, making it easier to accurately select the desired focus point.

    Second, the new version also refines the behavior of parameters such as fading and brightness adjustments, and introduces a setting that automatically falls back to SDR when the system crops HDR photos under strong lighting conditions. PhotonCam has also improved its launch speed, allowing you to enter shooting mode faster and capture moments more promptly. In addition, a new photo queue feature has been added: when shooting in burst mode or when photos require longer processing times (such as long exposures at night), PhotonCam displays a real-time counter on the gallery button in the lower left corner, indicating how many photos are currently being processed.

    Finally, PhotonCam has introduced several new Lock Screen widgets, including options for wide-angle, telephoto, and ultra-wide lenses. However, the developer has clarified that tapping these widgets will only open the app, rather than directly switching to the corresponding focal length. It’s unclear whether this is due to system permission limitations or other design considerations.

    That covers the main highlights of PhotonCam’s 1.30 update. If you’re looking for a full-featured third-party photography app on iPhone that balances both shooting and editing capabilities, PhotonCam remains a very solid choice. PhotonCam is available on the App Store under a “free download + in-app purchase” model, with subscription options priced at CNY 12 per month or CNY 68 per year, as well as a one-time lifetime purchase option for CNY 88.

    Controller for HomeKit 8.1: Introducing State Logic

    • Platform: iOS / iPadOS / macOS / watchOS
    • Keywords: smart home, HomeKit

    @Snow: Last week, Controller for HomeKit rolled out version 8.1, introducing an all-new States feature. Compared with the native Home app or Aqara’s “Scenes,” which apply a one-time batch change to device states, States enable Controller to support much more complex logical layering, allowing users to build far more flexible automation flows.

    Within Workflows, you can create all kinds of state logic. For example: when “Dog at Home” is active, enable the balcony door sensor and alarms; when “Deep Cleaning” is active, pause all motion-triggered lighting rules; when “Guests Visiting,” keep all living room lights permanently on; when “Watching a Movie,” silence all notifications and alarms. On the surface, each individual state may look similar to a scene, but the real power lies in the fact that States not only support logical stacking, they can also be used as triggers, conditions, steps, or stop events within a wide variety of workflows.

    For instance, if you’re about to do a deep clean after walking the dog, you can enable both the “Dog at Home” and “Deep Cleaning” states at the same time. This way, the lights won’t constantly change while you’re cleaning, and you’ll still receive notifications if your dog is causing trouble on the balcony. You can also use “Guests Visiting” as a workflow trigger: while turning on the lights to welcome visitors, the system can notify your family members and immediately lock the study door—preventing curious kids from wreaking havoc on your “collection.”

    Back in version 7.4, when Hub Mode was introduced, Controller already brought external control links to non-HomeKit users. With this update, the new States feature also supports external control URLs. This means you can use local Shortcuts, or third-party workflow tools like IFTTT, to trigger vacation modes via calendar events or quickly change states from non-Apple devices.

    After the 8.0 update, the developer restructured Controller’s pricing model. The original subscription / lifetime purchase option has been renamed Controller Essentials, with the lifetime price remaining unchanged. However, continued access to Hub Mode, Automate Workflows, and the new charting features now requires a Controller Plus subscription. Non-Essentials users must pay CNY 598 per year, while Essentials users can subscribe for CNY 228 per year, both with a 7-day free trial. The price barrier for Controller has clearly risen, so it’s recommended to try it out before deciding whether to commit to further payment.

    You can download Controller for HomeKit from the App Store.