Keykobo Emoji

At the end of March, KEI published the GB post for Emoji, a keycap set inspired by chat emojis. “EMOJI elements have become part of everyone’s daily conversations now, and I found them especially charming, so I wanted to incorporate them into a keycap design.”
When it comes to designs inspired by “emoji,” they are actually not uncommon in the world of keycaps. Most of the time, though, they appear only as decorative elements — novelty keys, or a small number of special alphas. Examples include Alpaca’s UwU Alphas or novelty concepts like 404. But building an entire keycap set around emojis as the core theme is still relatively rare.

In terms of color scheme, the Alpha section uses dark gray as its base, paired with lighter gray legends, while the sublegends introduce highly saturated yellow accents. The Mod section uses gray as the base with black legends. Some extension keys and novelty accents use yellow as the base color with black legends. Normally, when people think of emojis, large areas of yellow are the first thing that come to mind. However, KEI’s design instead uses grayscale as the foundation, with yellow-green accents layered on top. This approach also gives the set a much broader compatibility range. The combination of restrained cold-toned bases with bright, high-contrast symbols feels somewhat similar to colorways like GMK Nerve — using subdued foundations to carry more visually aggressive saturated elements, making the focal points stand out while avoiding an overly chaotic overall appearance.


If the Base kit alone doesn’t immediately communicate a strong connection to emojis, then the novelty and extension kits fully unleash the theme.
Visually, the set adopts a rounded “face-like” design language, somewhere between early pixel-style symbols and modern emoji expressions, while faintly resembling Pac-Man-esque shapes. At the same time, the design also incorporates quite a few memes and references rooted in the Chinese internet culture.
The PAD section takes an even more direct approach, using variations of the “👀” symbol from different angles to replace traditional numpad legends. While preserving functional zoning, it also reinforces the playful personality and recognizability of the entire set. In addition, translucent novelty keys appear as accent elements — something that has basically become standard practice in modern novelty design. Still, the absence of classics like the “sweating yellow bean” or the “Huaji” meme feels a little disappointing to me.

From a pairing perspective, the core of Emoji lies in its grayscale foundation combined with bright accent highlights, which means there are fairly clear boundaries in terms of compatibility.
It works best with keyboards that lean toward colder tones and cleaner structural designs, such as dark gray, black, or silver neutral-colored cases. These kinds of base colors naturally complement the grayscale system used in the Alpha and Mod sections, helping the overall appearance remain cohesive while allowing the yellow accents to become the visual focal point.
For keyboard kits whose design language is relatively restrained — for example, cases without excessive chamfers or aggressive decorative elements — this keycap set can effectively brighten the overall look and add personality without breaking the existing aesthetic. But if paired with keyboards that are already highly colorful or carry a strong thematic color scheme of their own, I personally don’t think the result would work particularly well.
GMK Gregory 2

At the end of April, pancake published the GB post for Gregory 2, a parody-themed keycap set inspired by the classic doge reaction meme. While most keycap designs try to establish some sort of theme or worldbuilding, this set feels more like a form of community performance art. Its inspiration does not come from films, art movements, industrial design, or cultural symbols, but from a “doge meme” printed on a Taobao desk mat. Most people make desk mats to match their keycaps — they fell in love with the desk mat first, then decided to turn that face into a keycap set.

And the set genuinely carries a uniquely internet-meme kind of energy: starting from a place of absurdity, stupidity, and even a slightly nonsensical emotional tone, then retroactively rationalizing that feeling into something cohesive. Precisely because of this, it gained extremely strong traction on Geekhack and Reddit, where many users joined in and started riffing on the joke themselves.
The R2 Base kit continues the iconic “ugly-cute” aesthetic of the original generation: large areas of black-and-yellow coloring, exaggerated facial expressions, graphics that almost resemble low-resolution texture maps, and, of course, the instantly recognizable Gregory face.

That said, despite being a meme set, the color palette itself is actually fairly traditional. Whether in industrial warning systems, engineering equipment, or street signage, black and yellow naturally create strong visual impact and high recognizability — similar to classic colorways like Serika.
As for novelties, there are dog paws, red accent keys intended to replace the pupils, and even red-and-blue Matrix-style pills. There’s also a flesh-pink add-on kit inspired by the rosy-cheeked “dimple face” expression. The entire set may be absurd, but it never feels cheap. Of course, because of the theme itself, this set works especially well with TKL layouts, where the full Gregory face can be displayed more completely.

For pairings, smaller layouts work well with silver narrow-bezel cases, while larger layouts can experiment with yellow or black boards. WKL and TKL are recommended; HHKB is not. In reality, Gregory isn’t the kind of traditional themed keycap set where people can still appreciate the aesthetics through color or artwork even without understanding the background. It also inspired later meme-driven sets such as Silly Goose-style designs. Opinions on the set are quite polarized, though — some people consider it one of the most community-driven and lively GMK projects in recent years, while others see it as nothing more than “turning a dead meme into keycaps.”
MW Philosopher’s Stone

At the beginning of March, York published the IC post for Philosopher’s Stone, an alchemy-themed keycap set.
“The design draws inspiration from medieval alchemical manuscripts, distilling the symbols, instruments, and philosophical core of the alchemical world into each tiny keycap. It also incorporates elements from the anime Fullmetal Alchemist.”

The most interesting aspect of this set is undoubtedly its color design. Unlike many alchemy-themed sets that instinctively go for a straightforward “gold + black” combination, Philosopher’s Stone instead chooses a brownish-yellow tone reminiscent of aged parchment as its primary foundation. The Alpha section evokes the appearance of ancient books, scrolls, and oxidized metal surfaces, paired with slightly darkened legends. From the very first glance, the set carries a distinct sense of “age.”

Meanwhile, the burgundy wine-red color serves as the most important visual anchor throughout the entire design.
Whether on larger keys, the arrow cluster, or the novelties, it feels like the “result of transmutation” itself — intentionally extracted from the otherwise restrained and humble base tones. This color logic aligns closely with the concept mentioned in the original post: “base metals → aqua regia → Philosopher’s Stone.” The main body remains grounded and primal, while the reds and golds symbolize the higher-order material produced after the transmutation is complete. In addition, the set does not use conventional sublegends, instead incorporating a large number of alchemical symbols and cipher-like characters. Because these symbols naturally carry strong ritualistic and totemic qualities, they are able to establish a clear thematic atmosphere even if we do not fully understand their exact meanings.

Under warm lighting, the entire set takes on the character of old books, ceremonial tools, and brass artifacts blended together.
The novelty section is built directly around the alchemical system itself: the four classical elements, water/fire/earth/air, the stages of alchemical transformation (nigredo, albedo, citrinitas, rubedo), transmutation circles, the Emerald Tablet, the Kabbalistic Tree of Life, and various instrument symbols. It feels fairly unconventional and uncompromising in its approach.

For pairings, warm gray, champagne gold, and silver cases are recommended, while white and highly saturated-colored cases are less suitable. Overall, rather than feeling like straightforward Fullmetal Alchemist fan work, this set leans much more toward a rustic and traditional interpretation of alchemy itself. It does not intentionally explore the darker side of alchemical themes, instead remaining relatively restrained. The transparent yellow elements and semi-transparent structures essentially simulate liquids mid-transmutation and glass laboratory vessels. However, because the overall brightness level is fairly low, pairing it with darker-colored cases can easily make the entire setup feel even dimmer. Personally, I think the barrier for achieving a good-looking build with this set is still relatively high.
MW Gesha

At the end of March, KENT published the IC update post for Gesha, a keycap set inspired by hand-poured coffee.
“As a corporate workhorse myself, coffee every morning is absolutely essential (otherwise I’d genuinely fall asleep). I started out ordering coffee delivery, then moved on to drip bags. As I gradually learned more about coffee flavors, I began trying hand-pouring myself, and eventually it turned into a daily hobby.
“Although there are already plenty of coffee-themed keycap sets on the market — GMK/DCS Cafe, SP SA Espresso, MW Barista, and so on — there still doesn’t seem to be a design specifically centered around hand-poured coffee. So, combining that with my own interests, I began developing the concept for MW Gesha.
“First of all, the name Gesha actually comes from a fairly famous coffee bean variety. While thinking about the novelty designs, I wanted to include botanical elements inspired by coffee cherries (which, coincidentally, really do resemble cherries). So I borrowed this widely recognized bean variety as the theme name. Combined with illustrations of brewing tools commonly used in hand-poured coffee, the foundation of this design gradually took shape.”

Coffee-themed keycaps are actually quite common within the community, and every designer tends to have their own interpretation. Most still revolve around the classic “milk white + coffee brown” formula — essentially white alphas with coffee-colored legends, or coffee-colored bases with white legends. Some attempt espresso-like gradient effects as well, though those can easily go wrong if not handled carefully. Gesha’s color philosophy, however, leans more toward expressing the process itself: using the gradual color transition of coffee beans from raw green beans to roasted beans as the central visual narrative, while translucent accent kits metaphorically represent the brewed coffee liquid, extending the concept from raw ingredient to finished drink.
The main typing area uses a warm light beige as its primary base color, paired with soft light coffee-colored legends, creating a gentle texture reminiscent of lightly roasted coffee beans. The Mod section shifts toward a dark brown base with off-white legends for contrast, corresponding to deeper roasting stages. Transitional accents appear on keys such as Enter, where lighter coffee-colored bases are paired with off-white legends. Meanwhile, some extension keys use reddish translucent dark coffee-colored bases with off-white legends to represent brewed coffee itself.

The novelty designs are one of the more interesting aspects of the set. The reddish tones of raw coffee cherries and brewed coffee are used as silk-print accents, while brewing tools such as moka pots and manual coffee grinders appear as graphic elements.
Overall, the reddish silk-print accents do successfully function as a kind of “finishing touch,” preventing the design from becoming trapped within a monotonous brown palette. However, when looking closely at the illustrations themselves, some elements feel slightly underdeveloped. For example, the proportions and structure of the kettle handle, as well as the linework of the hand holding the coffee, carry a certain awkwardness. They are neither fully realistic nor stylized enough to establish a clear artistic direction, which slightly weakens the overall consistency and refinement of the design.

For pairings, warm gray, off-white, and silver cases are more strongly recommended, as these neutral warm-toned housings naturally complement the beige and coffee-colored layering of the keycaps themselves, creating a softer and more cohesive overall appearance. If you want to emphasize contrast and layering further, dark brown or deep coffee-colored cases approaching black can also work well, though pure black is probably not the best choice.
KBS Psychedelic House

At the end of March, York published the IC post for Psychedelic House R2, a psychedelic-themed keycap set.
“The inspiration comes from psychedelic mushrooms, blending hallucinatory visual effects and distorted consciousness into a bold aesthetic.”
In terms of color design, compared to the blue-and-pink palette of R1 inspired by holographic film, the R2 colorway is clearly far more aggressive. The set collides extremely saturated fluorescent green, purple, and orange together. The Base kit completely abandons the traditional idea of “restrained balance,” instead directly creating intense contrast through purple-blue and fluorescent green. Even the legends themselves are rendered in bright neon green, giving the entire set an overwhelmingly aggressive presence from the very first glance.

The novelty section is filled with repeatedly layered wave patterns, spirals, mushrooms, distorted symbols, and visuals resembling motion afterimages. It gives me the same feeling as electronic music spectrums or psychedelic concert posters — almost like the attack effects in Kirby after absorbing one of those laser-eye enemies.
Personally, I think this set is extremely taste-dependent. There is almost no visual resting area anywhere across the entire design. At first glance, it immediately grabs your attention, but over longer periods of time, it inevitably becomes somewhat exhausting on the eyes. At the same time, the design heavily uses inverted fluorescent green and orange treatments, where identical graphics continuously switch between different background colors. This high-frequency visual collision further reinforces the theme of “mental contamination.”

To me, it feels like York intentionally gave up compatibility with everyday desktop setups in favor of pursuing a purer, more subcultural form of expression.
Personally, I think this set works best as part of a heavily stylized desk setup, a display-focused keyboard build, or as a collector-oriented piece for specific subculture enthusiasts. Pairing it with translucent PC or acrylic cases in unconventional colors would probably produce excellent results. However, for cases that already feature strong contrasting colors or highly stylized designs of their own, I don’t think the combination would work very well — because this keycap set already completely dominates the visual center of the build.

GMK Arcade

In mid-March, Rassles published the IC post for GMK Arcade, a keycap set inspired by arcade gaming.
“I grew up playing video games and spent a lot of time in arcades, so this project gave me an opportunity to reinterpret those classics in a fresh way. GMK Arcade is a tribute to classic themes, rebuilt with vibrant colors and packed with references to iconic games, aiming to capture that nostalgic arcade atmosphere. A hit of pure nostalgia.”

In terms of color design, the moment I first saw this set, it immediately reminded me of the color palette from GMK Miami Nights years ago. The original Miami is undeniably iconic, and countless later designs have drawn inspiration from it. The base uses pure black, likely intended to simulate the glow of CRT monitors inside dark arcade rooms. With ambient light suppressed, the colors on-screen seem to float within the darkness itself. The main typing area adopts a cyan tone reminiscent of Tiffany Blue, though deeper and more saturated, a color extremely common in arcade game interfaces throughout the 1980s and 1990s. The Mod section uses highly saturated magenta tones, while certain extension and novelty keys introduce bluish-purple accents, filling the hue gap that previously existed between the cyan and pink elements.
Compared to the soft neon reflections of Miami — like lights diffusing through humid evening air at dusk — Arcade’s overall color palette feels far more vivid and direct.

The novelty section revolves around classic early-era games such as 3D Pinball, The King of Fighters, and vertical shooters, with the overall execution remaining fairly straightforward.
Personally, I think this set plays things relatively safe. The black-base neon formula has already been repeatedly proven successful through Miami Nights and countless derivative designs. Dark gray or black cases feel like the most natural extension of the theme. White cases raise the overall brightness and shift the aesthetic toward a cleaner, more futuristic vibe, and transparent PC cases create a similar effect. However, extra attention should be paid to RGB lighting implementation — if the lighting effects become too chaotic, the already highly saturated color palette can easily start to feel cheap rather than cohesive.
That said, while there are not many brand-new Miami-inspired releases these days, there is still plenty of stock circulating, including in the aftermarket. Picking up a novelty kit alone could actually be a pretty fun option.

KeyBoy40

In mid-March, Niuniu published the GB post for KeyBoy40, a keyboard inspired by the Game Boy.
“The Game Boy is an iconic milestone product in the history of handheld consoles. Previously, the GB34 from the same lineup was designed by Teacher Earth and became beloved among many 40% keyboard enthusiasts. Two years later, we’ve finally brought out what can truly be considered its upgraded successor.”
Custom keyboards themed around the Game Boy are actually not uncommon — examples include Tetris60, AM RGB 65, GAME1989, and others. The predecessor to KeyBoy40, the #34, attracted a huge amount of attention largely thanks to its unbelievably aggressive pricing. While this new version has become noticeably more expensive, it still firmly belongs in the “affordable enthusiast toy” category around the thousand-yuan range, and both the overall configuration and build quality have also received meaningful upgrades.
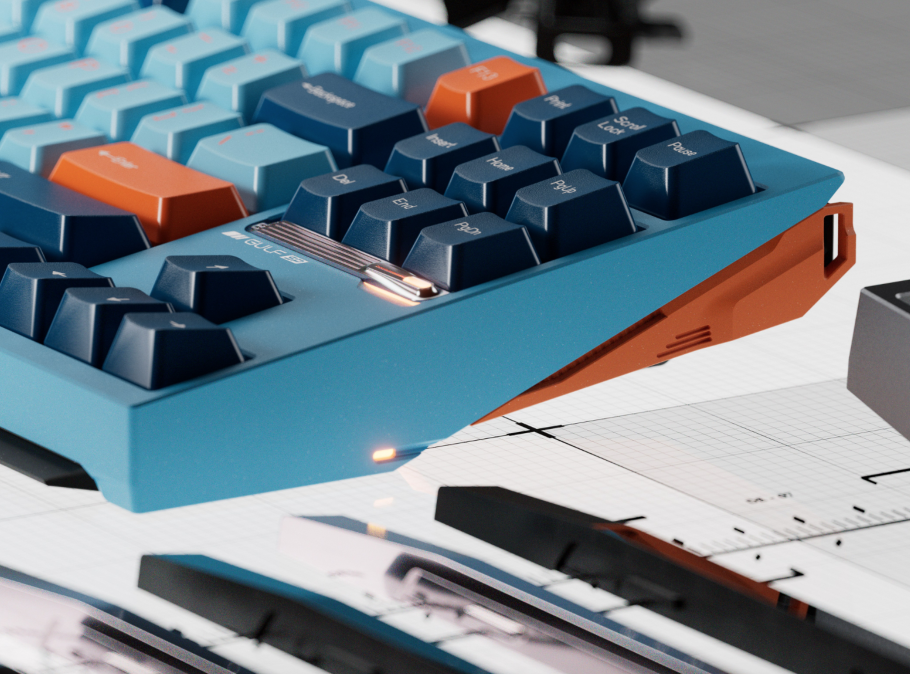
The exterior incorporates a number of sculpted details inspired by the Game Boy itself, such as the signature angled cut on the bottom-right corner, decorative grooves, accent lines across the top, anti-slip side textures, and a rear decorative plate. Overall, the design remains fairly minimalistic. Structurally, it uses a shell-style construction paired with either an O-ring or gasket silicone bean mounting system. This setup works particularly well on compact products like 40% boards, while also eliminating the annoyance of screw-based assembly. As for typing feel and related discussions, I imagine people who regularly buy Niuniu’s products are probably not choosing them primarily for that reason anyway.

One of the major selling points of the KeyBoy40 is its dual compatibility with both mechanical and electrocapacitive switches. A single PCB supports both electrocapacitive switches and mechanical switches — though they cannot be mixed together simultaneously. “By flashing different firmware, you can freely switch between electrocapacitive and mechanical modes. For example, if you install mechanical switches, you simply flash the mechanical firmware either before or after assembly following a straightforward tutorial, and the KB40 will work normally. The same applies to electrocapacitive mode.”
In terms of layout, the 40HHKB version offers both ortholinear and staggered configurations. The staggered layout uses a 7u long spacebar along with split-space options in 2.25u and 2.75u configurations, making it relatively keycap-friendly.
The current group-buy version achieves compatibility with both mechanical switches and TEC electrocapacitive switches through the plate design, with additional support for screw-post and PCB mounting. Meanwhile, the more traditional electrocapacitive version used on the HX40 will later be offered separately as an add-on purchase within the customer group.

As for colors, it still carries Niuniu’s signature approach: custom spray-painted finishes are available for an additional fee. Among the anodized options, I personally think the light gold finish looks especially good. Over the past two years, 40% keyboards have noticeably gained more visibility within the Chinese custom keyboard scene, gradually evolving from an extremely niche enthusiast category into a relatively established subculture of its own. Although the number of people who truly use 40% layouts as a long-term daily-driver solution remains small, these keyboards have instead found a more stable role as objects meant to be appreciated, collected, and played with. And part of that evolution undoubtedly comes from organizers like Niuniu, who have continued supporting the 40% format for years. Perhaps it is precisely through this kind of persistent experimentation and continued supply that what was once a fringe branch has gradually become visible to more enthusiasts. Hopefully, more and more people will discover these fun little creations in the future.
Key Boy Advance

At the beginning of March, Galo published the IC update post for KeyBoy Advance.
“Many studios have already released custom keyboard products inspired by the classic Game Boy handheld, experimenting with various proportions and form factors. Inspired by this, I started wondering: why not move beyond a single reference prototype and explore a wider range of handheld console designs through reinterpretation? My first choice became the Game Boy’s successor — the Game Boy Advance.”
Right after discussing the KeyBoy40 above, another GBA-inspired product immediately follows.

In terms of overall form, KeyBoy Advance does not directly replicate the horizontally stretched proportions of the original GBA. Instead, it returns to the keyboard’s own rectangular foundation. Through adjustments to the layout and outer boundaries, the four corners are visually pulled inward, creating an “embedded zone” structure surrounding the typing area, while each corner retains its own dedicated region for detailed treatment.
A recessed engraved line extends from the front edge toward the back of the chassis, forming a segmented relationship reminiscent of a battery cover panel. Meanwhile, both sides of the bottom edge rise slightly upward, giving the overall silhouette a subtle floating appearance.
The right side concentrates most of the decorative elements: an independent indicator-light structure sits at the top, while below it, a recessed split-piece structure creates the impression of a speaker module, with color separation further enhancing the layered effect. The left side is comparatively restrained, preserving only a lightly engraved text mark at the lower-left corner, while the upper-left corner introduces an offset light-strip structure to rebalance the visual center of gravity.

Structurally, the keyboard adopts a traditional top-and-bottom shell construction. Extremely small chamfers are used along the seams to recreate the appearance of injection-molded handheld casing joints. The sides incorporate split-piece and color-separated elements to reconstruct forms resembling palm rests. On the underside, the original prototype’s complex curved surfaces are simplified and reorganized into upward-curving arcs on both sides, visually echoing the upward lift of the front bottom edge and further reinforcing the floating aesthetic. In addition, the chassis introduces pressable shoulder-button structures on both sides, preserving the interaction points of handheld consoles while supporting customizable functionality.
If previous Game Boy-inspired keyboards mostly stopped at surface-level visual imitation, then KeyBoy Advance offers much more of the interaction and collectible charm associated with the handheld gaming era itself.

Internally, the board uses a fairly conventional TOP mounting structure. The layout is based on a modified dimple-style configuration combined with a recessed spacebar arrangement and HHKB layout. Spacebar options include 6U, dual 3U, and dual 2.75U + 1U (steel plate only). However, if you want a more symmetrical layout configuration, sourcing compatible dual 3U and dual 1.75U Shift keycaps is still fairly troublesome.

In addition, the project also offers dedicated contrasting-color accessories, along with optional universal PC add-on components for creating mixed-color combinations. There are quite a few possible configuration combinations available. I’m still curious how the actual anodized finishes will look in real life, though.
As for pricing, the kit is positioned around the 1.7k–1.8k RMB range. For a “small-scale themed product,” that pricing is admittedly not especially approachable, particularly for users who are attracted primarily by the design alone, since the barrier to entry becomes relatively high. However, considering the structural complexity and the number of individual parts involved, the production cost is clearly not low either. After all, Niuniu’s KeyBoy40 uses a much simpler integrated shell construction. Personally, I still hope this project successfully reaches production — because among recent works of this type, I think this is one of the more fully realized executions we’ve seen in quite a while.

Matter 65

At the beginning of April, Chq published the IC post for Matter 65, a 65% keyboard kit combining PC and copper materials. From the front, the kit follows a fairly conventional 65% layout, while the side profile takes the HHKB Line concept and reshapes it into a subtly curved arc. The rear also adopts a relatively standard two-stage design. But what truly makes this keyboard interesting is that it does not place its design emphasis on the outer silhouette. Instead, it uses the PC material to construct an “interior meant to be observed.”
Structurally, it uses fairly standard O-ring and silicone-particle gasket mounting systems — safe and conventional choices overall.

The copper component on the underside features wing-like cuts on both sides. The lightweight PC shell wraps around dark metal that has been carved, exposed, and visually emphasized, creating a very deliberate contrast between interior and exterior. At the same time, the center area overlays two completely different typographic styles: the clean and modern “natural,” alongside the more handwritten and emotionally expressive “artificial.” The entire kit uses contrast as a design language throughout — from materials and structure to graphical elements, everything continuously reinforces this sense of internal tension.

That said, when viewed in the context of today’s market, this design also cannot really be considered particularly radical or groundbreaking.
On one hand, the combination of PC and visible metal internals is no longer especially novel within the custom keyboard scene over the past two years. Whether it’s projects like Sha 65, Protagonist, or various other attempts at transparent-shell designs, many have already explored the idea of “internal visualization” to varying degrees. On the other hand, the mounting structure itself also falls into the category of relatively common “safe configurations,” offering users a level of optional flexibility that feels somewhat noncommittal.
As for the micro-arc oxidation process mentioned in the IC post, I don’t think it needs to be overly romanticized. First, the moment an aluminum top case is chosen, the design’s core “internal visualization” concept is already weakened significantly, causing the product to quickly revert into something comparatively ordinary. Second, micro-arc oxidation itself is hardly new technology. Earlier projects experimented with similar treatments as well — products such as Bozi’s Cod67, for example, already used comparable processes. Its advantages lie more in differences in surface hardness and texture rather than any supposed “dramatic improvement” in typing feel or sound performance.

A more practical issue is that micro-arc oxidation places heavy limitations on color options. The available range is nowhere near as versatile as traditional anodization, which is also one of the major reasons why the process has gradually faded from mainstream custom keyboard design in recent years.
Finally, returning to the renders themselves: the official images depict the PC material as extremely transparent, but based on real-world experience, CNC-machined PC rarely achieves that level of visual clarity — especially when dealing with thicker structures and more complex internal geometry. Fogging and light diffusion issues are almost unavoidable to some extent. As a result, the final physical product will most likely appear more hazy than the renders suggest, and the visibility of the internal structure may not end up nearly as crisp or idealized as shown in the promotional images. Pricing has not yet been announced.
Venus

In mid-April, TRY published the IC post for Venus, a 40% keyboard kit inspired by sculpture.
When talking about Greek-themed custom keyboard projects — such as Melgeek’s MG WAHTSY, Createkeebs’ Thera75, or Fotu’s Elysium — most of these designs still approach the theme through “symbols” and “imagery.” Their names, color palettes, and localized decorative details are essentially additive layers placed onto already familiar keyboard forms.
Venus takes a slightly different path. Rather than emphasizing external symbolism, it starts directly from “form” itself, breaking sculptural language down into relationships between volumes and curved surfaces. It is not about adding sculptural elements onto a keyboard, but instead attempting to turn the keyboard itself into a sculptural object.

TRY mentioned a particularly important point in the IC post: in traditional sculpture, the “front” is the side facing the viewer and establishing a relationship with the ground. But keyboards are different. Although they also have a “ground-facing surface,” our actual viewing angle while using them mostly falls somewhere within a 70–90° frontal perspective. So on Venus, the designer directly treated the “front” as the primary design reference point, organizing the entire form through continuous curves spanning the front, sides, and underside, allowing users to perceive a relatively complete shape from a normal usage angle alone.
This idea directly influenced all subsequent details. Instead of prioritizing how the structure should be layered or assembled, the design follows a much more “form-first, structure-second” approach. Overall, it feels closer to designing an object meant to be observed.
Following this logic, Venus also reinterprets the HHKB Line. The original line, which traditionally runs parallel to the bottom case, is interrupted and transformed into an angled break that becomes part of the side profile’s overall transition. To make the proportions feel more balanced, this transition point is intentionally lowered, shifting the visual center of gravity downward and toward the front while also filling the previously empty areas on both sides of the HHKB layout.

In terms of execution, the design avoids typical chamfers or rounded corners, instead using a continuous concave surface to complete the transition. This surface extends from the front all the way to the side and then down toward the underside of the keyboard, with the curvature gradually changing throughout. Because the transition point is lowered, the side profile creates a visible “break point” near the bottom instead of maintaining the usual top-and-bottom symmetry. This treatment also echoes the “fracture” imagery mentioned in the design concept itself.
The front-facing details are comparatively restrained, though two additional elements were still introduced. At the layout blocker position, a nameplate with a curved outline is slightly raised and tangent to the front surface, effectively extending the curved surface language upward by another layer. In addition, the very front edge features a rounded contour with changing curvature that corresponds to the concave surface above, creating an inward-contracting tendency through the center area. This section sits directly in front of the spacebar, making it the exact area where the thumbs naturally come into contact during use. As a result, there is also a subtle tactile design consideration involved here, somewhat reminiscent of Domikey’s approach to spacebar-area shaping.

The side profile overall still maintains upper-and-lower symmetry, using two curved sections to connect the form and preserve the integrity of the volume. The rear is comparatively more restrained, relying on carefully controlled proportions within the weight design to keep the composition visually stable. The underside is divided into four separate weights surrounding a central recessed region. The concave lines here continue the same curved-surface language established earlier, and it actually reminded me somewhat of Lily’s bottom-case design. However, compared to the restrained and continuous curvature expression on the rest of the keyboard, the underside treatment feels noticeably more “filled.” The four weights combined with the recessed contours occupy almost all available visual space, resulting in a denser and more information-heavy appearance. Internally, the board uses a fairly standard silicone-ring O-ring mounting system.

Venus will be available in anodized, coated, and PC variants, while the weights and decorative pieces can be configured in coated aluminum alloy, raw stainless steel with machined texture, PVD, or stonewashed finishes. Overall, I think the execution quality of this project is relatively high. Starting from the idea of “designing from the front viewing angle,” it consistently derives its curves, transitions, and break points through every level of detail, resulting in a fairly unified design language. In terms of pricing, the higher-end configurations sit slightly above the 2K RMB range, while the standard version starts at just over 1K RMB. If you’re interested in more sculptural keyboard designs that strongly emphasize curved surface language, this is definitely a project worth paying attention to.

Do.25

In mid-April, ises published the IC update post for Do.25, a retro-inspired keyboard kit rebuilt from the WS 785 platform.
Unlike many retro-style keyboards that stop at recreating vintage visual language, Do.25 starts directly from the layout itself, compressing and restructuring the original Digital layout.
At first glance, the layout somewhat resembles a combination of FKL and HHKB, though the actual differences are concentrated mainly within the alpha section. On traditional keyboards, the number row, Q row, A row, and Z row follow a staggered progression of 0.5U, 0.25U, and 0.5U offsets. This uneven arrangement largely exists as the result of historical and structural compromises. Do.25, however, standardizes all inter-column spacing — including the number row — to a uniform 0.25U. Without completely abandoning conventional typing habits, it simplifies the entire system into a more unified structure.

Building on that foundation, the lengths of the modifier keys are also redistributed. Backspace is compressed down to 1U, while Shift is shortened to 1.75U on the left and 2.25U on the right. These adjustments help control overall key density while reducing reliance on uncommon keycaps, allowing the layout to remain compatible with standard base kits without significantly increasing the barrier to entry.
The spacebar area is handled more aggressively. Although the left-side Ctrl key is retained, it is compressed down to 1U in order to preserve the original 0.25U offset relationship between the WKL blockers. This not only maintains the proportions of the blockers themselves, but also creates enough room to fit a 10U spacebar purely for the sake of “dumplings wrapped around vinegar” — though of course, standard spacebars remain supported as well.
In terms of appearance, Do.25 inherits the foundational design language of WYSE, but rather than simply recreating it, the case structure is rebuilt around this unique non-standard layout system.

Because the vertical proportions of the modifier section are not fully uniform, the front-facing negative space distribution naturally becomes uneven. Do.25 addresses this by re-dividing the case frame using additional lines. Without altering the overall outer silhouette, it reconstructs visual order by segmenting the rectangular structure itself.
More specifically, the offset areas to the left of the number row and Z row are visually weakened or partially stripped of their frame structure, then transformed into layered depth through recessed treatment. In the upper-right corner, stepped segmentation creates a distinct isolated area, preventing repetition with surrounding elements. At the same time, the split lines along the side and bottom edges are shifted inward from their original centered positioning, while the relationship between outer frame width and top-and-bottom case boundaries is standardized, resulting in more stable overall proportions. Without relying on extra decorative elements, this approach gives what would otherwise feel like a relatively loose layout structure a much clearer external framework. Compared to directly emphasizing retro symbols, this method feels much closer to reconstruction.

During later prototyping stages, several structural experiments were also tested and revised. For example, the early detachable F-row top cover introduced problems in assembly and interrupted line continuity, eventually leading to its removal. The USB-C port area was also redesigned: instead of using a more direct segmented cut, it now transitions through separated structural pieces and engraved recessed lines, extending the visual relationship toward the rear of the board. Meanwhile, some previously exposed structural elements were moved internally in order to reduce interference with the overall form. Of course, a separate top case and PCB will also be produced for the retro-accurate Doo version.
Overall, Do.25 feels much more like a design project built around “layout” as its starting point — the exterior serves the layout, while the structure serves the exterior. The overall logic feels relatively unified, with a clear design direction and a certain degree of experimentation. At the same time, however, a design built upon a non-standard layout naturally demands more adaptation from the user, making the barrier to entry somewhat higher. Personally, I’m quite fond of these kinds of retro-innovation product designs. The standard anodized/RAW version is priced at 1888 RMB, while the coated version comes in at 1950 RMB. Definitely worth keeping an eye on if this sort of design interests you.

MetaPulse

In mid-April, Charles from MetaKeebs published the GB post for MetaPulse, an electrocapacitive accessory ecosystem designed for the custom keyboard market.
When people talk about electrocapacitive keyboards, the common perception is often inseparable from ideas like “expensive” and “closed-off.” For a long time, electrocapacitive products were almost entirely dominated by original manufacturers, and combined with existing patent barriers, they never truly became part of the open custom keyboard ecosystem in the same way MX-style switches did. Agar previously attempted to launch its own electrocapacitive solution as well, but ultimately had to take it down due to patent disputes.
Looking back at MetaPulse, however, its arrival was not something that happened overnight.

Last year, Charles first developed his own electrocapacitive rubber dome molds and launched them through a group buy, taking the first step toward an independent electrocapacitive ecosystem. This was later followed by group buys for electrocapacitive PCBs, the EM60 electrocapacitive keyboard kit, electrocapacitive “crater” keycaps, and a series of related products. By the time MetaPulse arrived, it was no longer just a single standalone accessory, but rather an entire fully integrated electrocapacitive customization platform.
MetaPulse covers most of the core components of an electrocapacitive keyboard, including the PCB, sliders, switch housings, rubber domes, and stabilizers. Compared to traditional electrocapacitive systems, its biggest characteristic lies in its expanded compatibility.

The PCB follows the GH60 standard, making it compatible with mainstream tray-mount and O-ring-based cases, while the accessories support both crater-profile and MX-compatible keycaps. The switch housings use a cuttable design, allowing users to avoid interference with internally mounted screws, O-rings, and stabilizers.
As for the rubber domes, two different feel profiles are offered. The Red series focuses on a moderately rounded tactile experience, somewhat similar to OEM Hybrids Snow. Meanwhile, the Blue series takes inspiration from OG BKE domes, pursuing a much heavier and more dramatic tactile event. Across both series, there are twelve different weight options ranging from 25g to 75g, with preset dome sizes covering 1u to 4u keys, allowing users to assemble keyboards ranging from 60% to 80% layouts without needing to cut the domes themselves.

Personally, I’m genuinely happy to see electrocapacitive keyboards gradually moving toward a more open ecosystem. For many years, electrocapacitive boards felt almost like an “isolated island” outside the broader custom keyboard community — they had their own unique tactile philosophy, along with rich sound and rebound characteristics, yet always lacked a solution truly designed for custom keyboard enthusiasts. MetaKeebs has now provided that option, and hopefully more and more people will be able to experience electrocapacitive keyboards more easily in the future.

Jahre 65

At the end of February, Jingvv published the IC post for Jahre 65, a 65% custom keyboard kit inspired by the Porsche 911.
When it comes to keyboards inspired by the 911, many people immediately think of the Singer 80 from a few years ago. But unlike Singer 80, which focused more heavily on expressing the theme through the backplate, Jahre 65 chooses to integrate the design language of the 911 directly into the keyboard’s silhouette itself.
“The design inspiration for Jahre 65% comes from the first three generations of the Porsche 911 — the 901, 930, and 964. Even after decades of evolution, these cars still possess incredible charm today. Among them, the most iconic is undoubtedly the special-edition 964 model released in 1994 to commemorate Porsche’s 30th anniversary — the ‘30 Jahre 911.’

“Compared to the standard Carrera 4, the ‘30 Jahre 911’ adopted the Turbo model’s widebody design. The fuller fenders, smoother waistline transitions, and more layered rear intake grille together created one of the most recognizable silhouettes in the history of the 911.”
On the front side of the keyboard, the upper case introduces subtly tapering spindle-shaped curves along both sides. This makes the entire board appear visually thicker and fuller, similar to the horizontal tension created by the widebody proportions of the 964 Turbo. At the same time, the side profile incorporates an additional crease line that echoes the curvature of the bottom case, preventing the side view from appearing overly flat while instead creating a more fluid and layered surface transition.

Many previous “sports car-themed” keyboards tended to focus on elements such as nameplates, engraved backplates, or directly borrowing highly recognizable features like headlights and spoilers. Jahre’s approach feels much closer to industrial design itself, without deliberately emphasizing “this is a Porsche reference.”
A similar philosophy can also be seen on the underside. The curved bottom surface references the waistline contours of the 911’s rear fenders, while integrating the classic front-hood intake vent elements into the bottom structure itself, giving the underside much stronger visual layering. A black sandblasted nameplate sits below, finished with secondary flat polishing and anodization treatment, adding a touch of refined detail similar to automotive badging within the otherwise understated design.
Internally, the weight system consists of two stainless steel weights whose overall form references the rear intake grille structure of the 911. The larger weight uses a RAW-machined surface finish, while the smaller weight employs mirror-polished PVD to emphasize metallic reflectivity.

Structurally, Jahre 65 adopts a Leaf Spring Gasket system this time, along with a genuinely useful “dual-mode” silicone sleeve design.
By flipping the orientation of the silicone sleeve, users can switch between “firm support” and “soft flex.” When the narrower side faces downward, the Leaf Spring region gains more suspended space, resulting in a bouncier and more elastic typing feel. When the wider side faces downward, the structure provides fuller support, creating feedback that feels firmer and more stable.
In addition, Jahre 65 also offers a traditional Poron gasket configuration, effectively accommodating different user preferences regarding sound profile and flex characteristics.

The mechanical-switch PCB uses a 1.6mm black-core board, supports 8K polling rate, and comes in both soldered and hot-swap versions. At the same time, it is also compatible with Venom’s 65% magnetic-switch PCB. As magnetic switches gradually continue entering the custom keyboard market, we will probably see more and more teams moving into the magnetic-switch ecosystem as well — it feels increasingly inevitable.
As for colors, the current lineup includes green, gold, blue, silver, gray, ice blue, and orange. Personally, I prefer the orange version the most. Compared to the more restrained gray, silver, and darker tones, it carries much more of that classic sports-car “performance” feeling.
In terms of pricing, Jahre 65 starts at 2399 RMB.

Within today’s custom keyboard market, that price point already sits in an extremely competitive range. On one hand, users now have increasingly high expectations for build quality, structure, and detailing. On the other hand, there is certainly no shortage of products emphasizing value and aggressive specifications.
What I think makes Jahre relatively special is that it never feels like a project focused purely on spec-sheet competition.
Whether it’s the exterior lines, the bottom structure, or the design language built around the 911 theme itself, everything feels thoughtfully developed rather than simply collaging automotive elements together. This kind of genuine thematic cohesion is actually something many projects tend to lack.

Overall, I personally think Jahre 65 is a highly refined project. Over the past few years, making keyboards more rounded, emphasizing curves and flowing surfaces, has no longer been anything particularly new. But Jahre gives me a feeling of being “soft within strength.” You can sense a certain power through its crease lines, metal components, and widebody-inspired silhouette, while the extensive use of rounded corners, curved surfaces, and waistline shaping prevents it from ever feeling excessively cold or rigid.
Aepex 60

At the end of April, KBDfans published the GB post for Aepex 60, a nature-inspired custom keyboard kit.
“We are drawn to the quiet weight of ancient stone, and fascinated by the cliffside contours carved over time by wind, water, and the passing of ages.”
The kit adopts a wraparound-style design where the top case sits slightly higher than the bottom case. The edges are softened with fine rounded corners, making the front-facing silhouette appear gentler overall and creating a subtle stepped transition. Combined with the rounded elements, the entire keyboard gives off a visually “enclosed” feeling.

The treatment of the bottom case is especially distinctive. Large rounded corners are used throughout, but the side profile is not simply a smooth curve. Instead, it incorporates multidimensional cuts that gradually taper inward from top to bottom, forming a streamlined contour. This design becomes especially noticeable when holding the board or viewing it from the side — it does not feel like a straightforward rectangular block, but rather like a continuously shifting curve. The curvature also affects the perceived thickness from side angles, making the Aepex 60 appear visually heavier and thicker than most typical 60% keyboards.
The backplate is where the design language becomes most concentrated. KBDfans incorporates mountain-like contours here, using continuous undulating lines and textured engraving to simulate cliffs shaped by erosion from wind and water over time. These lines are not flat decorative graphics layered onto the surface, but instead integrated directly into the three-dimensional curved structure of the bottom case itself. The contrast formed between different surfaces creates a certain sense of depth at first glance, almost like looking at a sliced geological terrain sample.
Internally, the keyboard offers both gasket silicone-strip mounting and silicone-bean mounting options.

The gasket silicone-strip setup is the more traditional approach. Long strips are placed between the plate and the case, and because the contact surfaces are continuous with larger support areas, the typing feedback leans more direct and firm. Bottom-out transmission feels crisp and decisive, making it suitable for users who prefer a more solid and stable typing experience.
The silicone-bean setup follows a different philosophy. The point-based elastic support system uses much smaller contact areas, leaving more room for internal flex. During typing, the plate exhibits more noticeable compression and rebound, resulting in a softer, springier feel, while the sound profile also tends to become more muted. If choosing the PC top-case version, I would personally recommend prioritizing the silicone-bean mounting option. Black gasket strips become extremely visible beneath transparent or semi-transparent PC top cases. From either the front or side angle, having a black strip running visibly across the internals feels visually intrusive.
As for color options, I personally recommend the stonewashed pine green finish. The color carries a slight grayness and weathered appearance — unsaturated and understated — which fits the kit’s overall geological and erosion-inspired theme extremely well.

Pricing ranges from 2054 RMB to 2279 RMB. Compared to boards like the Tofu or Agar, it is definitely more expensive, though it also generally delivers what you would expect within this price bracket. Still, compared to something like the Pangea Mini, this one honestly feels like the better value overall.
KINE

In mid-May, LUMINKEY released KINE, a pad-style peripheral product.
“There is still a lack of a pad that can truly break layout limitations and achieve highly flexible configurability. KINE, meaning ‘movement.’ It is not merely a static decoration on the desktop, but a dynamically transformable productivity tool.”
In my personal impression, pads have always been a very “deterministic” product category — fixed layouts, fixed purposes, and even increasingly fixed aesthetics. KINE, however, allows users to actively reshape the pad layout itself, not to make it more complicated, but to better adapt to different desktop needs. Through four FR4 plates of different specifications, along with combinations such as reversible layouts, mirrored layouts, and full-1U configurations, it can switch between as many as seven different layout forms, reducing the likelihood of the pad eventually being left unused and gathering dust.

“On the side, we recreated the classic button styling of the 1979 Sony TC-MR2 micro cassette recorder.”
The appearance of KINE carries a very strong “device-like” quality. Many macro pads or numpads tend to look quite “boxy,” with the visual center focused entirely on the key area itself. KINE instead shifts much of its visual weight toward the functional area on the right side, giving it more of the feeling of a mixing console, industrial controller, or photography monitor.
The key area itself does not use the deep surrounding frame structure commonly seen on traditional pads. Instead, through a shallower bezel and large amounts of negative space, the keycaps almost appear to float above the chassis. Especially when paired with these matte frosted keycaps, the entire product takes on an extremely strong “capsule-like” feeling — somewhat reminiscent of early Braun calculators, transparent consumer electronics, or certain experimental electronic devices.
The horizontal rotary knob is also one of LUMINKEY’s signature design traditions, and on a pad product like this, it genuinely feels even more practical.

Honestly, the most noteworthy thing about this product is probably its 649 RMB price point. Of course, with how aggressively mass-produced keyboards compete nowadays, six or seven hundred RMB is already enough to buy a fairly solid keyboard. But as a fully assembled custom product that also offers a genuinely interesting level of configurability and a strong visual identity, I still think this pricing makes it very worth considering.

Katina TKL

In mid-January, iNN Studio released the Katina TKL, a keyboard kit built around a softer and more decorative design language. Compared to many kits that emphasize aggressive lines, exposed structures, and complex surface cuts, Katina feels far more restrained.
“Elegance, softness, and purity. We imagined Katina TKL as a pure and elegant woman, which not only inspired its external form, but also turned it into a deeper expression of emotion and aesthetics.”

Katina’s bezels are not particularly narrow, and it still retains some of the substantial presence associated with traditional TKL keyboards. Yet the board itself never feels especially bulky. The reason lies in how the side profile is handled: the middle section noticeably tapers inward, creating a kind of “waistline” effect that effectively softens the sense of mass typically associated with larger keyboards. As a result, the overall silhouette, despite being relatively wide, avoids feeling overly rigid.

That said, this approach also comes with its own trade-offs. Because the design relies heavily on curvature transitions rather than strong structural features, the initial visual impact is not especially aggressive. Many keyboards built around sharp cuts and bold edges can establish an immediate visual identity even in thumbnail form, whereas Katina TKL feels more like a product that gradually reveals its design logic through closer observation and repeated attention to detail.
The most recognizable element on the front of the keyboard is the decorative section above the arrow cluster. This area takes inspiration from the architectural concept art of the “Gate of Order.” Instead of simply placing a badge there, the entire region is treated as a unified visual module. To the left of the badge, a three-tier stepped structure is introduced, echoing the progressively inward spatial relationship associated with the “Gate of Order.” The execution is not excessively complicated, but instead uses gradually narrowing layers to guide the eye naturally toward the center.

Personally, I think this treatment works very well. Once many keyboards begin introducing decorative regions, they often fall into the trap of “visual overload” — textures, logos, lighting, and cuts all piled together at once. The result may technically contain many details, but visually it becomes chaotic. Katina TKL remains comparatively restrained. The stepped structure is not made excessively deep, nor does it rely on complicated patterns. Instead, the lines gradually tighten along the curvature beneath the badge before eventually returning to a flat surface.
Another aspect I particularly appreciate is the large amount of negative space preserved on the right side.

This is actually something many designs tend to overlook. Once decorative regions begin accumulating elements, designers often instinctively try to fill every available area. Katina TKL deliberately avoids doing that. A relatively quiet empty zone is intentionally preserved on the right side, preventing the decorative area from losing its sense of breathing room.

From an actual visual standpoint, this kind of “negative space” is arguably even more important than the decoration itself. Since Katina TKL already follows a soft and restrained overall design language, introducing large areas of complex detailing above the function cluster would easily throw the visual balance off. The current arrangement — visually denser toward the left and more relaxed toward the right — ends up feeling much more comfortable.

The central lighting element also uses a fairly clever design. Through the use of a silicone diffuser and an independent daughterboard, the light output becomes much softer and more evenly distributed, resembling a subtle atmospheric light bar. The engraved line beneath it is another particularly interesting detail. This recessed groove is CNC-machined directly into the aluminum top case, functioning as a kind of “guiding line” that visually connects the light bar, badge, and function-row contour together while further reinforcing the integrity of the decorative section as a whole.
The rear uses a dual-arc weight design, emphasizing the relationship between the different curves. To me, the most impressive thing about the backplate is actually its sense of “completeness.” Rather than relying on exaggerated structural cuts, it builds a visual center around the middle area, then creates layering through the relationships between curves and material transitions. In particular, there is clear continuity between the curvature on the back and the shaping of the side profile.

Structurally, Katina TKL adopts an internal mounting system based on iNN’s multi-common-point philosophy. This structure has already been validated on previous products such as the Flo-AT and Veil65, and supports three installation methods overall: PCB gasket, top mount, and O-ring configurations.
As for additional finer details, reviewers who received prototype units will likely cover them more thoroughly. Pricing starts at 2099 RMB, while higher-end configurations begin at 3159 RMB. The standard configuration pricing feels relatively reasonable overall. Personally, my favorite colors are Spinel Purple and Mingshui Duck Green.

Since 2024, iNN Studio has continued releasing new projects consistently. From their earlier, more experimental structural explorations to later attempts across different layouts, they have continuously tested the boundaries of the same underlying design philosophy across multiple product forms. Hopefully, they continue getting even better moving forward.
Neson NoryTek-70%

In mid-November 2025, Neson Design published the GB post for the NoryTek-70%, a keyboard kit themed around retro aesthetics and modern technology. Compared to the more experimental structural expressions seen in earlier projects from this series, NoryTek feels, to me, like a further exploration centered around the fusion of “order” and “information-driven interfaces.”
From the front, NoryTek still retains the series’ signature recessed spacebar area, while the entire right-side function cluster is lowered downward as a whole, creating a distinct stepped height difference between the arrow keys and navigation cluster. Above that, an integrated module area is raised upward in reverse. According to the official description, this section is not a simple assembled component, but rather a single-piece machined structure directly integrated into the top case itself.

Visually, the impact of this treatment is quite obvious: the front is no longer a single flat plane, but instead broken into multiple “height layers.” These layers are not merely decorative divisions, but structural elements actively participating in the visual language itself. At the same time, however, this multilayered structure also introduces a certain issue — as information density increases, the visual transitions between functional areas become more fragmented, especially under darker colorways or low ambient lighting conditions, where the layering itself begins to blur.

In terms of spatial organization, a diagonal cut is introduced between the spacebar area and the arrow cluster. Its purpose is to break the stability of the horizontal structure, preventing the lower half from becoming overly regularized. However, this cut itself carries no direct functional or interactive purpose, instead acting more as a visual rhythm adjustment element. Boards like the Luminkey75 have explored similar treatments before.
The primary visual focus on the front, however, is concentrated around the badge area. This section can arguably be considered the most recognizable part of the entire kit’s design language — a complete hybrid of interaction and decoration.

The region is divided into two sections: on the left sits a dot-matrix-style light bar module composed of multiple small square elements, intended for status feedback or ambient lighting effects; on the right is a 160×40 pixel display used for UI elements, animations, or user-customized content. The relationship between the two is not simply parallel, but intentionally designed as a contrast between “information hierarchies”: one side leans toward static decoration, while the other focuses on dynamic information output.
The light bar provides low-density background feedback, while the display handles high-density content presentation, with structural boundaries separating the two. But the issue becomes equally apparent — when the lighting effects, screen content, and surrounding textures are all active simultaneously, this region reaches a significantly higher information density than the rest of the keyboard. In static display scenarios, this can easily create an overly concentrated visual focal point.

The side profile continues using the fairly common HHKB Line treatment, relying on a clean straight contour to control the overall proportions, while localized color separation further reinforces the sense of layering. The rear design leans more heavily into a designer-toy aesthetic, continuing the use of mixed materials: sandblasted electroplated stainless steel weights above and below, with a central sandblasted electroplated stainless steel “NoryTek” typography weight in the middle. Structurally, it uses a Leaf Spring Gasket mounting solution — relatively conventional overall.
In terms of pricing, the aluminum standard version starts at 3100 RMB, while the PC version comes in at 3200 RMB. Personally, I think the pricing overall feels somewhat expensive. That said, if you particularly enjoy the combination of recessed spacebar layouts, retro aesthetics, and modern technological themes, it may still be worth considering.

As for colors, I would more strongly recommend silver, retro green, and P2K. These colorways are better suited to carrying the layered front-facing structure and material contrasts of the design, while also more clearly presenting the hierarchical relationships between the different information modules. Darker colorways, on the other hand, tend to compress the visual layering of this design. Especially with both the front functional modules and the diagonal cut line existing simultaneously, darker finishes can make the segmented relationships feel less distinct, compressing the entire composition into a flatter visual plane and ultimately weakening the structural expression that defines the keyboard in the first place.