
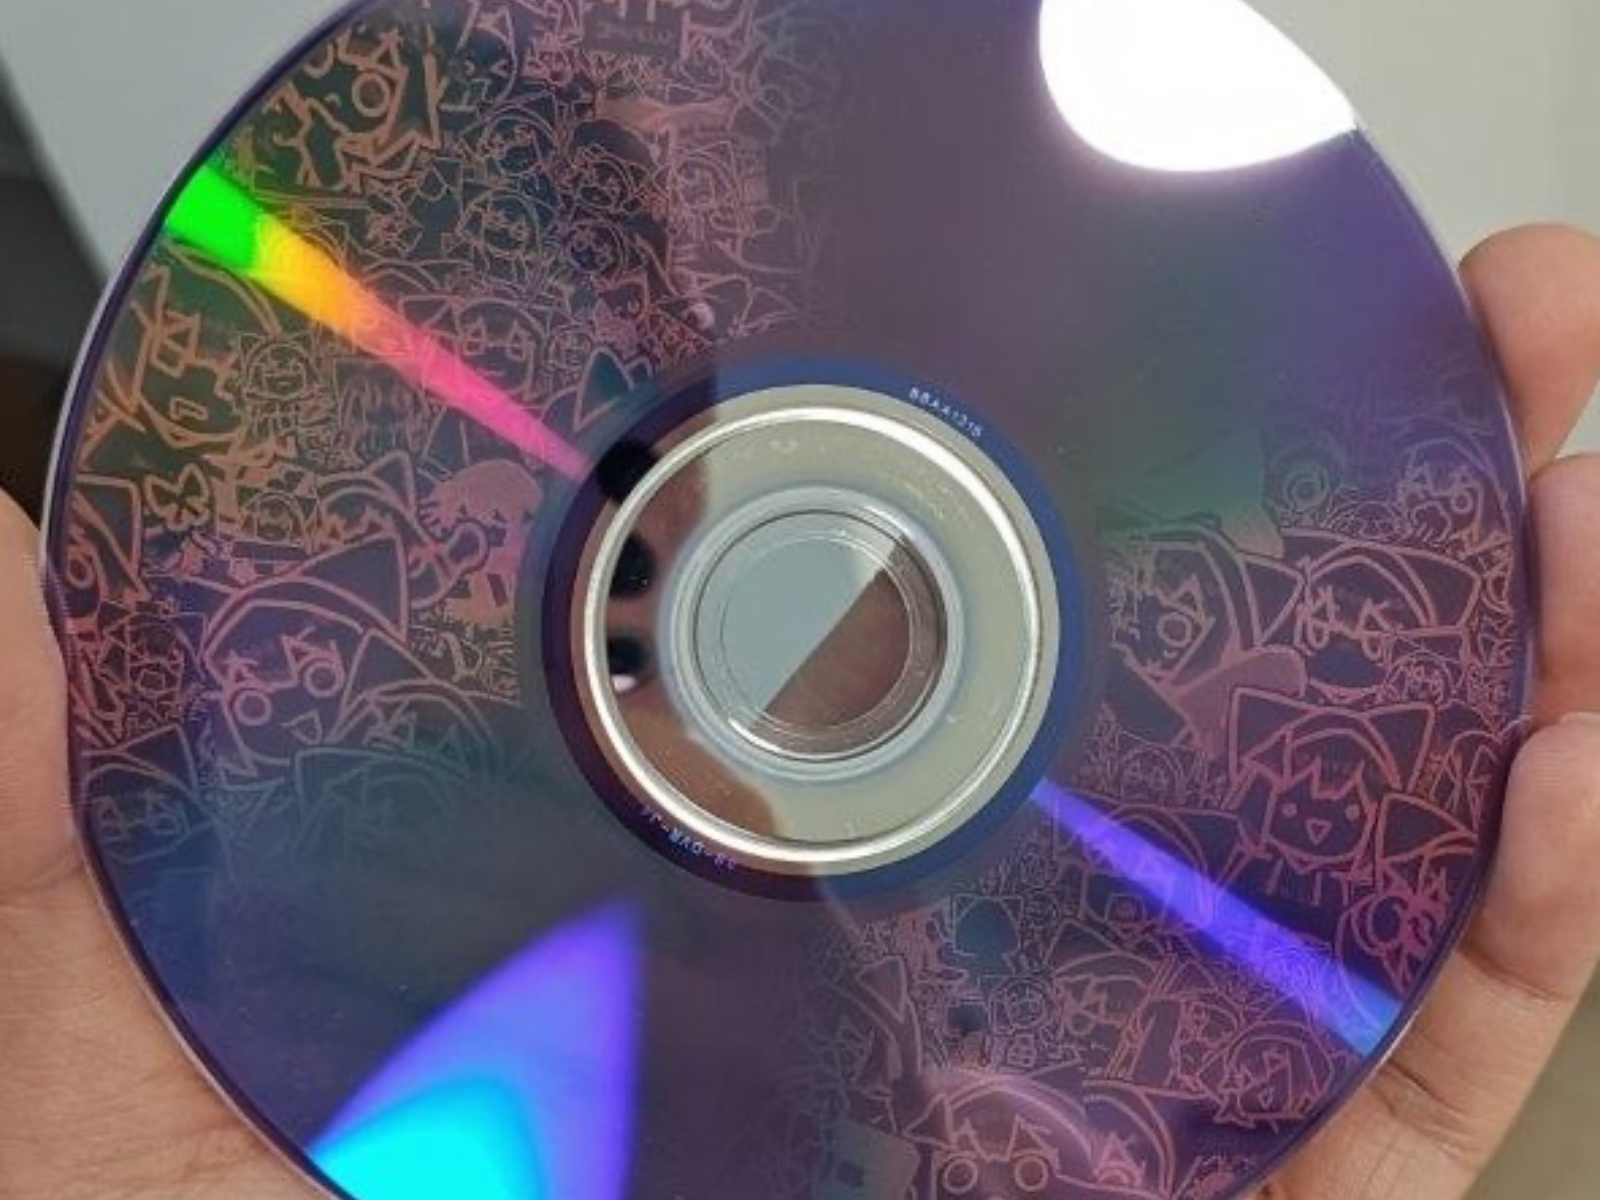
Disc Image Studio turns ordinary blank CDs, DVDs, and single-layer Blu-ray discs into a canvas. This hands-on guide explains how it works and how to calibrate your discs so the artwork comes out as intended.
***
Editor’s note: A version of this article by Catho168 appears on November 2, 2026 on SSPAI with the title “Disc Image Studio:你想不想在光盘上「画」点什么?”. Translated and published by agreement.
A little while ago, I came across a fascinating project on GitHub: it lets you use any disc burner and any disc to burn artwork into the data area that you can see with the naked eye.

If you’ve been around optical discs long enough, you’ll probably remember that “drawing” on them is hardly a new idea:
- Yamaha’s DiscT@2 technology, introduced in 2002, could burn images onto the data side of a CD-R, but required a special burner.
- HP’s LightScribe, introduced in 2004, and Yamaha and Fujifilm’s Labelflash, introduced in 2005, could burn images onto the label side. The results looked pretty good, to be fair. But you needed both a compatible burner and specially coated discs, which were eye-wateringly expensive. You also had to flip the disc over and burn it a second time, adding a lot of waiting around.
All three technologies fizzled out. Their dedicated discs and drives were gradually discontinued, and the surviving hardware is pretty expensive these days.
Disc Image Studio, though, is an incredibly cool open-source project. All you need is an ordinary burner and an ordinary blank CD, DVD, or single-layer BD-R. It uses algorithms to turn an image into data, then writes that data to the disc’s data area. Hold the data side under a desk lamp, and there’s your picture.
Now that’s art. Naturally, I had to write a guide to making one yourself.
How it works
Before we get into burning and calibration, here’s a quick explanation of the underlying idea.
When a drive burns data onto a disc, its laser leaves tiny pits or spots where the recording material changes color. These marks reflect light differently from the surrounding surface, and the drive reads those changes as digital data: 0s and 1s. On a larger scale, those differences in reflectivity can also form a visible image. That’s the principle behind drawing in the data area.
During burning, the optical head follows a spiral track from the center outward. On a DVD, for example, the data area extends from an inner radius of 24 mm to an outer radius of 58 mm.
The drive divides data into sectors of a fixed length. In this DVD example, each sector occupies about 5.16 mm of track, and there are 2,297,888 sectors across the disc, so the total track length is fixed too. The inner and outer radii, together with the track pitch—the distance between adjacent turns—determine where each sector falls on the disc in terms of radius and angle. This gives us a sector-to-position lookup table.
Following the process illustrated below, Disc Image Studio generates data that will form the picture when burned.

In other words, the image is “printed one turn at a time,” sampled and laid out along the spiral. As long as the inner and outer radii in the lookup table match the disc’s actual dimensions, every pixel will land where it belongs.
That turns out to be the hard part. Optical discs have international dimensional standards, but they weren’t designed as drawing surfaces. The actual inner and outer radii and sector counts vary slightly between manufacturers and disc models!

What happens when the parameters are off?
The main purpose of this guide is to show you how to work out and calibrate the actual physical parameters of a particular disc model. First, let’s see what happens when those parameters are wrong.
The lookup table is calculated using the radii the software assumes. If the disc’s actual inner or outer radius is even slightly different, a given sector will land at a slightly different angle from the one expected. That error accumulates: the farther out you go, the farther off the image gets.
Take the test pattern above. Its data was generated with an inner radius of 24 mm and an outer radius of 58 mm. Now let’s simulate burning it onto discs whose actual inner radii are 24.002 mm and 24.05 mm, respectively:


Using the geometry of a DVD’s spiral track, an inner-radius discrepancy of 0.002 mm produces an accumulated angular error of about 1.1 turns at the outer edge. At 0.05 mm, it’s about 28 turns.
With that out of the way, let’s get to the actual printing lesson.
The easiest way
To be honest, if you’re new to this, your first calibration can take days and cost you 10–30 blank discs.
If you just want to make a few for fun or give them to friends, the simplest option is to buy a disc model the developer has already calibrated. The app includes several presets tested on real discs; just choose one when creating a project:
- DVD: Verbatim DVD-R AZO (43533)
- CD: Ritek Medical Aqua CD-Rs; Verbatim CD-R AZO (43438)
- Blu-ray: Ritek BD-R 10x; Verbatim BD-R (64099)

Pay close attention to the model and product number when buying discs! Different models—and even different batches—from the same brand may need different parameters. Even if you’re sure you bought the right ones, I’d still recommend burning a test pattern first.
Manual calibration: coarse adjustment
Determined to calibrate the discs you already have? Let’s get started.
Make and burn your first test pattern
This pattern is just for inspection. It doesn’t need to look good; it needs to be easy to recognize.
- Keep it near the outer edge. Errors accumulate from the inner turns outward and are largest at the edge, so this makes them easier to spot.
- Give the lines some radial length. Each black line should extend inward from near the outer edge far enough for you to see how much it bends.
- Spread the lines around part of the circumference. Arranging several lines along the outer edge makes it easier to tell whether the resulting spiral twists clockwise or counterclockwise—and which way you should adjust the parameters.
- Use clear black-and-white edges and consistent spacing. Make the pattern easy to read.
I recommend using the pattern from the earlier examples: a series of short black bars extending inward from near the edge. Import it into your project and burn a disc using the current parameters.
Choose a fixed burning speed, such as Automatic (lowest speed, recommended)—“自动(最低速率,推荐)” in the Chinese interface—and try to stick with it for every subsequent burn. Speed shouldn’t affect the result in theory, but there’s no reason to introduce another variable.
Inspect the disc
A desk lamp makes this easiest.
- You can’t make out anything: the parameters are way off. Try adding or subtracting 0.5 from the current radius setting and see if you get lucky. In theory, though, you shouldn’t run into this situation.
- You can see a very tight spiral, like the 0.05 mm example above: keep reading.
- The pattern is recognizable and only slightly curved, like the 0.002 mm example: skip ahead to “Assisted calibration: fine adjustment.”
If you’re way off, find the right direction first
When the spiral is so tight that the pattern disappears, it can feel pretty hopeless. At this point, you have just one goal: loosen that spiral.
- In the project settings, change the inner radius by a noticeable amount in either direction—say, 0.1 or 0.05 mm. Save, regenerate the disc image, and burn another disc.
- If the spiral is a little looser and the pattern starts to emerge, you’re going in the right direction.
- If it gets tighter, reverse direction.
Once you’ve found the right direction, keep reducing the size of your adjustments, roughly halving them each time: 0.025 → 0.01 → 0.005 → 0.002 → 0.001. Three or four decimal places should be enough before you move on to fine adjustment.
It’s basically a binary search!
Change only one parameter throughout this process. We’ll leave the finer calibration for the next section. Personally, I only adjust the inner radius.
A couple of lessons learned the hard way:
- Save after changing the parameters, or you’ll burn the next disc with the old settings.
- Photograph each result and record the parameters used. By disc seven or eight, you’ll have no idea which is which otherwise.
Once the spiral is loose enough that you can make out roughly eight or nine turns, you can move on.
Fit the preview to the spiral on your disc
Open Preview (“预览”) on the left. Make sure Design projection (“设计投影”) is selected at the top; this uses the composite image from the Design page. Then expand Advanced preview settings, labeled “实测参数与预览精度(高级)” in the screenshot’s Chinese interface.

The Inner radius and Outer radius fields here are for your estimate of the disc’s actual dimensions. The preview on the right reprojects the design using those values, showing what the burn would look like if your estimate were correct.
What we’re doing now is working backward: keep changing the radii until the originally straight-edged shapes in the preview match the direction, shape, and spacing of the spirals on the actual disc. You can ignore the DVD’s cubic track-pitch parameters for now; we’ll get to those in the assisted-calibration section.
Once you’re close, keep making progressively smaller adjustments until the preview and the physical result match as closely as possible.
Copy those numbers into the project
As with saving, this is an easy step to forget. The measured parameters in Preview affect only the preview, not the burn. Burning always uses the project’s own parameters.
Once you have a match:
- In Preview, click Geometry → Edit…—shown as “当前工程参数 → 编辑…” in the Chinese interface.
- Change the radii to the values you just matched.
- Press
Ctrl-Sto save the project, then regenerate the disc image or burn another disc.
The spiral on this disc should be noticeably looser.
Set your expectations
It’s normal to go through more than 20 discs on your first attempt. Once you understand how the preview relates to the physical result, you can usually get there in 5–10 discs.

Assisted calibration: fine adjustment
Once the image is visible but still slightly warped, judging further adjustments by eye gets difficult. This is where the app’s assisted calibration comes in. Take a photo, and it can do the rest with some clever math.

The process has three steps, already laid out in the app as shown above. In the English interface, this workspace is called Calibration (“辅助标定” in the screenshots).
Step 1: Generate a calibration disc
Click Create target from parameters (“从当前参数新建标靶”). This creates a pattern of nine concentric circles and crosshairs. Burn it onto a disc.

Step 2: Correct perspective and lens distortion
Take a photo of the disc under a desk lamp.
- Click Import disc photo (“导入盘片照片”) and select the disc type.
- Drag the two sets of control points onto the disc’s physical outer edge and physical inner edge—the actual boundaries you can touch.

- Click Calculate rectification (“计算矫正”). The app calculates a correction for perspective and lens distortion.

- If everything looks right, click Confirm and trace curves (“确认矫正,开始描线”).
Step 3: Trace a curve and solve for the parameters
- Follow one clearly visible radial line, placing evenly spaced points from the inside outward. I recommend at least 16 points.
- Click Solve parameters (“反推参数”). The app will produce several candidates.
- Select a candidate and inspect the orange prediction line overlaid on the photo. It should closely follow the entire line you traced. Pay particular attention to whether it makes an extra turn between any two points.

- Check I checked the full curve; its shape and turns match (“已对照整条曲线,形状与绕圈一致”), then click Apply calibration (“应用标定参数”).
The new parameters are automatically applied to the project. A Parameters updated (“参数已更新”) message appears in the project header at the top left, complete with a cool little visual effect. Remember to save the project, then repeat the three steps above. Another iteration or two should do it.

Frequently asked questions
Q1: Assisted calibration gives me concentric circles, but I can’t see any of the crosshair lines.
The parameters are still too far off, and the crosshair lines have been warped beyond recognition. Go back to manual calibration and make some coarse adjustments.
Q2: Every disc I burn looks exactly the same.
You probably haven’t saved the changes, or you’re still burning an old disc image. Check the project parameters, the export timestamp, and the file path.
Q3: Can I burn the files with ImgBurn, cdrecord, or similar software?
Yes. The exported ISO, WAV+CUE, and RAW files use standard formats. Some burning programs handle them differently, which may produce ghosting in the artwork, but the calibration parameters are still valid. Your best bet is to use the app’s built-in live burning.
Q4: What does “dithering strength” mean?
It’s a setting in the Tone (“影调”) panel on the right of the Design page, labeled Dithering in English and “抖动强度” in the screenshots. Think of it as controlling the distribution of black and white dots, with an effect a little like contrast.
Q5: Does it matter whether I use DVD-R or DVD+R?
Not for the calibration process. The built-in Verbatim 43533 preset is for DVD-R.
Q6: Do I need a particular disc drive?
No. Any drive that can burn discs will work. Calibration depends on the disc, not the drive model.
Q7: Can I use 8 cm mini discs?
Yes. Just remember to choose Mini disc · 8 cm (“小光盘 · 8 cm”) during assisted calibration.
Q8: Live burning failed. What should I do?
If you’ve already waited a long time, the data has been written, and the error occurs only during the final buffer flush, you can ignore it: that’s a known bug. If it fails right at the start, check the drive connection, make sure the disc is blank, and so on.
One last thing
Calibration takes a huge amount of time and effort. If you get a disc model calibrated successfully, please share those hard-won parameters in a GitHub issue.
Some of the artwork burned onto the discs in this article comes from illustrations found online. If any of it infringes your rights, please get in touch so I can make the necessary changes.
Looks good, meow!

Further reading:
- Burn Your Favorite Picture onto a CD: Exploring Optical-Drive Drawing: a post on the original developer’s blog for anyone who wants to dig into the mathematics. The post is in Chinese.
Share: