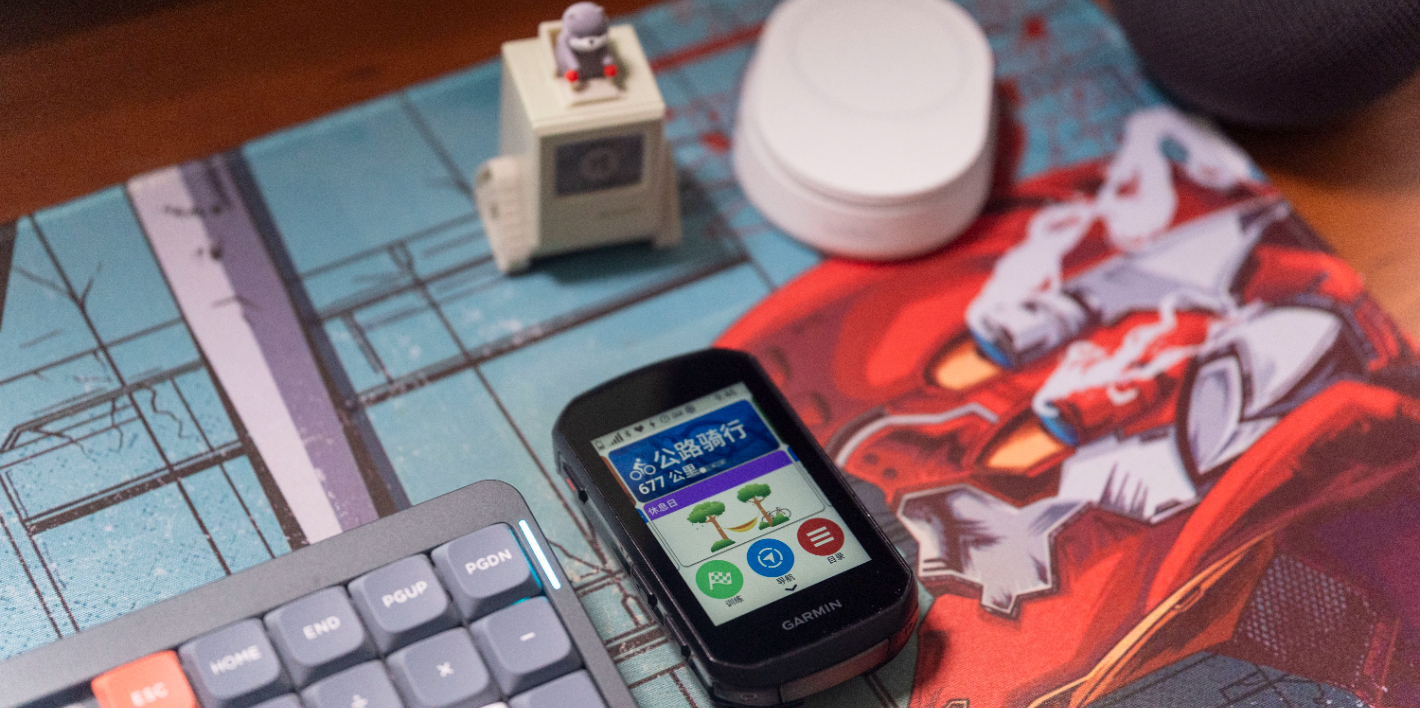
Over the past ten months of 2025, I’ve read quite a few books about habit formation. And based on my own “completely unwilling to force myself” personality — plus the fact that I’ve tried every habit-tracking app and none of them worked — I’ve gained some personal insights.
Warning: If you’re someone with extremely strong discipline and execution, please… walk away!
But if you’re like me — someone with almost no willpower, full of things you want to do yet never manage to start — then I hope this article offers you even a little help.
My Habit-Building ABC
A: Define the Time and Space Context
I’ve noticed that people always think of downloading a habit-tracking app when they want to build a habit. But for people with no self-discipline — like me — it does absolutely nothing. Sometimes when I’m in a good mood, I’ll download an app, set some habit goals, use it for two or three days… and by next week, I’ve already forgotten which app I used the week before.
Last month I reread Atomic Habits and realized I had always ignored one of its core ideas: the influence of environment on behavior. Trying to control yourself through “mindset” or “willpower” is weak, whereas environment shapes and changes behavior in ways no abstract mental method can compare to. Yet many people subconsciously believe that “difficult environments” are the secret to success. You often hear things like: “People with good calligraphy can write beautifully even with a tree branch.” “People who love reading can read anywhere, even in a crowded street.” Sure, that may be true — but concluding that you must use a tree branch to practice or go to a noisy market to read is reversing cause and effect.
I’m someone who really struggles to focus on reading. Whenever I tried reading in my messy rental apartment, I found myself constantly switching between feeling uneasy and dozing off.But earlier this year, by pure accident — I was trapped in a downtown bookstore by a heavy rainstorm. Hungry and with nowhere to go, I wandered upstairs looking for a café and stumbled onto the most relaxing coffee shop I had ever encountered.
The café was filled with people reading or working on laptops, all deeply focused. Outside was the sound of rain, mixed with soft conversations, the metallic clink of the barista’s tools, and gentle jazz music. I don’t know whether it was the collective atmosphere of productivity, or a perfectly balanced white-noise environment, or simply the fact that reading books in a bookstore feels “free”…
But in just a few short hours that afternoon, I finished two books. It hit me: I wasn’t incapable of reading — I simply hadn’t found the environment that puts me in the right state. From then on, my calendar changed from “Read for 3 hours on Saturday afternoon” to “Saturday 2–5 PM, go to the bookstore.” The former usually ended with me falling asleep at home; the latter at least guaranteed I’d read a good number of pages — or at minimum, pretend to and scribble some notes. Since then, every weekend I go to the bookstore rather than force myself to read at home.
So: Find a setting, location, and ritual that makes the activity feel enjoyable, comforting, and easy to enter. Once this context becomes part of your daily life, arriving at that time and place will naturally trigger the behavior — no extra mental effort needed. Just like how waking up and walking to the bathroom to wash up is now an automatic habit: time, space, and action are perfectly aligned.
But of course, some things can’t be changed easily. For example, I don’t like washing dishes, and I don’t have a dishwasher. I still have to force myself to wash them. In this case, you can shift the perspective: Play music or a podcast you like. Put on rubber gloves. Wear a specific pair of shoes. Even dress like you’re doing a “shift” as a cleaner in someone else’s house. It sounds silly, but clothing and sound naturally trigger a role-switch in your mind. I still don’t like washing dishes, but I’ve become more comfortable in the “dishwashing worker” role — and removing the gloves gives me that tiny feeling of liberation. This aligns with what many habit books describe as rituals or cues.
In short: think carefully about the time, place, context, and emotional state surrounding the task. Make yourself look forward to it, or at least not dread it.You can do this by: Changing the physical location — like reading and watching shows in different rooms. Creating a personal reading nook with a specific chair, pillow, lamp, or mug. Making a special housework playlist
In reality, this process isn’t easy. It requires continuous adjustments based on your lifestyle. It’s extremely personal.And yes — if you can afford it, I genuinely encourage “pay-to-win” solutions: buying comfortable equipment, tools, or setup upgrades. No habit is formed overnight. It’s a shame to blame yourself for “lack of willpower” when it’s really an environment problem.
Many of us grew up hearing: “Do you really need all that?” “Typical underachiever — always wants fancy stationery.” These beliefs unconsciously push us toward the “hard, spartan” path. If you are exceptionally strong-willed, maybe you’ll persevere. But most people will eventually burn out and give up one day. (And frankly, if you eventually buy a mechanical keyboard, you’ll probably regret not enjoying it earlier!)
B: Build Positive Feedback
Building positive feedback is a cliché topic, yet an unavoidable one. In fact, some of the elements mentioned in the previous section about environment already serve as forms of positive feedback—helping you feel good about yourself. But here, I want to talk about the positive feedback generated specifically from the habit itself (rather than the environment in which you perform it).
First of all, never underestimate the power of recording. Our brains reset every day. The good part is that we forget troubles easily; the bad part is that we also effortlessly overlook what we’ve already accomplished. Only by reviewing and comparing over time can we truly see change. Many fitness enthusiasts take mirror selfies to track progress—this is a perfect example of gaining positive feedback through accumulation and self-recognition.
Here are a few methods I personally use to gain positive feedback:
I treat flomo like my private Twitter, sending myself weekly summaries. The benefit of flomo is that you can attach photos and screenshots, which makes everything feel more rewarding when you look back.
I pinned a full-year table to my Obsidian homepage. Every time I open it, I can immediately record what I did today. Looking back over the entire year gives me strong feedback—“It’s okay I didn’t do much this month… at least last month I wrote something… it’s not too late to keep going… there are only two months left in this year anyway.”
Of course, checking all sorts of habit-tracking apps for their statistical reports. And remember, whenever you review your own logs, you must shamelessly say things like: “I only managed 2 days out of 7 but I’m amazing,” or “I am destined to become a master of XXX!” (Even if XXX means becoming a dishwashing master!)
Habit-tracking apps can provide positive feedback, but some habits—such as learning a language—are stubborn exceptions. Even Duolingo, with its relentless attempts to tempt me into tapping that check-in button, cannot move me on days when I want to do absolutely nothing. Why? Because I can’t see my progress. The truth is, some habits, like reading or running, naturally produce dopamine-driven positive feedback or are easily measured. But others—like learning a language, mastering an instrument, studying photography—don’t show quick results or can’t be easily quantified. That makes self-recognition much harder. In these cases, external positive feedback becomes essential.
Ever since graduating university, whenever I wanted to learn a language or a new skill, two voices in my head always argued: One said, “If you want to learn properly, find a teacher.” The other said, “There are tons of free resources online. Just self-study and save the money.” Two months ago, I accidentally attended a trial Japanese class. The unexpected emotional support the teacher offered made me feel like I needed to sign up. Some people might say, “That’s just a tactic to get your money.” But I knew clearly: With my willpower and current mental state, even if I waited until 2030, I still wouldn’t self-study Japanese properly. So hiring a teacher isn’t about gaining access to knowledge unavailable online. It’s about receiving motivation and positive feedback through interaction—turning something you kept postponing into something you genuinely enjoy. That’s also why many people prefer joining classes or hiring personal trainers rather than going to the gym alone.
Of course, positive feedback doesn’t have to come from teachers or professional coaches. Sharing with friends or telling GPT your progress can work too.
Though I must admit—based on my experience—the encouragement from friends and AI is helpful but somewhat limited. Even when they do their best to cheer me on, the feedback often feels more like emotional support than true recognition. You might still wonder: “This doesn’t feel like an objective acknowledgment of the quality of my effort.”“They’re just trying to make me feel good.”
This is why publishing your work online can be a very effective option. It pushes you to turn your habit and your accumulation into something you can share—like going from reading to writing, or from cooking to posting recipes. After I published my first article on SSPAI earlier this year, I received positive feedback from many strangers. It was magical. And it gave me the motivation to continue writing and reading—because recognition from strangers can sometimes be far more powerful than feedback from family or friends. Perhaps this is the internet in its purest form.
C: “Other Options?” “How would you know if you don’t try?”
Finally, here’s a point that slightly diverges from the mechanics of habit-building but is incredibly important: rather than obsessing over persistence itself, it’s far more valuable to understand what you actually want to gain from a habit—and then find the habit that suits you personally.
What works for others doesn’t necessarily work for you. For example, the stereotype of a disciplined person often includes getting up early to run a few kilometers. But if your goal is simply to increase physical activity, then going for a swim after work might be just as good—no need to force yourself to wake up early. Likewise, badminton, volleyball, soccer, basketball—even frisbee—are often more fun and easier to stick with than running (thanks to social interaction and the element of play). The problem is that many people hesitate because these feel “troublesome. ”This is exactly when you need to give yourself a little kick. You’ll usually discover that once you find the right direction, habit-building becomes a “downhill slope that only gets faster and easier as you roll” (see Figure 1).
Figure 1: Once you overcome static friction, building habits becomes a downhill slope that accelerates over time.
Here’s an example of how I accidentally broke through my own “static friction”: A while back, the subway in my city shut down for a week, and I was forced to switch to biking five kilometers to work every day. At first, five kilometers sounded astronomical to me. But I soon realized I could actually do it—and that I arrived at work feeling more refreshed than after sitting half-asleep inside a stuffy subway car. So biking to work became a long-term habit. In other words, the only thing separating you from a good habit might simply be the first trigger. When you’re hesitant and unsure whether to try something, give yourself that push. After all, even if you try and don’t stick with it, nothing terrible happens. For example, if you decide to try running 5 km and end up miserable afterward (or don’t finish at all), swearing you’ll never run again—well, then don’t run. It’s not like you lose your legs for trying.
Now let’s combine C with the earlier A and B, and revisit the example of reading:
If your true purpose behind “I want to read more” is simply to gain new knowledge or information, then aside from reading books, you also have podcasts, audiobooks, videos, and blog articles (from places like SSPAI, of course). And reading itself can be enhanced through:
A: Designing contexts and environments—new places, different atmospheres
So reading no longer has to mean sitting at home flipping pages in boredom. It can become a combination of many different options, even mutually reinforcing (see Figure 2).
Figure 2: Well, at the very least, you’re already browsing SSPAI!
Thus, persistence is not the goal. The key is to identify why you can’t persist, find alternatives, design a better context, or increase positive feedback. Maybe this weekend, impulsively signing up for a new activity or exploring a place you’ve never been will become the beginning of your next new habit.
Summary: Everything Comes Down to Overcoming Static Friction
Good habits are valuable, of course—but it’s even more precious to build an entire lifestyle system that feels healthy, comfortable, and truly your own.
The “static friction” required to start something is often immense. It may stem from fear shaped by stereotypes about certain tasks, neglect of the environment and the experience itself, a lack of positive feedback, or even anxiety about receiving negative feedback. To overcome this friction at the starting line, you need to choose habits that feel less painful to begin with, shape a supportive environment, gently “coax and trick” yourself as needed, and actively seek any form of positive reinforcement. Gradually, this new habit becomes an organic part of your lifestyle system.
If you, too, happen to be a procrastinator with limited willpower but a strong interest in time management, you might want to revisit my previous article on time-management methodology—it serves as an extension to this piece.
Finally, I hope everyone can create a small opportunity for themselves to keep doing the things they truly want to do.
The colder it gets, the more room there is to play with outfits. In autumn and winter, whether it’s inner layers or outerwear, there are countless categories to choose from — naturally opening up endless styling possibilities. Beyond the usual “base layer + jacket” formula, the colder seasons also allow for layering, which helps emphasize depth and create different dressing moods. Now that autumn and winter have arrived again, the final installment of this series is here as promised.
When it comes to style, I believe everyone has their own unique taste and aesthetic. The outfits I share might not suit your body shape or vibe; you might even feel completely indifferent to them — and that’s perfectly normal. But what I genuinely hope is that my sharing doesn’t become a “standard answer,” but rather a spark that inspires you. If I can offer you some ideas about color, coordination, or key pieces that help you better understand and shape your own style, that would be the most meaningful thing to me.
Principles of Fall/Winter Outfits
The most obvious difference between late-autumn/winter clothing and other seasons is thickness. Generally, people choose shirts, knitwear, and hoodies as inner layers, while outerwear includes heavy jackets, coats, padded jackets, and down jackets. The most common—and also the most basic—way to dress is “inner layer + outerwear + pants.” A slightly more challenging approach is layering multiple inner layers or multiple outer layers paired with one pair of pants, which is the layered-wearing method.
Basic Styling Methods
When it comes to the basic “inner layer + jacket + pants” outfit, there’s a popular saying on Xiaohongshu: “If the top is simple, the bottom shouldn’t be simple,” and sometimes the saying is reversed. The idea is that only one part of the outfit should be “not simple.” Personally, I’m skeptical about this rule. It’s not wrong—actually, it’s a perfectly safe styling consideration. But in reality, the opposite combinations—whether both top and bottom are simple or both are not—can also look great, as long as they’re well-coordinated. It’s just that having one simple piece makes things easier. Next, I’ll break down the everyday basic styling principles by level of difficulty.
Easiest: One Simple, Two Not-Simple
Fashion is subjective, so defining “simple” is tricky. Let’s assume solid-colored, pattern-free items are simple pieces, and everything else is not-simple.
The easiest method: A solid-color simple inner layer + solid-color pants, paired with a not-simple jacket.
One level up: A not-simple inner layer + solid-color pants, paired with a simple jacket.
Two levels up: Not-simple pants paired with a simple inner layer and simple jacket.
In short, under this styling logic: if you don’t want to go wrong, choose a simple inner layer; if you want the best result within the “rules,” choose not-simple pants.
Moderately Difficult: All Simple
Learning outfits from Uniqlo’s lookbooks is a good idea, since the outfits are mostly solid-colored basics and look very easy to coordinate. But I think this varies from person to person. A fully simple outfit may seem effortless to style, but it also means the clothes offer almost no additional shaping or visual support to your body. It places higher demands on your body shape, looks, and even skin tone. Take me for example—I’ve encouraged myself countless times to buy a “minimalist” outfit from Uniqlo or MUJI, but I’m always discouraged before leaving the fitting room.
So my suggestion is: light-colored “all simple” outfits are often easier to pull off than dark-colored ones. If you want to try a full minimalist look, start with an all-light set and add one dark jacket.
Very Difficult: All Not-Simple
No doubt, an outfit where every single item is not-simple is the hardest combination of all. Unusual colors, bold patterns, and standout materials—all are challenging to pair. So here are two suggestions:
When you want to go in this direction, follow the style of an idol you like and try to recreate their outfits.
A more practical suggestion: prioritize bold patterns or cuts instead of bold colors.
Highly unconventional colors are demanding on both face shape and skin tone, while bold patterns or silhouettes are relatively easier to manage. In the worst case, you’ll just look like a stylish street kid—and honestly, that’s not necessarily a bad thing.
Layering Layering is challenging because it really tests your ability to control a sense of depth in an outfit. Even something as simple as a shirt layered under a crewneck sweatshirt can create very different vibes depending on how much of the collar is exposed. The countries best at layering are probably the UK and Japan, so if you’re really into this style, you can check out magazines from those two places.
Japanese outfits often love layering pieces, and autumn and winter are exactly the seasons where layering shines the most. For everyday wear, it’s especially important to pay attention to how you manage the sense of depth. I recommend a basic layering rule: treat the collar area as the core element that highlights layering, combining wide collars, collarless pieces, and lapelled jackets. Once you’re comfortable with this style, you can experiment with more advanced techniques, including layering with differences in length or with contrasting colors.
But remember, don’t fully cover the layer underneath, or it’ll look abrupt and stiff. Whether it’s the color, material, or something else from the next layer, as long as something is visible, it works. Ultimately, no matter how you layer, the goal is to see different levels on your body—and material and color are the easiest ways to showcase that. In daily life, it’s all about trying things out. The more you experiment, the easier it becomes to discover your own layering style.
Materials Suitable for Autumn and Winter Clothing
Autumn and winter garments tend to be thicker, which makes the differences in material texture much more noticeable. In this part, I’ll focus on materials and recommend different types of clothing so you have more options when shopping.
Cashmere/Wool Cashmere and wool are very familiar to most people and are among the most popular materials in autumn and winter, especially for sweaters and pants. Cashmere sweaters are lightweight, warm, elastic, and resistant to wrinkles. Other than being a bit troublesome to wash, they basically have no downsides. Unlike previous years, many fashion and casual brands are now offering more wool items, including shirts, sweaters, and trousers, which meet the needs of everyday casual dressing.
Wool casual trousers and dress pants are particularly worth mentioning. They’re durable, stretchy, and usually have very straight silhouettes that nicely flatter the legs. When properly cared for, they don’t deform easily, making them great winter staples. Many fashion influencers recommend pairing wool dress trousers with an overcoat, showing just how popular this category has become in recent years.
Additionally, cashmere and wool are extremely versatile in autumn and winter and pair well with almost anything. Using wool sweaters or cashmere trousers as part of your outfit helps elevate the overall texture and sense of style.
Corduroy Corduroy is actually a composite fabric, usually woven from materials such as cotton, polyester, or wool. Its surface features dense, soft ridges with a certain thickness, making it particularly suitable for fall and winter. Compared to regular cotton fabrics, corduroy adds more visual texture, which works especially well for minimalist outfits.
Common corduroy pieces include shirts and pants. Shirts typically have a structured silhouette, making them suitable for wearing alone or layered over a knit sweater. Pants on the market seem to come most frequently in khaki tones and work well for a preppy style. Overall, corduroy—with its unique texture and aesthetic appeal—is both practical and stylish for fall and winter looks. Whether you prefer a casual vibe or a retro mood, corduroy performs exceptionally well and can easily create warm yet distinctive seasonal outfits when styled thoughtfully.
niko and Corduroy Shirt / NORYBRAND Corduroy Pants
Leather Leather garments are a key part of fall and winter wardrobes thanks to their warmth, durability, and unmistakable texture. The leather used in jackets and pants that most people purchase tends to fall into three categories: cowhide, sheepskin, and synthetic leather. Each type differs in characteristics and price. From the perspective of individual pieces, the easiest to style is the leather jacket (including blousons and outerwear), followed by leather boots, and lastly leather pants, which are usually the hardest to pull off.
Leather jackets commonly use cowhide or sheepskin. Both are highly durable and elastic, making them great for outerwear. Cowhide tends to be thicker and tougher, offering excellent longevity and the ability to “break in” over time. It has great wind resistance and a structured appearance, and while its price is high, the cost performance is also excellent. Sheepskin, on the other hand, is typically softer and more delicate, making it suitable for jackets with a more body-hugging silhouette. It has become increasingly popular in fashion design in recent years—especially among many Japanese streetwear brands, where sheepskin is being used noticeably more frequently than before.
Synthetic leather differs from the two natural types. It’s usually made from plastics such as PVC (polyvinyl chloride) or PU (polyurethane), sometimes combined with other materials. It offers better waterproof performance and allows much easier color and texture control, enabling a wide range of styles and visual effects. Unlike natural leather, which tends to come in a limited color palette, synthetic leather can be produced in a rich variety of hues and patterns to meet different styling needs.
Kevinqi Cowhide Jacket
Duck Down / Goose Down Duck down and goose down are common insulating materials for fall and winter. Both offer excellent warmth, but they differ in several details—the most obvious one being price. Goose down is warmer than duck down, so it’s naturally more expensive. For example, goose-down jackets from Li-Ning often cost upward of 3,000 RMB per piece; even during discount seasons, they usually remain around 2,000 RMB. The second major difference is loftiness. Goose down clusters are typically larger and fluffier, giving goose down better insulation at the same weight. For instance, in a Beijing winter, a duck-down jacket usually needs more than 300g of filling to feel very warm, whereas goose down can achieve similar warmth with around 250g.
If you’ve ever shopped for down jackets on Taobao or in livestreams, you’ve probably heard sellers emphasize the “New National Standard.” In short, the new standard requires that at least 80% of the filling in down products must be actual down (excluding feathers). High-quality down jackets can reach 90%. Just pay attention to this percentage when you shop.
Li-Ning Duck Down Jacket / Li-Ning Goose Down Jacket
Fleece Fleece is actually a synthetic fiber fabric—essentially polyester. The polyester fibers are woven into a dense, fuzzy structure and then brushed to create a soft, wool-like surface, which gives fleece its name and characteristic texture. The brushed fibers trap air effectively, providing excellent insulation. Its warmth is close to wool, yet it’s much lighter than many natural fibers.
In the past couple of years, many outdoor brands have shown a strong preference for fleece items. They’re easy to maintain, durable, and look good. Other than not being windproof, fleece doesn’t have many drawbacks. Choosing a fleece jacket in fall and winter can significantly enhance the visual warmth and cozy outdoor feel of your outfits. If you want to create a warm, relaxed, and slightly lazy vibe, fleece is a must.
When the economy is booming, people tend to pursue trendy, eye-catching designs. When the economy declines, they quickly shift toward durability and practicality. In reality, material and style complement each other—certain designs simply require specific materials to convey their intended texture and visual effect. Instead of treating them as mutually exclusive, it’s better to consider both. Fall and winter garments are generally thicker, so when choosing materials, it’s important to factor in how the design affects comfort and visual coherence. Only then can you achieve outfits that feel both effortless and stylish.
Patagonia Fleece Jacket
Outfit Combinations: Start with One Item You Already Own
When writing the Double 11 menswear guide, a reader mentioned that they hoped I could recommend outfits based on specific scenarios, considering styles, fabrics, and more. I thought it was a great idea. But after thinking it over again, I realized that scenarios are too complicated — and if you add aesthetic styles on top of them, things become even harder to explain. So although I genuinely appreciate the suggestion, I decided to use a simpler and more direct approach: starting with any item you already have on hand.
In the summer edition, I mentioned that when putting together an outfit, we can begin with the category in which we own the fewest items and build the rest of the outfit around it. In the fall and winter, the items we usually own the least of are heavy jackets, overcoats, padded jackets, and down jackets. However, compared with other categories, these pieces are much easier to match — starting with them is almost the same as not needing to match anything at all. Given that, it makes more sense to start with shirts and pants. I’ll consider both material and style to give you a more practical reference.
To improve the clarity of the imagery, the outfit combinations in this section use Gemini-generated background replacements applied to real clothing items. However, because I may not have suitable photos for every single piece, some examples may be demonstrated without real images — thank you for understanding.
Shirts
Shirts are extremely common all-season items. As inner layers — whether worn alone or for layering — they pair well with a wide variety of outerwear and fit many different styles. I categorized several types of shirts you might have in your wardrobe and will offer some pairing suggestions you can use as reference.
Basic styles: solid / striped / plaid shirts
The most basic and commonly owned shirts are solid-colored, striped, or plaid. Their materials are usually cotton blended with polyester or other synthetic fibers.
Solid Color Shirts
For solid shirts, I recommend choosing earthy or warm neutrals, such as off-white, cream, or light khaki. These colors are generally less picky about skin tone. For me personally, pure black or deep-colored shirts tend to make my skin tone look duller, so I don’t prefer them. With solid shirts, the cut becomes even more important — I recommend shirts with a more structured, oversized silhouette for better shape and presence.
For light-colored solid shirts, I especially recommend pairing them with dress pants or jeans. Dress pants in a matching color family work especially well; if you want to enhance the sophistication of the outfit, consider upgrading to wool trousers — they not only elevate the texture but also provide warmth. When pairing with jeans, try to avoid shades that are too light. Washed blue, classic denim blue, and vintage dark blue-black washes are all good choices. In terms of fit, avoid skinny or slim cuts; go for wide-leg or curved-cut (“弯刀”) silhouettes. Also try to avoid designs with too many pockets — anything with strong streetwear motifs — as they tend to clash with the clean style of a shirt.
The outerwear that pairs most naturally with shirts are sturdy work jackets or overcoats. Work jackets are extremely effortless to style; dark colors are the most versatile, and you can choose designs with contrasting leather collars to create texture contrast. For overcoats, camel and black are usually the easiest to match with shirts.
Striped Shirts
Striped shirts are a bit of an unfamiliar territory for me. Personally, my ability to pull off stripes is quite low, and I don’t have many good-looking striped pieces in my wardrobe. So for striped shirts, I only have one suggestion: preppy style. A simple vintage striped shirt paired with a cardigan and a classic pair of jeans or dress pants is already enough.
Plaid Shirts
Wearing plaid shirts as outerwear can sometimes make you look a bit older, but as an inner layer for autumn and winter, they’re definitely versatile and reliable. First, I recommend choosing warm-toned large-check patterns, which highlight a relaxed vibe more effectively. Second, it’s best not to pair them directly with only an outer jacket—instead, layer a cardigan of a similar warm tone over them. This enhances warmth and also works great as a standalone outfit for going out. Finally, if you want to achieve a softer, cozier look, pair them with a short coat and light-colored dress pants. If you prefer something slightly more street-casual, pair them with a long coat and jeans. Holding a coffee cup in hand will instantly boost the overall vibe.
Advanced Option A: Knit Shirts
Compared with spring and summer, autumn–winter outfits place greater emphasis on texture because clothing tends to be thicker, and choosing the right material significantly enhances the quality of each piece. Naturally, items with better texture require more thoughtful styling too.
A few years ago, I bought a cotton knit shirt and found it incredibly useful as a fall–winter item. This type of shirt feels and looks very similar to a sweater, fitting perfectly with the texture-driven vibe of the cold seasons. Yet since it’s cotton, it can be machine-washed and ironed, making maintenance much easier. It can absolutely serve as an advanced shirt option for autumn and winter.
I think knit shirts are also great for layering. If worn as an outer layer, you can add a turtleneck underneath. If worn as an inner layer, add a fuzzy cardigan on top. For bottoms, simply choose suitable dress pants or jeans depending on the occasion. For outerwear, both coats and down jackets will work fine, as long as they’re not overly sporty.
Advanced Option B: Denim Shirts
Wearing a denim shirt on its own is easy, but making it look stylish is a bit tricky. Based on my experience, if you want a tougher, more rugged vibe, it’s best to pair denim shirts—regardless of their color—with dark denim jeans to avoid a top-heavy look. If you prefer a softer style, pair them with warm-toned casual pants. As for outerwear, whether you’re going for rugged or gentle, leather jackets are always a great match. On top of that, you can finish the outfit with a pair of versatile German-trainer sneakers or classic yellow boots.
Sweaters
In autumn and winter, sweaters are naturally essential wardrobe staples. When it’s not too cold, you can wear a warm inner layer and use the sweater as an outer piece. When temperatures drop, pairing a sweater with a coat or down jacket gives you both warmth and style. So, sweaters are basically pieces that work well both dressed up and dressed down.
Basic Style: Solid-Color Sweaters
The easiest and most universally flattering option is the solid-color sweater (even small patterns are fine—if the overall look is one uniform color, you can treat it as solid for styling purposes). Solid-color sweaters pair well with virtually any type of pants, whether exaggerated or simple, and they also work with either coats or down jackets.
With that in mind, I’ll recommend two combinations I’ve been loving this year. One is a solid-color sweater + warm-toned casual pants + coat. The other is a solid-color sweater + dark denim jeans + down jacket. The first is great for sunny days out, and you can add a scarf when it gets chilly. The second works perfectly for commuting, school, or casual outings—it’s a look you can comfortably wear from Monday through Saturday.
Advanced Option A: Turtlenecks
I’m sure everyone has bought a turtleneck before, but why is it considered an “advanced option”? Because it’s picky—picky about the wearer and picky about what you pair it with. If you’re not careful, it can make your neck look shorter and your skin less bright. I personally can’t always pull off a turtleneck well either, and I’ve found that a good solution is to layer a loose-fitting knit over it—whether it’s a pullover or a cardigan. Adding an outer layer to a turtleneck creates more visual depth, and when you’re indoors without a jacket, you won’t look awkward or too bare. On top of that, pair it with casual dress pants and a coat, and you’ve got yourself a solid outfit for both commuting and going out.
Advanced Option B: Cardigans
I’ve already mentioned cardigans in both the knit-over-turtleneck combo and the shirt-plus-knit combo, so you probably already know how to wear them. In my opinion, cardigans are one of the most atmospheric pieces for fall and winter. Pair them with sweaters or shirts to create a warm, cozy, or collegiate vibe. One more reminder: it’s best to choose light-colored, loose-fitting cardigans. Dark ones can easily make you look older if not styled well, and fitted ones lean too heavily toward businesswear.
Sweatshirts
For many guys, sweatshirts are probably something they wear for three out of four seasons. They come in tons of styles, they’re easy to pair, and having a few in the closet covers most situations. However, there’s one issue people often overlook: sweatshirts can make you look messy if worn poorly. When using sweatshirts in your outfits, keep these two points in mind:
Dark, plain crewneck sweatshirts can make you look 20 years older—I personally avoid them in everyday outfits
Crewnecks are easy to buy and come in many styles, but in terms of fit, “wide rather than long” is key. If it’s a longer cut, consider pairing it with a short jacket.
Basic Option: Solid-color Sweatshirts
Once you have a basic solid-color sweatshirt, pairing becomes effortless. If it’s a colored sweatshirt, I recommend styling it with an outerwear piece in the same color family but in a different shade, plus pants with some contrast. If it’s white or beige, almost any outerwear and pants will work. For hoodies, you can pair them with a coat in a matching color. And some of the sporty, yoga-style solid sweatshirts also work great with outdoor jackets.
Advanced Option A: Bright Hoodies
In spring and fall, sweatshirts are often worn on their own, so most people have at least one or two bright or boldly patterned hoodies. For these more eye-catching hoodies, I recommend pairing them with a varsity jacket. Casual varsity jackets usually feature ribbed cuffs and contrasting color details—they’re already visually striking, and pairing them with an equally lively hoodie screams youthful energy. Personally, I think it’s totally fine to choose a boldly designed varsity jacket as your signature piece—when you want to look energetic and vibrant, it’ll make you stand out instantly.
Ever since waffle-knit fabrics suddenly became popular, the market has been flooded with waffle sweatshirts and similar textured pieces. These usually come in warm tones—white, beige, and earthy shades. Compared with the plain crewneck sweatshirts most people wear, waffle sweatshirts naturally have a “lazy, relaxed” vibe. The only thing to watch out for is avoiding overly patterned pants or jackets—keep the whole outfit clean and simple. In late fall, you can wear a waffle sweatshirt with light-colored denim and a denim jacket. In winter, just swap the denim jacket for a long coat or a puffer jacket, and you’re good to go.
Pants
I’m someone who absolutely loves buying pants—I always feel like I have nothing to wear and need to restock, to the point where my wardrobe is nearly full. Because pants take up half of the visual space in an outfit, they’re also a perfectly legitimate place to start when putting together a look. If you ever feel stuck choosing a top, you can simply begin with a pair of pants instead.
Basic Style A: Regular Jeans
Straight-leg, solid-color denim—regular jeans—can pair well with almost anything. When you’re rushing to work, throw on a light-colored sweater or sweatshirt and add a jacket that contrasts with the pants. On weekends, when you want to look more put-together, try pairing them with a long shirt or cardigan to create differences in color and layering, then add any outerwear on top. Regular jeans rarely go wrong. The only thing you should avoid is dressing head-to-toe in a single denim color (unless you have idol-level looks). Some degree of contrast is always better.
Basic Style B: Regular Casual Pants
A lot of people don’t like wearing jeans and find them uncomfortable, so casual pants often become their go-to. Most casual pants have a straight, slightly loose silhouette and are easy to style. In autumn and winter, I highly recommend choosing corduroy or wide-wale trousers. On that foundation, pair them with a sporty sweatshirt and finish with a shell jacket. Another practical option is to match athletic-style sweatshirts with low-saturation outerwear or down jackets—this combination also works really well.
Advanced Style A: Wool Trousers
I’ve mentioned wool trousers several times already, so I won’t repeat too much here. Simply choose a knit sweater or knit shirt, pair it with wool trousers and a coat, and you’re set.
Advanced Style B: Leather Pants
When people think of leather pants, they tend to picture rock musicians or motorcyclists—tight leather pants are common in those circles. But for everyday wear, looser fits work much better. Leather pants usually come in black or dark tones, so a loose, light-colored sweater works perfectly on top. From there, I recommend adding a shiny black down jacket as the finishing touch. With that, you’ll have a winter “cool guy” outfit ready to debut.
I often hear people say that in autumn and winter, you end up throwing on a big black puffer jacket anyway, so every outfit looks the same. But I don’t think dressing warm necessarily means looking bad. Not to mention that many puffer jackets and coats nowadays manage to be both lightweight and warm, and high-quality inner layers can also help keep you warm, so you don’t have to rely on overly bulky outerwear.
Autumn and winter come with plenty of wardrobe options, making them the perfect seasons for experimenting with outfits. It might feel troublesome at first, but once you grasp some basic techniques and start trying more combinations, I believe you’ll quickly find the styles and pairings that work for you. Dressing well is all about trying—once you try enough, it becomes second nature.
I hope that this winter, your outfits bring you a bit more joy, help you shake off the boredom of the cold season, and give you the good mood you need to face what is rumored to be a very chilly winter ahead.
Welcome to this week’s Pi Review. You can use the table of contents to jump directly to the sections you’re interested in. And if you discover other apps or topics worth discussing, feel free to join the conversation in the comments.
Must-See App Updates
Beyond the “new and shiny,” many long-standing App Store favorites continue to iterate, release updates, and add more useful or delightful features. At Sspai, we want to help you filter through these changes and quickly catch up on the latest app developments worth your attention.
Moment Pro Camera II: A Classic Third-Party Camera App Reborn — Practicality Above All
Platform: iOS
Keywords: mobile photography, LUT
@Vanilla: Most third-party camera apps these days fall into one of three categories:
Filter-driven, featuring LUTs, film simulations, and similar effects;
Design-driven, using custom skins or UI interactions to evoke a mood or aesthetic;
Feature-driven, offering advanced controls to unlock more powerful shooting capabilities on the iPhone.
The newly released second-generation Moment Pro Camera belongs squarely to the third category. While it doesn’t bring bold innovations in visual design or interaction, it strikes an excellent balance in terms of feature implementation—and crucially, it supports both photo and video workflows. It’s fair to call it a “comprehensive, all-in-one” camera app.
Opening Moment Pro Camera reveals a familiar interface, with the main area naturally dominated by the viewfinder. On the right side of the viewfinder are two indicators showing the status of the flash and orientation lock. To change either of these settings, simply swipe down on the viewfinder to open the shooting settings panel. This panel is divided into two major sections: shooting functions and viewfinder tools. The former includes options like flash and timer settings, while the latter offers tools such as grids, a level, device orientation, highlight/shadow zebra intensity, focus peaking, and monitor settings.
At the top center of the viewfinder, you can quickly adjust parameters related to the captured file, with different options available depending on whether you are in photo or video mode. In photo mode, you can modify settings such as processing method, manual exposure, Fusion, encoding format, pixel count, and aspect ratio. In video mode, you can adjust the encoding format, maximum bitrate, chroma subsampling, resolution, color space, and frame rate.
At the top left and right sides of the viewfinder, you’ll find the software and hardware settings, respectively. In the software settings panel, you can enable options such as mirroring the front-facing camera, locking auto white balance during recording, choosing the Fusion saving format, and toggling geolocation data. In the hardware settings panel, you can configure the audio input source, output source, as well as settings for both the viewfinder and the monitor.
On the left side of the shutter button, you’ll find buttons for LUTs, white balance, the photo library, and mode switching. On the right side of the shutter button are the controls for adjusting shooting parameters (shutter speed, exposure compensation, ISO), switching parameter modes, and enabling the minimalist mode.
At the top of the viewfinder, just above the shutter button, you’ll find an indicator displaying the device’s acceleration. Above that is the lens-switching area. The button on the left lets you perform seamless, continuous zoom, while the button on the right enables manual focus.
Moment Pro Camera II essentially integrates all functions and settings into the main interface, putting everything within easy reach while shooting. The downside, of course, is that the entire interface can look a bit cluttered.
Moment Pro Camera II is available on the App Store for 68 RMB. It’s a one-time purchase with no subscription required — truly a breath of fresh air among third-party photography apps.
WaterMinder 7: Let AI Track Your Water Intake for You
@Snow: In this era where everything seems to be infused with AI, WaterMinder’s major 7.x update this month also puts AI at the center. Its core feature, Gulp AI (AI Swallow Enhancement), is designed to automatically estimate how much water you drink, simplifying the logging process.
Using Gulp AI is incredibly simple. When adding a record, choose Gulp AI and WaterMinder will automatically activate the front-facing camera. You just need to make sure your mouth, neck, and cup or bottle are within the frame. Tap the record button and start drinking. When you’re done, stop the recording. Gulp AI will analyze the drink type and the amount consumed based on the appearance of the beverage and your swallowing actions. Tap Add to complete the entry.
In the 7.1 update, WaterMinder also enhanced its voice logging capabilities. When adding data, you can now use either voice or text input with natural language, and the app will automatically analyze the drink type and the amount consumed.
However, WaterMinder’s AI features are still not performing as well as expected. First, Gulp AI requires your mouth, neck, and a mostly unobstructed view of your cup to be visible at the same time. This basically means you need to face the camera from the side when drinking. And since the front-facing camera’s field of view is limited on all devices except the iPhone 17 series, if you normally use a large cup, your other hand will almost need to stretch out to selfie length just to complete a recording — every sip becomes an arm workout.
Second, Gulp AI’s ability to recognize bottled beverages is also very limited. I tried Coca-Cola, Oriental Leaf tea, 7UP, and Suntory. Only the slim canned Coca-Cola was correctly identified; everything else was labeled as water. The main issue with voice logging also lies in drink-type recognition. Aside from text containing explicit keywords like “cola” or “milk,” which have higher accuracy, any drink not in the database will still be classified as water — meaning you’ll often have to adjust it manually.
Some minor tweaks to the icons do offer small usability improvements, such as more milk-related indicators and the ability to quickly find the icon you need through text search.
Although we at SSPAI have always been committed to discovering and introducing high-quality apps across various platforms, there are still many apps with excellent design, functionality, interaction, and overall experience that we haven’t yet covered. They might be long-standing apps, or newly launched ones — and we’ll introduce them to you here.
Riveo: A Video Creation App Packed with Special-Effects Templates
Platform: iOS, iPadOS, macOS
Keywords: video creation, special-effects templates
@ElijahLee: Riveo is a creative app developed by Forge and Form GmbH, focused on video effects and animation editing. It was even shortlisted as a finalist for the Apple Design Awards.
Riveo’s standout feature is its emphasis on visual effects and creative editing, offering results far beyond typical video-editing apps. First, it provides a rich selection of special-effects templates, including retro styles, beat-synced cuts, action effects, text art, and many other high-quality options. These templates are also very easy to use. In some of them, you simply import photos or videos into Riveo, and the app automatically blends filters and motion effects with your media to create visually stunning videos.
Riveo lets you dive into advanced creative adjustments for any video you make — including those built from templates. The app offers more than 100 effects, ranging from particle effects (smoke, gas, bubbles, cartoon flames, etc.) to decorative lens effects (shattered glass, pencil sketch, fog), and for subjects within a video, you can even overlay motion-based effects. In terms of filters, Riveo supports a wide variety of color styles such as VHS, retro, glitch, ’90s TV, pixelation, and more. The editor also includes keyframe control, allowing you to customize how each effect moves or changes from start to finish. The masking feature is AI-assisted, letting you use a contour or a person for background replacement or layered effects. Other standard tools — adding text, shapes, subtitles, music, and more — are all present as you’d expect from a full-featured video editor.
Text-based templates are also one of Riveo’s highlight features. It supports 3D text effects, including materials like metal, glass, and reflective surfaces. In terms of motion effects, it offers a variety of dynamic styles such as entrance, pop-out, floating, and distortion. Paired with beat-synced music or rhythmic tracks, it can easily create the fast-paced, catchy, and eye-grabbing effects often seen in short videos.
Riveo also provides AI-assisted creative tools. First, there’s AI-powered image transformation: by entering keywords such as “forest,” “universe,” or “anime,” Riveo can transform real portraits or landscape photos into scenes based on the chosen keywords. With the AI generation feature, you simply input a text description of the desired image and Riveo will begin creating. I tried using: “In a magical world, inside a castle, a wand and a wizard hat placed on a thick, vintage patterned tablecloth, with the castle’s stained-glass windows in the distant background.” The generated image had an impressively refined texture, and I was very satisfied with the result. The output can be directly applied to the editor for secondary creation.
Overall, Riveo allows creators to quickly produce impactful, visually distinctive videos thanks to its rich library of templates and effects. Compared with ordinary editing apps that mainly offer cutting and filters, Riveo feels more like a compact visual-effects compositing tool, and it also supports a seamless workflow that integrates shooting and editing—making it suitable for various creative scenarios. In terms of exporting, it supports multiple aspect ratios and up to 4K @ 60fps, meeting the needs of high-quality rendering as well as fast publishing on social media.
You can download Riveo for free on the App Store. Setapp users can access it directly at no additional cost.
Meow: HarmonyOS App Update Tracker
Platform: HarmonyOS
Keywords: App updates
@侧脸君: After upgrading to HarmonyOS NEXT, many people find themselves frequently checking the App Store to see whether their commonly used apps have been released or updated. MeoW, a notification subscription tool, taps perfectly into this need. You can subscribe to the app channels you care about, and whenever an app releases an invitation test, public beta, or official update, you’ll receive a notification right away.
Because the test versions published in App Early Access have limited invitation slots, MeoW has also become a must-have tool for digital content creators, helping them track updates for major apps like WeChat, QQ, Douyin, Taobao, and more. In just one year, it has gained 370,000 installs—a remarkable achievement for a new system whose device base has just passed 23 million.
In addition, MeoW also supports the creation and subscription of personal channels, which I think is a particularly clever move.
After subscribing to a channel, any content update will trigger a push notification, with support for jumping directly to the content source — whether it’s a personal website, Xiaohongshu, WeChat Official Accounts, and so on. To some extent, it has become a content distribution platform and a messaging channel within the Huawei HarmonyOS ecosystem, attracting many content creators and independent media bloggers to join. This also opens up more possibilities for future commercialization.
You can download MeoW from the HarmonyOS App Market.
Related reading: A HarmonyOS App Developed in Less Than a Month Accidentally Became a Hit
InkRoot: An Enhanced Note-Taking App Based on Memos Platform: Android Keywords: Notes
@化学心情下2: I’ve been using Memos, an open-source and self-hosted note-taking service. By deploying Memos on my NAS, I can use the Memos mobile client to quickly capture fragmented information. And because Memos is open source, there are now many third-party Memos mobile clients available for us to choose from—such as InkRoot, which is developed by a Chinese developer.
InkRoot builds on Memos and offers users several ways to use the service: if you simply want to store your note data locally without considering sync, you can directly use InkRoot’s local service. Otherwise, you can consider using InkRoot’s official server. Or, if you’re like me and have already deployed a Memos instance on your NAS, you can use InkRoot as the mobile client for your self-hosted Memos service. The only caveat is that InkRoot has version requirements for connecting to Memos—currently, it only supports version v0.21.0.
Besides the features already supported by Memos, InkRoot also introduces a number of improvements. For example, its recording feature can quickly convert voice into text, and the AI feature can continue and refine the current content.
InkRoot also offers AI Insight features for organizing notes. By setting keywords, time ranges, and included tags, it helps you quickly extract and summarize the fragmented notes you’ve recorded recently. It also comes with multiple note-view modes, including All Tags, Random Review, and a Knowledge Graph, making it easier to organize your notes in a structured way.
You can download InkRoot for free from the official website. The app supports both Android and iOS (manual sideloading via AltStore is required).
Glow HDR: Convert Any Photo into Ultra HDR Format
Platform: Android
Keywords: Imaging, HDR
@大大大K: Ultra HDR is a new feature introduced by Google in Android 14. Compared with traditional HDR images, Ultra HDR overlays an additional gain map within the image, allowing for precise preservation of highlights and shadows, while maintaining backward compatibility—displaying as standard SDR on devices that don’t support HDR. Glow HDR takes advantage of this feature, enabling the conversion of regular SDR photos or the editing of images already in Ultra HDR format.
You need to confirm whether your device is compatible to truly experience the effects brought by Ultra HDR. Glow HDR includes a built-in quick testing tool. From the home screen, enter the Ultra HDR Test feature, where the two logo images at the top correspond to standard SDR output and Ultra HDR output. If your device supports Ultra HDR, the brightness difference between the two images will be very noticeable, and the parameters listed below will also display compatibility reminders. However, keep in mind that the final HDR/SDR ratio may be affected by your current screen brightness and does not represent the final result.
Glow HDR is compatible with JPEG, PNG, HEIC, and other formats, and it supports adjustments to parameters such as brightness and contrast. By swiping right on the function menu, you can edit image quality and HDR ratio, and you can also save your frequently used parameter settings as presets. The histogram is displayed by default in the upper-right corner of the editing page, allowing you to observe color and brightness information separately within both the SDR and HDR ranges during the editing process.
Since Ultra HDR’s gain information is essentially an additional gain layer embedded within the original image, the gain editing status shown in the upper-left corner is usually labeled as “Embedded.” To inspect the gain information of an image, you can tap the button at the bottom of the screen—this will display the gain data in grayscale in the preview window. The button on the right allows you to compare the before-and-after effects of your edits. If you notice no significant difference between the two, make sure to check the test tool to confirm whether your device is compatible with Ultra HDR.
You can verify whether the edited image has successfully applied the Ultra HDR effect by opening it in your system gallery and checking whether the screen brightness is boosted by HDR. Alternatively, you can view the image details in Google Photos to see if the Ultra HDR label is present.
Besides that, Glow HDR also supports batch image processing and metadata adjustments, though some of these features require a donation to unlock. Additionally, if you need to edit HEIC-format images, you may encounter occasional compatibility issues, but they won’t affect basic usage. If you mind this, you can wait for the developer to release a fix. For now, you can download it for free on Google Play.
Tack: Putting a Beautiful Metronome on Your Phone
Platform: Android
Keywords: Metronome
@Peggy_: My understanding of music has mostly come from what I’ve seen in movies and TV shows. One thing that always intrigued me was the peculiar little device often placed on top of a piano—its pointer swinging rhythmically back and forth, accompanied by an off-screen “tick-tock” sound. Eventually, I learned that this device is a metronome, which helps learners grasp rhythm and improve the effectiveness of their instrument practice.
Tack is a beautifully designed metronome app, from its icon to its interface. In terms of visual refinement alone, Tack is one of the rare apps this year that truly blends functionality with aesthetics. Its icon is an abstract representation of a metronome, and upon opening the app, you’re greeted with a brief splash animation showing a metronome’s pendulum swinging in steady rhythm.
Entering the main interface, the most prominent element is the tempo displayed at the center, with arrow buttons on both sides that help users quickly adjust the speed. From top to bottom, there are buttons for increasing or decreasing by 1, 5, and 10 BPM, making tempo adjustments extremely convenient and highly practical. Beyond the basic features, Tack thoughtfully includes visualized beat animations and supports beat cues through both sound and vibration. Additionally, Tack lets you add songs within the app to create your own personal practice playlist. This allows you to save each track’s tempo configuration, eliminating the hassle of reconfiguring your settings every time you practice.
Before using the metronome, you can further set the duration of your practice. Tack allows timing by measures, seconds, or minutes, letting you personalize your practice sessions. Interestingly, once practice begins, the app’s main interface shows a small metronome animation in the upper-left corner that runs according to your current settings—a thoughtful touch from the developer. If you enjoy this little animation or prefer a more prominent visual beat indicator, you can enable the “Show Large Logo Animation” option in the settings to let the beautifully designed metronome take center stage. Of course, if you care more about battery life, you can toggle on “Reduce Animations,” allowing you to focus purely on the app’s functionality and avoid excessive animation that might drain your phone’s battery.
Since I’m not a professional, I can’t go into detail about the more advanced features, but if you happen to need a tool like this, you might as well download and try Tack through the Play Store or F-Droid. The app is completely free.
Many readers are often curious about what the editors at SSPAI actually buy. Through the “Editors’ New Toys” column, we hope to introduce the interesting gadgets and products that our team members have recently started using — and let them personally share what the experience of using these “new toys” has really been like.
Content Note: If any installment of the New Toys column includes commercial content, it will be clearly marked as “Advertisement” within that entry.
@路中南: Yuexingtong X4
Reference Price: ¥235 (after coupon)
I first heard about this device from a New Toys submission back in August, but it didn’t really convince me to become one of its “cloud shareholders” at the time. Lately, though, there’s been so much discussion about it — and after scrolling through several Taiwanese friends’ posts and expat comments like “I can’t believe this thing only costs thirty bucks!” — I finally asked a friend to help me place an order. (Honestly, this was the first time I ever felt inconvenienced by not having a Xiaohongshu or Pinduoduo account.)
For readers unfamiliar with the Yuexingtong X4, there are a few hardware details worth noting before you buy one:
It has no backlight, so its ideal use scenarios are outdoors or in well-lit environments — say goodbye to late-night reading under a lamp.
It doesn’t support touch input; all operations, including typing, are done via physical buttons. The seller claims this improves response time and battery life while preventing accidental touches. That said, it’s still hard to resist tapping the screen instinctively when playing with it.
One of its main selling points is that it can magnetically attach to the back of your phone, becoming a kind of “second screen.” If that reminds you of that Russian “national gift phone” from a few years back — yes, that’s the idea.
It runs on a proprietary system and only supports .txt and .epub files.
The white version costs a few dozen yuan more, so I went with the black one. I didn’t really bother checking the other specs before buying — the only thing to note is that the screen has a 220 ppi resolution, roughly the same as my main Xiaomi Duokan e-reader. Since I’m not exactly an avid reader, I figured it would be “good enough.” However, after the device actually arrived, my hands-on experience turned out to be quite different from what I had expected. I’m planning to talk about it in more detail — it’s going to be a bit long-winded, so if you’re curious, bear with me and keep reading.
Received the package right at midnight on Double 11 — props to the logistics team for their dedication. Since it’s a small brand, I didn’t have high expectations for the packaging — it’s very minimal — but the product itself surprised me. It’s unbelievably light and thin. Borrowing Boli’s words from his iPhone Air video, the Yuexingtong X4 is also a “sheet” of electronics — thin enough to rest on a wall switch. The build quality is quite good: the cool aluminum-alloy back feels premium, and the matte, anti-glare glass on the front gives off a crisp, transparent impression without that dull haze you sometimes see. Honestly, it makes me wonder if just the screen alone already costs a lot.
The first thing I did after unboxing was update the system. It shipped with version V2.1.8 and jumped straight to V3.0.5 — pushed out right on Double 11! Along with the V3.0 update, Yuexingtong also released an official Android app. That update cadence is one of the main reasons I trusted and bought it in the end. Whether a team truly cares about its product or not often shows here — and they clearly do. Which brings me to my main point: for just over 200 RMB, this kind of hardware leaves me nothing to complain about (many phone cases cost more than that). But when it comes to software, there’s still a lot of room for improvement. The first issue worth mentioning is font rendering — see the comparison photo below.
The Yuexingtong X4 feels more like an embedded device than an e-reader with actual computing capabilities. It doesn’t support vector .ttf font files; instead, users have to manually convert them into .bin bitmap fonts. That means your rendering result heavily depends on the conversion tool and parameters you use. The system is closed and offers almost no typesetting options, aside from a three-level line-spacing adjustment. For example, when I use my go-to font — the LXGW New Zhixing Song Screen Edition(project link) — the difference becomes clear: on the Xiaomi Duokan Reader with KOReader, font rendering is sharp and takes full advantage of the 220 ppi display; but on the Yuexingtong X4, jagged edges are still obvious. My guess is that this issue lies in the system’s rendering algorithm, which users can hardly influence — we’ll just have to wait for a firmware update.
To comfort my fellow “cloud shareholders,” I’ll add this: the early rendering on the Xiaomi e-reader was just as bad. Both the native Duokan Reader and KOReader were disappointing at first, but one system update later, the improvement was huge — not quite Kindle-300 ppi level, but definitely usable. If Yuexingtong X4 can solve this technical challenge, I’ll happily raise my rating. Typography and layout present a second layer of difficulty beyond rendering — for instance, the forced first-line indentation and full-width punctuation still feel awkward. I really hope the team opens up more layout customization options in the future.
When it comes to font generation, there’s actually quite a bit more to talk about. At first, I thought I could just find some random online tool to convert a .ttf font into a .bin file and call it a day — naturally, that didn’t work. After some searching, I came across a paid iOS app called Dianmo, which specializes in converting fonts for devices like this and even offers fine-tuning options: anti-aliasing, text size, spacing, weight, line height, and so on. According to the latest update notes, Dianmo can also push any file — including generated font files — directly to the Yuexingtong using its “Mobile Push” feature. That basically makes it the ideal client in my mind (it can even tweak .ttf files directly, though that part isn’t really necessary).
The reason I turned to Dianmo in the first place was that Yuexingtong’s iOS client is still in beta, and transferring files through the TF card is just too much of a hassle. Writing directly to the TF card is fast and stable, but when using macOS, it tends to create lots of hidden system fragments — and unfortunately, those are visible on the Yuexingtong X4. So what used to take three page turns to find a book now takes six. In addition to the “Mobile Push” function (which is really just the device creating a Wi-Fi hotspot for your phone to connect to), the Yuexingtong X4 also supports local network file transfer under the same Wi-Fi — but it’s painfully slow. It’s an embedded device, after all, so patience is a virtue.
As for some of the hardware quirks I mentioned earlier — here are a few things curious readers might want to know:
The operation speed isn’t as snappy as you might expect. There’s about a half-second delay — acceptable for reading, but a little frustrating when navigating menus. In short, you can’t operate it too fast.
The six-button layout looks intimidating at first, but it’s surprisingly easy to get used to. The pair on the right, which resemble volume buttons, become second nature in no time.
Most official tutorials are hidden away on Xiaohongshu (RED), and there’s no proper website or official documentation online — only third-party reviews. A pity.
The Yuexingtong X4 has built-in magnets, so you can stick it on your fridge or even horizontally onto the back of an iPhone Pro Max — no magnetic plate required (though it won’t work on the Pro model due to the camera bump). If you want to attach it vertically, you’ll need to add a magnetic ring.
The package includes a matte screen protector, two decent-quality magnetic rings, and a TF card adapter — a thoughtful touch. The brand’s Xiaohongshu store also sells accessories like magnetic lights and clear cases.
These low-power e-ink devices really do have their own charm. You can even set a custom lock screen wallpaper, so it doubles nicely as a decorative desk piece. Speaking of e-ink gadgets, don’t forget about Quote/0 Excerpt, which is also available on the SSPAI store.
@鲸鱼鱼: OnePlus 15
Reference Price: ¥3,499 and up
Compared with the previous generation, the OnePlus 15 does bring hardware upgrades — though in some areas, it feels more “restrained.” Has this balance of choices affected its standing as a “good phone”? After using it for a while, I think I’ve found some answers.
Let’s start with the design. Compared to earlier digital-series models, the OnePlus 15 takes a noticeably different direction. Aesthetics are subjective, of course, but personally, I prefer this new, minimal look. The “Raw Sand Dune” colorway features a finely matte-textured metal frame and glass back, which do a great job at resisting fingerprints and feel comfortable to hold. That said, under dim lighting, the light gray tone tends to appear darker — closer to gray than silver.
Flip the phone around and light up the screen, and I can’t help but recall the day my colleague Old Mai unboxed the review unit at dinner — the collective “wow” from the table said it all. The ultra-thin, symmetrical bezels make a striking first impression. In actual use, the reduced black edges enhance immersion — it truly feels like holding a frameless screen. Speaking of the display, OnePlus made a deliberate choice between 165Hz refresh rate and 2K resolution, opting for the former. In hindsight, that may prove to be the right call. OnePlus 15 users are the first to enjoy such ultra-high refresh rates, though some apps still need native optimization — a temporary pain that might make people nostalgic for 2K displays. In daily use, however, the 1.5K screen looks nearly as crisp, while delivering smoother visuals and touch response. Combined with a larger battery and tuned vibration motor, the result is excellent battery life — though the spec changes may take users some time to fully embrace.
Moving to the camera, the biggest shift is from Hasselblad co-engineering to OnePlus’s in-house LUMO imaging. LUMO focuses more on portraits — colors look livelier and more pleasing, with no major loss of detail. Of course, color science is subjective, and without the Hasselblad logo on the body or watermark, the photos feel like they’ve lost a bit of that signature “Hasselblad touch.” On paper, changes to sensor size and focal lengths mean the OnePlus 15 performs better in distant shots and portrait background blur than its predecessor, though it still lags slightly behind imaging flagships in low light.
To be fair, the OnePlus 15 isn’t chasing the absolute limits of hardware specs. But after experiencing its refined design, premium feel, and smooth user experience from both hardware and software integration, I’d still call it a great phone. The OnePlus 15 represents an upgrade in experience, not just in numbers. That said, I do look forward to seeing a OnePlus that can strike the perfect balance between specs and experience in the future.
@Microhoo:DJI Neo 2
Reference Price: ¥1,499
Looking back at the first-generation Neo, it now feels more like a proof-of-concept — a Beta product. Its lack of active safety features meant that you actually had to stay more alert to your surroundings while flying it. Even its seemingly simplified controls could easily cause confusion. So, while the Neo’s design philosophy was built around an admirable “zero learning curve” concept, in practice, it still required a fair bit of prior drone-handling experience. Especially after the release of the Flip, I once thought the Neo line might be short-lived — that its vision of “flying freely” might remain just that, a vision.
But a year later, the Neo 2 arrived right on schedule. And thankfully, this is DJI we’re talking about — they didn’t just upgrade the specs, they also revisited the shortcomings of the first generation. With thoughtful refinements and entirely new features, the Neo 2 finally feels like a complete product.
Although DJI doesn’t state it outright, I think the Neo 2’s biggest distinction from other drones is that it’s designed — or rather, meant — to be flown completely independently, without relying on a phone or controller (though it still supports both, along with FPV goggles). This time, the control buttons have been moved to the central axis, perfectly positioned for intuitive, one-handed operation. Combined with voice feedback and a small front display, you can now access around 90% of the drone’s functions without any external device. Whether it’s switching flight modes or adjusting distance parameters, it all feels simple and direct.
To make up for the previous model’s lack of active safety, the Neo 2 now combines LiDAR and a monocular vision system to deliver full 360-degree obstacle avoidance — a feature usually reserved for professional-grade drones. That said, not all “360-degree obstacle avoidance” systems are created equal; performance varies depending on obstacle distance, lighting conditions, and flight speed. Compared with higher-end drones, the Neo 2’s system is, naturally, less sophisticated. And given how unpredictable flight environments can be, I’d still advise against using auto-tracking in dense forests or at night. It’s always worth scouting the area and flight path beforehand.
Still, the Neo 2’s fully enclosed propeller guards and featherlight 150g build deserve praise. Even if it takes a minor tumble — as long as it doesn’t land in water — it’ll likely come out unscathed. Taken together with its active and passive safety designs, the Neo 2 is safe enough for supervised use, meaning even kids can enjoy the thrill of flight, provided an adult is watching and the surroundings are secure.
Move your palm up, down, left, or right to control the flight direction.Spread or bring together your palms to control the distance of flight.
In my view, the most striking upgrade of the Neo 2 lies in its gesture controls — the main reason I believe it truly shines only when used without a controller. During flight, you can guide the drone’s direction by moving a single open palm, and control its distance by spreading or closing both hands. At present, this gesture control feels more like a fun, futuristic toy trick — perfect for showing off to kids. However, when using it for selfies, you’ll inevitably still want some form of visual monitoring. That’s why I’m really hoping DJI will release a small companion display or, better yet, enable compatibility with smartwatches like the Apple Watch to further simplify the experience.
Since we’re on the topic of filming, it’s worth noting that the Neo 2’s core idea remains that of a compact, intelligent follow-cam drone. Compared to the first generation’s “good enough” level of performance, the Neo 2 has made significant progress. The new model supports up to 4K 60fps video recording, with onboard storage doubled to nearly 50GB. Combined with DJI’s industry-leading image stabilization technology, footage captured in good lighting conditions can rival that of flagship smartphones.
Neo 2 Static Sample Images
Of course, when compared to DJI’s higher-end drones, the Neo 2’s imaging specs are modest. But that’s by design — it’s meant to be an entry-level, compact drone. Considering its overall experience — especially the precise gesture control and reliable obstacle avoidance — its price point feels like DJI’s way of reshaping the entry-tier drone market entirely. If you’re not chasing pro-grade image quality and simply want to enjoy the thrill of flying and taking photos from above, the Neo 2 is easily one of the best options available. On the other hand, if you care deeply about image fidelity, flight speed, or wind resistance, I believe upcoming models in the Flip series will soon offer comparable gesture and obstacle-avoidance capabilities — perhaps even better ones. So, waiting a bit longer might not be a bad idea either.
@北鸮: Sony Vintage Keyboard
Reference Price: ¥129
Let’s get this out of the way first — this keyboard is absolutely not worth the price. I bought it mostly for fun, so take this as a lighthearted read.
I came across this keyboard while scrolling through Xiaohongshu — it immediately caught my eye with its nostalgic, early-2000s “economic boom” aesthetic. After a bit of digging, I figured out its background. This batch of Sony keyboards mostly dates back to 10–20 years ago, from the era when Sony was still fully committed to its unified “transparent” design language. This particular keyboard with a built-in flip cover originally came bundled with the VAIO VGC-LT15E, a Core 2–era all-in-one desktop. The machine featured wide transparent bezels and came with wireless peripherals and a remote control — very much in line with VAIO’s design-first philosophy.
Its wireless connection system was quite unique as well. Sony designed a proprietary receiver for its VAIO accessories, and some models even had the receiver built into the computer itself. That gave VAIO users the same kind of seamless integration that Mac users enjoy — though, unfortunately, it didn’t support standard Bluetooth. The versions currently being resold online have likely been retrofitted with a new controller, turning these vintage Sony keyboards into modern Bluetooth-compatible ones with small USB receivers.
The keyboard’s original model number is VGP-WKB5. It’s lightweight but manages to feel metallic. The foldable lid doubles as a palm rest — a bit cold to the touch. Most of the top-row system shortcut keys have been revived, too. One day, I accidentally dropped my phone onto the sleep key — it instantly sent my computer to sleep, so that function works, at least. The Japanese version also comes with a built-in FeliCa card reader, though it’s essentially useless today. I never quite understood why an all-in-one PC keyboard would include one, but maybe it’s just another example of Japan’s peculiar attachment to old tech.
Typing on it is, frankly, nothing special — it’s your typical scissor-switch membrane keyboard. Mine was preserved surprisingly well; the rubber domes haven’t aged much. The typing feel is soft and short-travel, similar to most laptop keyboards. However, perhaps due to the replaced controller or my current preference for mechanical keyboards, it suffers from frequent double keystrokes — it feels like the debounce delay for key presses and releases is set too low. The seller also remapped the Japanese layout into what they thought was a “standard” one, which only made things more confusing for someone like me who’s used to the system’s default key mapping. My nostalgic membrane keyboard experiment ended less than two weeks later.
That said, I knew what I was getting into. I bought it expecting a “beautiful disaster” — a desk ornament, really. As a collectible adorned with SONY and VAIO logos, it’s a little piece of discontinued industrial design. Every once in a while, I pop in some batteries, tap a few keys, and catch a faint whiff of that bygone “future aesthetic.” For a hundred-odd yuan, I’d say that’s money well spent.
@ph: Metal-Cover PopSocket-Style Grip
Reference Price: ¥50
A while back, I tried my first PopSockets grip and quite liked it — except the moment you look beyond the basic models, the prices stop being friendly. The Huaqiangbei empire, of course, offers countless cheap alternatives, but most of them look… rough around the edges. Then I stumbled upon a shop called POCASE 破壳 (and no, unfortunately, I’m not sponsored), which makes some original metal phone grips. They looked decent in the pictures, so I ordered two to try out.
The version I bought was the “Through Adversity” design — the motivational quote engraved on it reads per aspera ad astra [through suffering to the stars].
The store carries quite a few styles, mostly priced around ¥50. Some designs were a bit too ornate for my taste, so I went with the simpler ones — though honestly, I wish they’d skipped the cheesy motivational quote printed on them. Once in hand, the build felt decent: the top plate is full metal and pretty thick, with a nice aged finish that makes it look like an old commemorative coin. The base, however, is less impressive — acrylic with a metallic coating, and the printed text feels cheap. Still, from a normal viewing distance, it looks fine. On the plus side, the magnets are strong — no corners cut there. In testing, the magnetic grip felt comparable to the original PopSockets, so I can trust it when heading out.
“Metal Moon” Style
Of course, the all-metal design comes at a cost — weight. A regular PopSockets grip with its base weighs around 20 grams, while these two come in at roughly 50 grams each. With a phone and case, the total weight easily hits 300 grams. Thankfully, because of how you hold it — wedged between your fingers — the heft isn’t too noticeable in use. Even after long sessions, I found it acceptable. And since the metal lid is slightly larger than a standard PopSocket, it props the phone up at a better, less reclined angle when used as a landscape stand — definitely more practical.
Lastly, most models come in either silver or black bases, and you can choose between “rotatable” or “non-rotatable” versions. That naming is a bit misleading: even the “non-rotatable” one can still twist around its main axis, just like a PopSocket. The so-called “rotatable” version adds an extra bearing on the top plate, letting it spin freely like a fidget spinner. I tried that one first, but it felt a bit loose and dizzying to look at, so I swapped back to the fixed version — and saved myself the price of three cans of Coke.
Huawei to Cancel Continuous Subscription Plan for High-Precision Positioning Service
Synology Fixes Critical Remote Execution Vulnerability in BeeStation
Valve Announces New Steam Hardware
On November 13, Valve announced a new lineup of Steam hardware products set to launch in 2026, including the Steam Frame VR headset, Steam Machine console, and a new Steam Controller.
The Steam Frame features a lightweight, modular design — the core body weighs only about 185 grams, and with the head strap and face mask, the total weight comes to around 440 grams. It is powered by the Qualcomm Snapdragon 8 Gen 3 chip and runs SteamOS, a Linux-based system. With the upgraded Proton compatibility layer, it can natively run most Linux, Windows, and Android games, while also supporting high-quality wireless game streaming from a PC via the included 6GHz wireless adapter. The display consists of dual 2160×2160 LCD panels, supporting up to a 144Hz refresh rate.
In terms of tracking and interaction, the Steam Frame abandons the Lighthouse base stations used in the Index era and adopts an inside-out tracking system with four outward-facing grayscale cameras and two inward-facing eye-tracking cameras. This setup enables spatial positioning and eye-tracking, which can be leveraged for foveated rendering and foveated streaming, reducing bandwidth and latency requirements. Additionally, Valve has integrated dual speaker units into both sides of the head strap. The opposing layout helps minimize low-frequency vibration interference with camera tracking, maintaining both immersive audio and tracking precision. Source
Product Images — Courtesy of News Sources
The Steam Machine is positioned as a console-class device designed for high-definition television platforms. According to Valve, its performance is approximately six times more powerful than that of the Steam Deck handheld, supporting 4K resolution at 60 fps gaming. It also runs the Linux-based SteamOS and comes preloaded with the Proton compatibility layer to ensure seamless compatibility with Windows games available in the Steam library. In terms of controllers, the new Steam Controller has been redesigned, combining the traditional gamepad layout with elements such as touchpads and shoulder triggers, making it better suited for living room and home console use.
Product Images — Courtesy of Valve
As of now, Valve has not yet announced the specific release date or pricing details for the new products. Source
Microsoft to Retire Microsoft Publisher
On November 11, Microsoft announced that it will end all support for its desktop publishing software Microsoft Publisher starting in October 2026. At that time, Publisher will no longer be included in the Microsoft 365 suite, and users will not be able to launch or access its features. According to Microsoft, the retirement of Publisher is primarily due to functional redundancy. Tools such as Word, PowerPoint, Designer, and Microsoft Create already overlap with Publisher’s features. For users who are still relying on Publisher, Microsoft recommends taking action as soon as possible by using the “Save As” function to convert all project files into more universal formats such as PDF or Word for storage and backup. Source
WeChat Unveils Hidden Video Call Features
On November 12, the WeChat team published a blog post revealing three hidden features currently available in WeChat video calls. The first feature allows users to initiate a video call directly from the phone’s lock screen via the Care Mode “One-Tap Video Call”, making it easier for users—especially the elderly—to connect with family members. The second feature enables a “split-face” effect: by long-pressing the video call’s floating window and dragging it to the top of the screen, users can activate split-screen mode, displaying both participants simultaneously. The third feature allows for instant call connection—if both parties press the call button at the same time, WeChat will automatically skip the call confirmation step and connect immediately. Source
Huawei to Discontinue Monthly Subscription Plan for High-Precision Positioning Service
On November 12, Huawei announced through its Member Center app that, due to business adjustments, the company will officially terminate the continuous monthly subscription plan for its High-Precision Positioning Service on November 30, 2025. After the termination date, the service’s auto-renewal feature will also be disabled. Huawei’s High-Precision Positioning Service is based on real-time kinematic (RTK) differential technology, providing greater GNSS positioning accuracy. Once activated, the service automatically engages during navigation on supported roads within map applications. Even after the discontinuation of the monthly subscription plan, users will still be able to manually subscribe to one-month access to continue using the service as needed. Source
Synology Fixes Critical Remote Code Execution Vulnerability in BeeStation
Recently, NAS brand Synology released a security update addressing a critical remote code execution (RCE) zero-day vulnerability (CVE-2025-12686) found in its personal cloud product BeeStation. The flaw was publicly demonstrated earlier at the well-known Pwn2Own hacking competition, posing a direct threat to users’ personal data security.
The technical root of the vulnerability lies in a failure to validate input size during buffer copying. Attackers could exploit this flaw to remotely execute arbitrary code without any physical access to the device, potentially gaining full control over affected systems. According to Synology’s official security advisory, no temporary mitigations or workarounds are available for this issue. The only solution is to update the system.
Synology strongly recommends all users upgrade BeeStation OS to version 1.3.2-65648 or later, which has fully patched the vulnerability. Source
I’ve Wanted a Projector for a Long Time — My Core Need Is Simple: A Big Screen for Movies.Back in October, when projector brands were rolling out new models ahead of Double 11, I finally decided to get the one I’d been eyeing for months. As someone with high myopia, I’ll share my thought process and hands-on experience. Winter is here—who can resist curling up in bed before sleep and watching movies on a big screen?
Purchase
Where I currently live, it’s not easy to go to the cinema. I do have a 24-inch monitor, which works fine for streaming shows, but when it comes to movies, the experience is just average. If you’re going to spend time watching, a large screen with high resolution and sufficient brightness brings a far stronger sense of immersion and lets you notice more details—making movie-watching both more enjoyable and more efficient. That alone makes a projector worth it.
Since I just started working, my budget isn’t big, and my room isn’t spacious either. So my core requirements were: image quality first, compact and portable, and fully functional. Even though TV prices have come down, I had to give up on that option. Having used monitors of various resolutions, I know the gap between 1080p and 4K is huge. The logic is the same for display devices—nowadays, you can get a 4K projector for around 3,000 RMB, and with so many 4K movies and remastered classics available, a 4K projector makes more sense.
I’ve also used classroom-style lamp projectors and some smart single-laser models—both were mediocre. Traditional brands like Epson and BenQ mostly make lamp-based projectors, while major domestic manufacturers focus on triple-laser systems. Initially, I was drawn to triple-laser models for their portability.
After watching a ton of reviews and comparison videos, though, I discovered an issue: people who wear glasses often notice color fringing or text ghosting on triple-laser projectors. As someone with high myopia and slight astigmatism, eye comfort matters a lot to me, so I decided to reconsider lamp-based options as well.
In the end, with the help of a government subsidy, I ended up buying within my means:
Xming V1 Ultra (1,861 RMB) — a native 4K lamp projector under Xiaomi
A triple-laser projector — native 1080p with pixel-shifting to 4K
Vidda M2 Pro (3,660 RMB) — 0.47″ chip, highly rated and great value over the past year
Dangbei X7 Pro (3,481 RMB) — 0.39″ chip, newly launched in October 2025 with promising specs
The Dangbei X7 Pro has a close rival in terms of specs—the XGIMI Z9X, which is cheaper (around 2,900 RMB with launch discount + subsidy). I initially bought the Dangbei for its looks, but halfway through writing this, I noticed many reviewers strongly recommended the Z9X—so I gave in and ordered one too (3,182 RMB) to see how it performs.
Unboxing
As a lamp-based projector, the Xming is quite heavy—5.5 kg bare, about the weight of a full bag of rice. It took some effort to lift it out of the box, and I nearly strained my back doing it. The casing is made of thick plastic, possibly with some metal parts.
The Vidda comes next in weight at 3.4 kg. Its stand is metal, and the body uses a textured plastic that feels great to the touch—sleek and premium-looking. It’s easy to move around, and the official packaging even includes a carrying case with a handle, which makes it convenient for travel.
The Dangbei’s casing appears to be entirely plastic and weighs about 1.9 kg, making it much lighter and more portable. However, the gray-white plastic gives off a slightly cheap vibe.
The XGIMI Z9X is shaped like a sugar cube—a compact square block. The camera can retract into the frame, which is a neat design detail. It weighs only 1.5 kg, the lightest of the bunch, and the body is plastic as well, finished in a brownish coffee tone with a metallic texture.
Viewing
Environment: A small 9㎡ room with poor natural lighting. I usually keep the lights on when I’m inside. The curtains block out most of the light—when drawn, a sunny day looks like dusk, a cloudy day feels like night, and at night it’s pitch dark. The wall is white, and I don’t use a screen. The projector’s placement is limited—it sits 1–2 meters from the wall, positioned toward the left side. When watching, I can only sit in front of or beside the projector.
Video sources: USB drive, laptop via HDMI, and Baidu Netdisk TV version. Test videos: I don’t have many 4K movies on hand, so I loaded three 4K animated films onto the USB drive—two versions of I Am What I Am 2 (MKV and MP4). I’ve seen this one nine times in theaters, both in Dolby Vision and on IMAX, so I can pick up subtle visual differences. I also included I Am What I Am 1 (MP4), which I’ve watched several times on my computer. On Baidu Netdisk, I streamed Interstellar (2K MKV) to test live-action performance, and compared the USB and Netdisk versions of I Am What I Am 2 (4K MKV vs. MP4) to check playback quality differences.
Note: All photos below were shot with a Xiaomi 15, unedited, most from side angles. The projected image appears roughly straight in reality.
Xming V1 Ultra
The Xming V1 Ultra uses a three-prong power cable, with the socket positioned on the base—similar to the cord on a small electric kettle, but longer and sturdier. When powered on, the machine emits a faint crackling sound (somewhere between an old kettle heating up and a windy Tom and Jerry sound effect). It makes the same noise when shutting down. Once the system interface appears, the sound changes to a steady low hum—quite loud and distracting.
Placed about two meters from the wall, I assumed the projection was aligned straight, but the image turned out slightly skewed. The system automatically focuses and adjusts keystone correction; as a result, the darker “base layer” of the screen (like a gray backdrop) appears tilted, while the brighter “top layer” looks mostly rectangular, with the bottom edge still a little off.
A Misunderstanding About the Xming Remote .For the first half hour after powering it on, I kept trying to pair the Bluetooth remote—with no success. Turns out, the remote that came with the Xming was still sitting quietly in the box. I’d been holding the Dangbei X7 Pro’s remote the whole time, trying to connect it instead. The instruction manual even had a diagram that looked almost identical to Dangbei’s, so naturally, I started to suspect the remote was broken! It was already close to 1 a.m. on Saturday night when I realized something was off. I searched on Xiaohongshu and found someone mentioning that you could use a mouse to control it, then connect to Wi-Fi and set it up through the Mi Home app.
That trick worked. Once the pairing was done, the system prompted me to choose between Movie Mode and Daily Mode—with Movie Mode offering more vivid colors. I selected it, and right after that, the projector decided to… start a system update. Well, fair enough—it is a model from last year.
When the System Finally Finished Updating. By the time the update was done, it was 1:08 a.m. The noise level had dropped a bit—but it was still quite noticeable. Speaking of heat: the projector had been running for over an hour at that point. Before turning it on, the room felt a little chilly, and the thermometer two meters away showed 21.5°C. An hour later, it read 23.5°C. The Xming’s air vents are on the left side, and—lucky me—that’s exactly where I had to sit. During video tests, it was both hot and loud.
Xming’s interface is co-branded with iQIYI, so the main page is the Kiwi TV system. Connecting to Wi-Fi and linking it to Mi Home under Settings → Network was pretty straightforward, and the phone control worked smoothly. There’s no optical zoom, but from just over two meters away, the projected image was already quite large—visually about 100 inches. After inserting a USB drive to play downloaded 4K movies, I noticed the projector only has 2GB of RAM, with the system itself using about 55%. It took a while to recognize the USB. MKV files with DTS audio weren’t supported, but several MP4 videos played just fine.
From some test shots, the Xming’s image looked fairly sharp across all four corners. The first two photos were taken in a dark room during the day; the last one, with the lights on.
Once Playback Began. There was a bit of stuttering and ghosting at the start. With glasses on, I could clearly see a fair amount of noise in the image—fine from a distance, but quite noticeable within one or two meters. It didn’t really affect the viewing experience, though. In a dark room, the color and brightness were both quite good. The native 4K resolution looked delicate and easy on the eyes. However, shadow details were lacking—most dark areas were simply black blobs. With a brightness of 700 lumens, the picture was almost unreadable once the lights were on. Using it during the day on Sunday, I had to pull the curtains completely closed; otherwise, it looked pretty much the same as watching with the lights on.
The images on the left (top and bottom) show dark scenes from I Am What I Am 1, and the ones on the right are from Interstellar. The upper and lower frames show the effect before and after turning on the lights. The lower-right shot was captured a second or two late, but all are from dark scenes.
Installing Third-Party Apps. You can install third-party apps through Settings → Sofa Manager. As a proud Baidu Netdisk VIP member, I was genuinely shocked to find that the TV version of the app wasn’t available for download here. That said, you can still manually install it by placing the APK file on a USB drive—troublesome, yes, but at least it works. When streaming movies from Netdisk, all MP4 files played without issue. One MKV movie that worked fine from the USB drive, however, refused to play directly online.
Built-in Voice Assistant. When I tried to use the built-in voice assistant to open another app by voice command, it simply replied, “Sorry, I’m still learning.” In addition, the device doesn’t have eye-protection detection, so it’s best not to adjust the projector in the dark—direct exposure to the light is genuinely harsh on the eyes.
The left photo shows the lens—after gently wiping it with a finger, you can see the layer of dust on it. The right photo captures what I call “colorful black,” the uneven hues that appear in the dark parts of the image.
Vidda M2 Pro
The Vidda’s power cable feels premium—it even comes with a built-in strap for easy storage. It uses a two-prong rectangular plug for the outlet and a round connector for the projector. The Dangbei D7X Pro and XGIMI Z9X chargers share a similar design, though their cables are noticeably thinner.
When booting up the M2 Pro for the first time, the remote works immediately. The setup starts by asking for the projection mode—front or rear, desktop or ceiling mount. Once selected, the projector begins auto-adjusting the image. On future startups, it briefly shows the Vidda logo, then automatically fine-tunes the display once the main interface loads.
The entire process is smooth and quick. The auto-calibration results are impressive—the image is large, crisp, and nearly perfectly aligned. If you’re being picky, the bottom edge tilts ever so slightly upward to the right. Moving the projector causes it to re-adjust automatically, which works well most of the time. A few times, though, after shifting it too far, the focus stayed blurry and required manual fine-tuning.
The M2 Pro features optical zoom, and from the same distance, it projects a much larger image. In actual viewing, the details are sharp and precise—the pixel grid is almost imperceptible.
Vidda M2 Pro Noise and System Experience. The Vidda M2 Pro is noticeably quieter than the Xiaomi model. I’m quite sensitive to noise, and in a silent room, the faint hum beside me can get irritating after a while. However, during movie playback, the film’s audio easily drowns it out, so it doesn’t really interfere with the experience. The projector vents heat from the back. During my first two-hour test, the unit only became mildly warm—just enough to warm your hands a little.
Most reviews of Hisense’s system are full of praise, and after using it myself, I have to agree—the company’s years of making TVs really show; it’s almost unfair how refined the system feels. On the home screen, pressing the up button reveals a quick-access row. The “heart +” button on the remote lets you easily adjust image position, focus, picture mode, brightness, and more. Using the voice assistant also works smoothly—commands are executed accurately and promptly.
App Installation and Playback. Installing third-party apps is also very convenient. Just say the app name through voice command, and it downloads in no time. When I asked it to open the USB drive, it immediately displayed the contents—neatly categorized into videos, images, and files. Video playback worked flawlessly—whether from a USB drive or Baidu Netdisk, everything opened smoothly and played without stutter. P.S.: I later realized I forgot to test whether MKV videos in Baidu Netdisk could play properly when the resolution was set to 4K.
The M2 Pro’s remote has a velvety texture on the buttons, and though the casing is plastic, it feels great in the hand—I actually enjoy fidgeting with it.
Hisense’s brightness really holds up. With the lights on at night or the curtains open during the day, the image remains visible, though the colors fade slightly. When projecting side by side with the Dangbei D7X Pro under standard brightness, the M2 Pro is clearly brighter. Watching the M2 Pro feels more relaxing on the eyes, while the D7X Pro requires more effort to focus—I suspect that’s due to the brightness difference. Once the lights are on, the D7X Pro dims further, making it even harder to watch comfortably.
I resized both the Vidda and Dangbei projections to roughly the same size for comparison. The D7X Pro still looks dimmer than the M2 Pro. The left side shows the Dangbei image, and the right side shows the Vidda—see for yourself.
At first, I couldn’t find the eye-protection feature on the Vidda. Unlike the Dangbei D7X Pro, the M2 Pro doesn’t have auto-start protection—you need to enable it manually. Once it’s on, the detection is impressively sensitive. Even the slightest obstruction triggers the screen to turn off and a voice alert says, “Please step back.” The image automatically resumes after about ten seconds.
Finally, let’s talk about the image modes—this part is highly subjective, but it’s also the main reason I decided to return it. The “Big Eye” image mode offers multiple brightness and color options, though adjustments take a moment to register. When using AI Image Mode, brightness can’t be manually changed.
The very first time I saw the M2 Pro’s home screen, my eyes felt uncomfortable. The dark red background was harsh—after a few glances, the text blurred and doubled. Actor faces were indistinct, features overlapping. Adjusting brightness and screen size didn’t help.
Switching to the “Supernova” mode made the colors greener, but my eyes immediately relaxed. However, during video playback, for better visual effect, I switched back to AI mode. That’s when I started noticing color fringing, especially during scene transitions, quick movements, or changes between light and dark. Characters’ eyes often appeared unusually bright—almost unnervingly artificial.
I genuinely liked the M2 Pro and didn’t want to give up on it. After a night’s rest, I tried again—but my eyes reacted instantly. Within minutes, the ghosting got worse, and after about twenty minutes, my eyes were sore. Before returning it, I gave it one last shot, but it was clear my eyes simply couldn’t adjust.
Dangbei D7X Pro
Startup noise is about the same as the Vidda. Once the screen appears, it automatically adjusts within seconds. Moving the projector also triggers instant recalibration. The D7X Pro adds optical zoom (1–1.3× range), and horizontal shift adjustment is limited.
After zooming or shifting, you’ll need to manually trigger auto-keystone and auto-focus again. Once adjusted, both the gray base layer and colored projection appear properly aligned. The bottom edge tilts slightly downward—while the Vidda’s slightly tilts upward. Perhaps it’s just an optical illusion? As for dust, it’s practically unavoidable on Earth. Every projector I tested had some visible particles under strong light, though most can self-clean using internal fans.
In the comparison photos: the left image shows the Vidda, and the right shows the Dangbei. The Vidda unit, judging from its packaging, seemed like a refurbished one, though its lens was cleaner. The Dangbei, a first-release unit, had more visible dust—but nothing that affected performance.
At first, I mistook the Dangbei remote for the one that came with the Xiaomi projector. I spent quite a while searching before realizing I had mixed them up. The Dangbei remote is made entirely of white plastic, and the button feel is fairly average. On the right edge, there are two buttons—a red one for adjusting short focus and a white one for quick settings. The side buttons are quite small and a bit uncomfortable to press.
As for the voice assistant, Dangbei allows you to change both the voice and character appearance, which feels a bit like opening a mystery box—you never quite know what you’ll get. Sometimes it can open the USB drive or system settings; other times, it can’t. However, it always manages to open third-party apps. Overall, it feels like Dangbei still has plenty of room to improve its smart interaction experience.
Usage Modes in the D7X Pro
The D7X Pro offers four usage modes: Standard (for everyday projection), Kids, Elderly, and Camping. The Standard mode needs no explanation—it covers the basics well. The other three are both aesthetic and practical, clearly designed with specific user needs in mind.
In the default startup mode, the D7X Pro’s screen brightness is set to 10. Dangbei’s brightness can be pushed slightly beyond that—“10+.” The change in brightness itself is moderate, but to the naked eye, the overall tone becomes noticeably warmer, and the noise level increases as well. The image below shows how the projection looks at different brightness levels on a cloudy day, with the curtain opened about 15 cm.
Using AI for image adjustment—called “Picture Master” in Dangbei—produces slightly blurred text when viewing static content, but it’s not overly harsh on the eyes. When watching dynamic videos, my eyes can stay relatively relaxed. Of course, blinking or switching scenes still brings out color fringing, a common issue with triple-laser projectors, but after testing several models, I’ve come to accept it.
There’s also a special “Office” mode, which makes the screen easier on the eyes, but the fan noise becomes noticeably louder. The “Performance” mode doesn’t seem to change much in picture quality, yet it’s also quite noisy. A fun detail: whenever you switch image modes on the D7X Pro, the screen briefly turns black before displaying again—it’s a bit like the “palette-cleansing water break” in a cooking show.
Comparing the Vidda M2 Pro and Dangbei D7X Pro, my main subjective impression is that Dangbei’s colors are less red and less striking than Hisense’s. While projecting with Dangbei, the characters’ eyes in the videos no longer glow excessively—they look more natural, closer to what you’d see on a regular monitor. I can also clearly read the subtitles without glowing edges. Perhaps Dangbei’s color tuning leans toward softness, avoiding overly high brightness or contrast.
Of course, with a 0.39-inch chip versus Vidda’s 0.47-inch, the pixel grid is still relatively larger. At a 1–2 meter viewing distance, the pixel structure is visible on static images, but during video playback—especially high-resolution ones—it’s barely noticeable.
Below are close-up shots of the pixel grid from Vidda, Dangbei, and XGIMI, all taken right against the wall for comparison.
After startup, the Dangbei’s noise level is just slightly higher than the Vidda’s—the difference is minimal. Once playback begins, you can only hear the video audio. The ventilation outlet is located on the back of the unit, featuring a large grille design. After about two hours of use, the plastic casing feels gently warm to the touch, and the air coming out the back is noticeably warm. Overall, the heat dissipation is quite good.
Dangbei recognizes USB drives quickly. Both the app store and USB drives allow easy installation of third-party software, and installation speed is fast. Videos played from the USB drive run smoothly with clear picture quality. When streaming from Baidu Netdisk, this time I remembered to adjust the resolution—only 4K MKV files failed to play properly, while all others worked fine. The poor network connection (I was using a mobile hotspot) made it possible to stream 1080p smoothly, but 2K and 4K were heavily lagging.
When connecting a computer via HDMI, the laptop’s resolution is likely 2.8K, while the projector is capped at 2160p. Using mobile casting to play videos from Baidu Netdisk maxes out at 1080p. Under the same network, both methods are quite smooth. Once the HDMI connection is active, adjustments can only be made on the connected device—so far, I haven’t figured out all the settings yet.
XGIMI Z9X
I’ve seen some comments claiming that the Dangbei D7X Pro is OEM-manufactured by XGIMI, though I can’t confirm it. However, the Z9X shares many similarities with the D7X Pro—once in hand, even the packaging design, startup process, automatic eye protection, image scaling, and lens shift all give me a strong sense of déjà vu—“as if the two are cut from the same cloth.”
The XGIMI Z9X emphasizes portability—its plastic body and cube-shaped design make it perfect for those who like to “grab and go.” Of course, there’s a trade-off: prioritizing portability means a smaller casing, and with a 0.39-inch chip, its brightness capacity is inherently limited. Higher brightness leads to higher heat output, so XGIMI must strike a balance between brightness, cooling, and the compact shell.At the default brightness setting, even though both the Z9X and the Dangbei D7X Pro are rated at 1300 lumens, I feel that the Z9X appears slightly dimmer in real use.
The remote control matches the projector’s creamy beige color and includes dedicated buttons for Aurora TV, Bilibili, Atmosphere Mode, and Resource Shortcut, along with a customizable button. Unlike other remotes with sliding battery covers, the Z9X’s cover must be popped open to insert the batteries.
The main interface of the XGIMI Z9X is a deep blue, and the moment I saw it, the only thing that came to mind was Monkey King’s famous line: “My eyes! Ah, my eyes!” Wearing glasses, I found the Z9X even more visually straining than the Vidda M2 Pro. The characters on screen looked as if their souls had left their bodies, surrounded by layers of ghosting, and the text was practically unreadable. If the M2 Pro leans toward red, then the Z9X feels overwhelmingly blue to me.
I tried changing the background color of the main screen and adjusting brightness, but nothing helped. There was no “Image Mode” option—only a “Style Filter” feature, which works like smartphone filters. Honestly, I couldn’t quite figure out the purpose of this design choice.
Feeling completely overwhelmed, I suddenly thought of taking a photo through my eyeglass lens to show my friends just how damaging laser projection can be for people who wear glasses. In the images, from left to right, the greater the lens tilt, the more pronounced the ghosting becomes. What I see with my own eyes is close to Image 2, but the longer I watch, the closer it feels to Image 3.
XGIMI Z9X Kids Mode:
Using voice control to download third-party apps or open videos only returned responses like “Sorry…” accompanied by a black doughnut-shaped icon. The voice itself sounded mechanical and stiff. The built-in app store does include major third-party apps, but downloading and installation are noticeably slow.
The XGIMI Z9X recognized the U disk quickly, but it couldn’t display Baidu Netdisk. For APK packages, according to other users’ reviews, file extensions may need to be modified before installation. Overall, manual installation of third-party software isn’t very convenient.
Testing several key video scenes from the U disk, my main impression was that XGIMI’s color tone felt dim, and everything looked slightly gray and hazy. Playing Baidu Netdisk videos, 4K MKV files still failed to run, and even at 2K and 4K resolutions, playback was quite choppy.
The left image shows the effect when photographing a completely black screen, while the right image is a screenshot from a movie — the drum in the scene should be a beautiful, glossy copper, yet here it appears dull and grayish.
I only used the XGIMI Z9X for about half an hour before turning it off. The machine noise wasn’t loud, but since the runtime was short, the heat dissipation data isn’t meaningful enough to draw conclusions.
Conclusion
These days, a 4K projector costs a bit over 3,000 RMB, about the same as a four-door refrigerator. As an experience-based purchase, it’s not exactly a small expense. I’m highly myopic, and since projection effects are greatly affected by lenses, I have to see them with my own eyes.
After testing four projectors at my own expense, I realized that online reviews focus too much on specs. In real-world use, beyond how your eyes perceive color and ears sense sound, there are other factors—system smoothness, third-party app compatibility, and how you’re actually watching: via external storage (U disk, hard drive, laptop), a self-built NAS, or purely online streaming (apps, screen casting, etc.). If any part of that chain fails, it can affect the viewing experience.
In the end, I kept the Dangbei D7X Pro — the only projector that didn’t make my eyes hurt and one that ran smoothly enough for daily use.
After days of tinkering, with each machine taking one to two hours just to test and tune, there was one night I finished watching and my eyes burned so badly I couldn’t open them, even tearing up uncontrollably. So, to avoid your projector becoming a dust collector, once you’ve decided on a product, it’s best to test it in person or buy online with a 7-day return policy. If you’re spending the money, make sure the experience is worth it.
General Recommendations (for reference only)
Xiaoming V1 Ultra — Under 2,000 RMB for 4K; both price and specs are excellent. If you can ceiling-mount it and turn up the sound, the noise and side heat issues are much less noticeable. Lamp projectors are also more comfortable for nearsighted or light-sensitive users. If you’re on a tight budget but want a good viewing experience, get a 70–80″ TV for daytime use and a projector for 100″+ movies at night — Xiaoming is a solid choice.
For triple-laser projectors, if you’re not nearsighted, the Vidda M2 Pro is the top pick — strong hardware, image quality, and system performance. If you are nearsighted, buy and test both the Vidda M2 Pro and the Dangbei D7X Pro, or any model you’re considering, and decide after real use. If you just want 4K on a budget, go for the XGIMI Z9X.
Some Reflections
The first three projectors arrived around the same time. I returned the Xiaoming first — there wasn’t enough space at home. I struggled between Vidda M2 Pro and Dangbei D7X Pro for a while before returning the Vidda. I really wanted to understand why I couldn’t watch the Vidda comfortably. My assumption was that the difference lay in brightness and color management — the Vidda appeared brighter and redder, and even the photos came out noticeably redder.
The Dangbei D7X Pro and XGIMI Z9X have very similar specs. While testing the Z9X, I noticed something odd — with my phone camera open, colorful light bands were spinning across the floor tiles, though they were invisible to the naked eye. So, I recorded the same video scene on both projectors to compare their light band behavior.
My impression was that Dangbei’s red, yellow, and blue light bands rotated slightly slower, and its bands were a bit wider. On static screens, the bands on Dangbei barely moved, or didn’t move at all. I suspect that the width and speed of these light bands may be key factors affecting visual comfort.
Fun Guessing Game
While organizing photos, I noticed only three devices captured the same scene. You can compare the results yourself.
Just a heads-up: due to factors like projectors, phone cameras, and different display devices, everyone’s perception may vary. To each their own—pick the one you like best.
Unlike last year’s trip to Inner Mongolia, I didn’t experience any sort of “post-travel withdrawal” this time. I got home at half past midnight, immediately started doing laundry, spent almost the entire next day unpacking, hosted a spontaneous hairy crab dinner that night, and by the following day I was fully back in work mode — the very definition of a high-energy traveler.
I even thought maybe “the call of the road” no longer stirred me the way it used to. But one day, as I passed by an outdoor billboard, the mountains in the photo suddenly overlapped with my memories — and I realized I’ll never lose my longing for nature, or my curiosity for the unknown. I’ll always crave that feeling of being on the road.
This National Day trip to Gannan and Northwestern Sichuan was another reunion of our “Autumn Chasers” — the same crew from last year’s Inner Mongolia adventure. Before departure, when I asked around who wanted to join, Ray promised it would be a chill, low-altitude trip. But in reality, our daily drives averaged five hours, and several days were spent at nearly 4,000 meters above sea level. I’m not sure if they regretted saying yes — but at this rate, I’m pretty sure we’ll eventually run out of friends willing to come along.
DAY 1 Chengdu → Maerkang
To avoid the crowds, we set off two days early. After landing in Chengdu, we picked up our rental — a Wenjie M7 — and hit the road toward Maerkang. Ray kept saying how much smoother it drove compared to the Tank 300. Along the way, the scenery shifted: first pines and cypresses, then ginkgo and willow trees, and suddenly bursts of goldenrain trees in full bloom — a lively splash of red amidst the green.
The road to Aba was tougher than the ones in Xinjiang. Dozens of tunnels stretched endlessly ahead, and we never knew when the last one would end — or what kind of sky awaited us on the other side: mist and drizzle, or clear and brilliant blue. Yet each time we emerged, the sight of mountains shrouded in drifting clouds made it all worth it.
By the roadside, cosmos flowers swayed freely in the wind stirred up by passing cars. As we climbed higher, autumn began to take hold — yellow and red leaves flickering among the green, the prelude to a forest painted in color. When we passed through Wenchuan, the car’s playlist randomly played “Wish Love No Worries”, and as the soft melody flowed, a wild openness seemed to bloom inside me.
Arriving in Maerkang, we were immediately struck by the sky — an impossibly vivid blue, both bright and deep. No matter how I adjusted my camera settings, the sky always looked overexposed, as if it were shining just a little too brilliantly for the lens to contain.
Maerkang is the capital of Aba Prefecture — and also the hometown setting of the TV drama Dust Settles. From an aerial view, the city stretches along a river valley flanked by mountain ridges on both sides, its streets winding gently with the flow of the water. Wisps of mist drift between the peaks like soft gauze, wrapping the small city in a tender haze. We decided to visit the Xisuo Tibetan Village first. On the way, we passed the Aba SWAT station — a few officers were jogging shirtless nearby, sweat glistening on their muscles under the sun… and, well, I couldn’t help but steal a few extra glances.
Xisuo Village is known as the “living fossil” of the Jiarong Tibetan settlements. Its charm lies in rows of traditional stone houses stacked along the hillside, connected by narrow stone steps that climb upward in a scattered rhythm, while the Suomo River flows quietly at the foot of the village.
A cute orange cat suddenly appeared and ended up leading us through the entire village — past rugged stone walls stacked from slate, vividly painted wooden doors and windows with intricate patterns, and little gardens blooming in front of every home. Even in the quiet corners, wildflowers grew freely. The village isn’t large, not much different in size from many old towns we’ve visited, but the atmosphere here feels truly unhurried and serene.
DAY 2 Maerkang – Seda
After spending one night acclimating, we set off toward Seda, where the altitude climbs even higher. Along National Highway 548, the navigation voice suddenly announced, “You’ve entered a zebra crossing.” I was confused — how could there be a zebra crossing in such a remote area? Then I looked up and realized: ah, it’s the county of Banma — “zebra” in Chinese, literally!
That’s the joy of a road trip. I often check the map to see all the places we’ve passed through. Even if I don’t remember their names later, their landscapes blend together in my memory, forming an abstract image — one that stirs up memories of other journeys and distant places.
The scenery along the way was stunning — the kind of deep blue sky and bright white clouds unique to the plateau, with clusters of blooming Gesang flowers and mist swirling between the mountains. At the time, I didn’t realize this breathtaking view would become an everyday sight for the rest of the trip. Driving through valleys and grasslands, the mountain slopes on both sides looked as if they were wrapped in fleece — dotted with clusters of shrubs that seemed both fluffy and prickly. As someone who never gets tired of photographing animals, I unlocked a new “species” this time — yaks, massive in size yet surprisingly nimble, almost dog-like when they run. We even came across wild monkeys that would swarm the cars whenever someone stopped, clinging to windows and tugging at the doors.
We arrived at Dongga Monastery just as the light softened into its most gentle hue. Meaning “White Conch,” the monastery stands quietly in the mountains, facing an endless stretch of open grassland.
When we arrived, there wasn’t another soul in sight. Sunbeams fell on the eaves, scattering into shimmering gold, flowing like water down the outer walls of the building, casting a beautiful interplay of light and shadow. The stillness of the moment gave the monastery an almost divine aura. The weather shifted quickly — moments ago, a faint moon hung in the sky, and soon after, thick dark clouds rolled in. A flock of black birds circled above the temple roof, while a faint rainbow arched across the distant grassland.
At the foot of the mountain, beside a long prayer corridor, stood a small house. A few children called out “Hello!” from afar, but when I walked closer, they shyly hid behind the doorway. Their mother flashed a cheerful peace sign just as she entered my frame.
I don’t know why, but I remember that house and that country road vividly — the children playing ball at the doorstep, a monk riding past on a motorcycle and casually joining their game. On the other side stretched a long earthen wall, and the blue sky and white clouds were mirrored in the puddles along the roadside. Occasionally, a passing car would stir up a cloud of dust. Watching from afar, I felt a strange sense of calm — a raw, unpolished beauty in everyday life.
DAY 3 Seda – Aba County
Because of the National Day holiday, the town had limited bus service to Larung Gar Buddhist Academy — only four departures a day — and the only one that fit our schedule left at 7 a.m. The pink dawn had barely faded when we set out, frost still glistening on the mountain road. The moment we stepped off the bus, we were greeted by a breathtaking sea of clouds.
Larung Gar had always been a place I longed to see since my student days — its remoteness and religious mystique gave it an almost mythical quality, like how Lijiang or Tibet once existed in the imagination of every romantic soul as a place to “cleanse one’s spirit.” But standing here now, I realized how different it was from what I had once imagined. Part of that change came from within me, and part from how the place itself had transformed.
Today, visitors can no longer freely enter the residential quarters or alleyways, so the officially allotted 90-minute visit feels perfectly sufficient.
Though the experience wasn’t quite what I had imagined, the moment I stepped onto the Mandala platform, I was deeply moved. Monks were circumambulating in the mist, turning their prayer wheels under the soft morning light. The sun’s rays glinted off the golden rooftops, bathing everything in a warm, sacred glow. For a brief moment, it all felt surreal — dreamlike, almost beyond reality.
From the nearby viewing platform, I could see the rows upon rows of crimson monk dwellings, stacked like building blocks along the mountainside, with thin wisps of incense smoke drifting lazily into the sky. It was easy to believe, in that instant, that this red kingdom in the sea of clouds was truly the dwelling place of the divine.
The next stop was Aba County. The weather along the way shifted constantly — clouds and sunlight playing chase across the mountains. From afar, the white stones scattered down the slopes looked like shards of unmelted ice, and I took countless photos before realizing, as we got closer, how mistaken I was. Passing through a stretch of steep pine forest, I could’ve sworn I was somewhere in Xinjiang — if not for the occasional Tibetan villages and white stupas dotting the landscape.
By dusk, we happened to pass the sacred mountain of Nianbaoyuze. There wasn’t time to drive in deeper — the most beautiful golden hour had already arrived. The sunlight poured over the meadows and streams, the distant mountains sharp and austere, a pale moon already rising in the sky. In that vast stillness, both the landscape and we ourselves fell silent. In that moment, I truly felt — sometimes we live just for moments like this. Of course, that poetic serenity didn’t stop us from, well, taking a quick wild pee under the fading light.
During the last stretch of the drive, I was still lost in my thoughts about how wonderful the day had been — only to have the rear right tire puncture, a full 30 kilometers before reaching the county town. The road ahead and behind was utterly desolate. We finally managed to stop near a lonely little car wash and called for roadside assistance. Self-driving lesson learned: always check that your rental has a spare tire. We gave the car wash owner 100 yuan to drive three of us to the hotel, while Ray stayed behind waiting for the rescue truck. It took until 12:30 a.m. before everything was finally sorted out.
DAY 4 Aba County – Lianbaoyuze – Ruoergai County
Lianbaoyuze sits on the other side of the same mountain range as Nianbaoyuze — sharing that same austere, almost forbidding beauty.
Naively, I thought that by this midpoint in our loop, the main crowds wouldn’t have arrived yet. But when we reached the entrance around 10 a.m., there were already more than 800 cars lined up. So, we switched to the park’s shuttle bus to continue in.
Lianbaoyuze feels like a massive geological park, packed with surreal glacial formations. The sharp folds and jagged ridges of the mountains tell stories of billions of years of change. Unlike any landscape I’d seen before, it feels more primitive, raw — like stepping into an otherworldly fantasy.
And right at the center of it all lies Lake Zhagacuo, shimmering faintly under shifting clouds. The light constantly dances — bright one moment, dim the next — making the lake seem alive, breathing with the rhythm of the mountains.
At the 4,520-meter viewing platform, a long wooden walkway stretches ahead, flanked by massive boulders. Ray and I walked all the way to the end, light-footed even at this altitude. We couldn’t help feeling smug — maybe we’re built for high-altitude travel after all; Tibet might not be so daunting next time!
Before leaving, we took one last look at Lake Zhagacuo. Up close, the cliffs towering above the water felt even more magnificent. But what I loved most was the grassy shoreline — the cold, distant mountains, the thick blades of grass, and the countless mani stones stacked across the rocks. The traces of human presence hadn’t erased its wildness or purity.
The road toward Gannan was even more beautiful than the days before. Rain, hail, and sunshine traded places in quick succession: at times, dark clouds pressed down from above, yet in the rearview mirror was a stretch of bright blue sky; at others, beams of light spilled between mountain folds, making it look as if the hills themselves were glowing. We were lucky enough to spot another rainbow, faintly appearing over the lakes and slopes. And the Tibetan sheep — their spiral horns and thick coats — were everywhere. Thanks to the region’s climate, Gannan’s mutton is famously tender and flavorful.
As we fully entered Gannan’s borders, vast wetlands and meadows began to unfurl before us, and suddenly, the world opened wide. It was another unforgettable sunset — the mountains glowing gold, their reflections rippling in the marsh pools. The wetland shimmered in the evening light, turning the whole landscape golden, almost luminescent. It struck me then — the view I missed last year in Erguna had found me here instead. Still, I couldn’t help feeling a little wistful — so close to such beauty, yet unable to walk right into it.
As we fully entered the Gannan region, vast stretches of wetlands and grasslands slowly unfolded before us, and suddenly the view opened wide. It was another sunset I’ll never forget — the golden light of the sun dipped across the mountains, their reflections shimmering in the ponds scattered across the plains. In the evening glow, the wetlands turned even richer in color, the whole world bathed in a golden light, as if it were glowing from within. I hadn’t expected to find here the scenery I missed last year in Erguna. Yet even as I admired it
I couldn’t help but feel a trace of regret — to be so close to something so beautiful, and still not be able to walk right into it. As we drove further, a pale moon rose above the horizon, hazy like a wisp of smoke. I watched as it slowly grew bright and clear. By the time we parked the car, the last of the sunset had faded, and right before us stood Niangma Monastery and the world’s largest prayer wheel, framed by the mist-wrapped mountains behind them.
DAY 5 Ruoergai County – Labrang Monastery
Congratulations to us — we discovered a new species! On a hillside full of tiny burrows, we spotted pika! Those little creatures are irresistibly cute, and the moment you see one, you just know what it is — unmistakably mouse-like and rabbit-like all at once.
After nearly five hours of driving, we arrived at Labrang Monastery, in a county with an equally beautiful name — Xiahe. For the past few months, Ray had been reading books on Tibetan Buddhism, and Labrang was one of the places he’d longed to visit. Often called the “World’s Academy of Tibetan Studies,” it wasn’t quite the secluded sanctuary I’d imagined. Instead, it felt like a living, breathing monastic campus — most non-restricted areas were open to visitors, and right outside the entrance stood a bustling food street, just like the ones near any university. Tourists and monks brushed past each other in the same alleys, where the sacred and the worldly coexist in the most natural way.
I love this photo so much. I had it printed while we were still on the road, and it arrived just in time for me to hang it up when we got home.
In the late afternoon, around 5 p.m., the monks gathered for their daily debating session. Before it began, dozens of them stood in a circle, clapping their hands in rhythm and chanting in unison, as the sun dipped behind the mountains. From where I stood, looking against the light, they seemed surrounded by a divine glow. When I stepped out of the main hall, the crisp air carried away the heavy, creamy scent of butter tea. Along the 3-kilometer prayer corridor, devoted pilgrims continued their rounds, one after another, tireless in their faith.
I was captivated by the colors and symmetry of the architecture here. The monks’ quarters were built with dark yellow rammed-earth walls, while the combination of red brick bases and white walls was reserved for higher temples. Every black-framed, carved wooden window was draped with bright, fluttering fabric curtains that rippled softly in the mountain breeze.
I had thought about trying on a set of traditional Tibetan clothes here, but those ornate, overdone tourist costumes couldn’t compare to the way my own outfit blended effortlessly into this place. Sometimes I wonder if, somewhere deep in my genes, there’s a trace of this vast and ancient northwest land.
DAY 6: Labrang Monastery – Rock’s Road – Zhagana
The route we took today, known as Rock’s Road, winds through forests, grasslands, gorges, and snow-capped mountains—earning it the nickname “Little Duku Highway.” As the mountain road climbed higher and higher, the scenery outside began to take on that vast, rugged “Xinjiang” kind of grandeur.
One thing that really struck me on this road trip: the whole northwest Sichuan–Gannan region feels like an endless chain of Zheduo Mountains. Every time we crossed a pass, we had to twist and turn through dozens—sometimes hundreds—of bends. It’s the only part that wasn’t exactly pleasant.
As the altitude approached 4,000 meters, we found ourselves driving inside the clouds. It was a surreal experience—the surroundings veiled in mist, as if suspended between dreaming and waking. Descending into the valley, we saw just a few scattered homes across a vast meadow, with a winding little river meandering through.
Hidden deep among the mountains, Zhagana is another world of wonder. In Tibetan, its name means “stone box,” and it’s made up of four villages encircled by towering rock walls that act as natural fortresses. When we arrived, the entire place was still wrapped in fog—so we turned and headed deeper into the mountains.
Runwu Gorge is the top hiking spot here, and it truly lives up to its reputation. The canyon roars with rushing water, its air thick with moisture, and a wooden trail winds through the forest toward a waterfall hidden in the depths. Every glance back offers another stunning view.
The walk itself was easygoing, surrounded by lush plants and tiny moss-covered landscapes. I couldn’t help wishing there were a botanist with us—but even without knowing the names, we still marveled at every detail. Soon we reached the narrowest part of the canyon, where the cliffs pressed in so close that it felt like walking through the line “at first so narrow, just enough for one person to pass.” Beyond the walls roared a massive waterfall, its spray turning into a fine rain. We stopped there, drenched and awestruck.
When we emerged from the gorge, the weather had worsened, so we headed straight back to our guesthouse. It happened to be Ray’s birthday, yet there we were—huddled in a pitch-dark courtyard, eating self-heating hotpot, laughing at the absurdity of it all. The host invited us to see his home: a single open room of about sixty square meters, where the stove and the bed shared the same space. You could wake up and start cooking right away—it felt so cozy, so content.
He told us that most villagers here make a living growing barley, earning very little. Because their village lies lower in the valley, it’s not the top choice for tourists, so even the busy travel season doesn’t last long for them. Nights in the village are cold—so cold it makes you feel a bit desolate—but once you slip under an electric blanket, everything suddenly feels forgivable.
DAY 7: Zhagana – Jiuzhaigou
We wanted to chase a sunrise.
A little after six, when the sky was still dim, we set out for the Dari Viewing Platform. Along the way, bundles of barley were laid out to dry, and the mountains were still shrouded in mist—it felt like walking through Silent Hill. Yet in that chill and fog, there was a strange kind of calm.
I thought, no one could possibly be more eager for the sunrise than us. But when we arrived, the parking lot was already full. We waited, crouched in the cold until 7:30, but the thick fog refused to lift. In the end, we gave up and went next door for a bowl of beef noodles instead.
If it were two years ago, I’d probably be really frustrated. But now, I seem to have learned to accept it. When nature doesn’t wish to welcome you at this moment, there’s simply nothing you can do. Back at the guesthouse, someone was burning sang in the courtyard, and the pines and cypresses behind the house appeared as soft silhouettes in the thick mist. “Just another ordinary day,” I thought. But ordinary is good.
Once we left Zhagana, the weather finally cleared up.The scenery along Jiuruo Road looked a bit like Xinjiang, yet also like Switzerland. Wild sea buckthorn berries grew thick in the forests on both sides, and autumn was painting everything in soft gradients—greens fading to gold, reds flickering among the hills. Once again, we crossed high mountains, driving from the clouds down to the streams at the valley floor.
When the views weren’t particularly stunning, I amused myself by checking the map and navigation. The village names were often simple yet delightful—Old House Village, Lantern-Fixing Village, Buddha Cave, Chicken Slope, Three Pines… Just reading them was enough to imagine a hundred little stories.
By the time we reached Jiuzhaigou, we felt like refugees returning to civilization.We went straight to a restaurant and ordered a steaming pot of yak meat. I love this feeling—the kind that comes after a long day on the road, grabbing quick bites along the way, and then finally sitting down for a hearty dinner. The moment you dig in, all the fatigue melts away. Afterwards, you stroll slowly back to the hotel, bliss maxed out.
Writing this now, I can’t help but think of those post-dinner walks in Dunhuang, Genhe, Kashgar, and Xiahe—heads buzzing with carbs, streetlights casting a soft yellow glow, everyone bundled up against the cold, yet feeling only the gentleness of the night.
DAY 8: Jiuzhaigou
Here, we once again felt the full force of peak-season crowds. But Jiuzhaigou’s management is truly impressive—“coordinating forty thousand people in fifteen minutes” isn’t much of an exaggeration.
The scenic area is laid out in a Y-shape. Many travel guides mention that the park buses stop at Nuorilang, the midpoint of the three routes—but that’s not entirely accurate. Each bus adjusts its route based on crowd flow. For example, we were first dropped off near Shuzheng Waterfall, though transferring between lines was thankfully quite easy.
Having experienced the near-emptiness of Xiaoqikong, my first impression of Jiuzhaigou wasn’t exactly awe.The turquoise lakes and rushing waterfalls—I’d seen them before. You can never truly relive that “first glance” feeling, and perhaps that’s its own kind of melancholy.
More than pure water, I prefer landscapes where mountains and rivers intertwine with depth and layers. The 3-kilometer hike through the Primeval Forest on the right route was exactly what I’d been hoping for.
Walking toward Caohai, the path was lined with dense spruce forests.A soft layer of lichen blanketed the ground, with moss and mushrooms everywhere—my eyes didn’t know where to land. In the latter half of the trail, vast stretches of aquatic meadows opened up, lush and green. Looking back, mist floated between the mountains—it was as if we had wandered into an autumn fairytale.
And the scenery beneath the water was even more enchanting. The crystal-clear lake blurred the boundary between above and below: the swaying water grass formed an underwater forest, the feathery plants looked like fuzzy transmission towers rising among mountains, and the fallen trees resembled quiet paths winding through a submerged woodland. It was like a mirrored world, peacefully existing beneath the untouched surface.
The second most beautiful spot was Wuhua Lake.Even though it was crowded with people along the banks, the beauty of it remained untouched. It felt as if all the colors of Jiuzhaigou’s lakes had gathered here. Fallen leaves and tiny fish occasionally stirred gentle ripples across the surface. Because of the calcium deposits that separate layers of the lake, fallen logs never rot—instead, they seem to bloom with a new kind of vitality underwater. A family of otters lives by the shore, and if you’re lucky, you might just catch them out for a little “swim.”
On the left route lies the most vividly colored lake of all—Wuse Lake.Its blue is mysterious and profound, but before you can see it, you’ll first have to spend a good ten minutes staring at a sea of bobbing heads.
We didn’t manage to see both routes in full, and before we knew it, the day was over. The planned light hike around Reed Lake never happened. I once thought I’d never return here, yet while sorting through the photos from these days, I finally understood Jiuzhaigou’s beauty. If there’s ever a next time, I hope it’ll be during the season of autumn colors.
DAY 9: Jiuzhaigou – Sanxingdui – Chengdu
We caught the newly opened Jiumian Expressway, which made the journey back to Chengdu much shorter. On the way, we listened to episode 880 of The Big Talk, all about Sanxingdui. A few hours later, the stories we had just heard—those ancient imaginations—appeared right before my eyes.
The three hours we set aside were barely enough for a quick walk-through, yet the Sanxingdui civilization is so unique and avant-garde that every detail feels fascinating.
Beyond the iconic sacred trees, towering figures, and countless masks, their pottery, wine vessels, ornaments, and everyday objects all reveal an extraordinary sense of beauty. The intricate bronze altars—layer upon layer, stacked together like pieces of Lego—are especially stunning, works of such precision that you can’t help but linger.
This was our fourth road trip together, and both Ray and I have become utterly addicted to this way of traveling—so much so that we instinctively reserve every long holiday for it. Many people describe this kind of trip as “your eyes in heaven, your body in hell,” but I’ve never felt that way. (Perhaps that’s because I’m not the one driving.)
For me, this is one of the rare moments when I can completely detach from a life wrapped in anxiety. There’s no need to worry about anyone or anything—the only things that matter are the day’s weather and the condition of the road. Life becomes beautifully simple: a hot meal and a warm shower are enough to bring you instantly back to yourself. The scenery, too, never fails to surprise—but more often than not, it’s not the planned destinations that move you. It’s those unrepeatable, unexpected moments along the way.
Sometimes I think back to the very first article I ever posted on my public account. The cover photo was of the Kanglex Grasslands—it used to be my favorite photo, without question. Looking at it now, it feels rather ordinary. Back then, I didn’t know that future me would go on to see landscapes far more breathtaking. It might sound like I’m too easily satisfied, but perhaps that’s exactly why I now feel so much more joy—and gratitude.
As Garmin’s best-selling product lines, the 5 Series and 8 Series have long been the benchmarks in the mid-to-high-end cycling computer market. Whether you’re a beginner, a casual rider, a data enthusiast, or a hardcore training rider, these two lines are always safe choices.
Since the release of the 540/840, there have been almost no functional differences among the 10, 8, and 5 Series. The decision now mainly comes down to screen size and interaction method — much like choosing an iPhone. Go for the 1050 if you want a large display, the 850 for a smaller touchscreen, and the 550 if you prefer physical buttons. As a 1050 user, I could more or less predict what the 850 and 550 would look like before their official release. I was mentally prepared for shorter battery life, but still hoped the 850 might surprise me somehow.
Unfortunately, disappointment followed. Battery life has dropped to 12 hours, while the weight increased by nearly 30 grams compared to the 840, now reaching a hefty 113 grams — a bit heavy in the hand. The only notable hardware additions are the expected LCD screen, 64GB of internal storage, a built-in speaker and bell, and a new 5Hz GPS module.
A Step Back in Hardware
How should I put it — understandable, but disappointing.
I understand Garmin’s decision. With the decline of the semi-reflective display supply chain, and with more beginners and casual riders preferring brighter, more colorful screens, Garmin had little choice but to sacrifice battery life and switch its entire product line to LCD displays.
But as an industry leader, I still expected at least 16 hours of battery life. It’s like how this year’s iPhone Air, despite its ultra-thin design and significantly smaller battery, still managed to match the iPhone 17’s endurance by improving power efficiency — that’s what leadership should look like.
To be fair, the 850’s 12-hour battery life is sufficient for most people. Looking back at over a decade of my own cycling logs, I found only one ride exceeding 10 hours — a 200-kilometer trip.
For 99% of riders, 10 hours is more than enough. For ultra-distance cyclists, though, there are a few options: attach an external battery mount to the computer, stock up on an 840 while it’s still on clearance and use it until the 860 arrives, or simply switch to power-saving mode to stretch it to around 36 hours.
Unlike the Hammerhead, which suffers from inconsistent battery life for similar reasons, the 850’s 12-hour endurance is solid and reliable — it doesn’t fluctuate dynamically. I paired it with a power meter and heart rate strap, turned on navigation, segments, Climb Pro, and various alerts. After a 6-hour ride, the battery dropped by 51%. Based on that, the projected 12-hour runtime checks out.The biggest issue with a 12-hour battery life is that it leaves little safety margin — if you end up on an unplanned long ride, you might not have enough charge to finish.
A Solid 6 Hours of Riding Uses About 50% Battery Each Time
So why did Garmin take the risk of cutting battery life in half? Besides supply chain constraints, the real reason is simple — the LCD display is just too good to resist.
The LCD screen is one of those things you have to experience to truly understand — and once you do, there’s no going back. Compared to the old semi-reflective screens, the difference is obvious to the naked eye: sharper resolution, smoother touch response, and a far more vibrant visual experience. The improvement feels as dramatic as the leap from early smartphones to the iPhone’s screen back in its day.
So why did Garmin take the risk of halving endurance? Aside from supply chain constraints, the other reason is simple: the LCD screen is just that good.
The LCD display is one of those things you don’t truly appreciate until you’ve used it — and once you do, there’s no going back. The difference from the old semi-reflective screen is obvious to the naked eye: higher resolution, faster touch response, and an overall smoother experience — much like the leap between the original iPhone and its contemporaries back in the day.
Comparison: Semi-Reflective Screen, LCD Screen, and Matte Semi-Reflective Screen
With the new display, the map page resolution has improved significantly — streets that previously required zooming in to see clearly are now visible within a much wider view. For users who rely heavily on map navigation, this is a noticeable upgrade.
The difference is especially striking on the map interface.
That said, it’s still best to visit a bike shop and see the screen in person before deciding whether to upgrade. Aside from the display, the other notable hardware updates are the new built-in bell and 5Hz GPS. The bell might look like a gimmick at first — but once you use it, it’s genuinely practical.
Ringing a cheerful “ding ding ding” on the road works far better than shouting — a perfect example of Pavlovian reflexes in action. The fact that Wahoo and others quickly followed suit says a lot.
The 5Hz GPS is designed primarily for mountain descents, recording positional data five times per second — five times faster than standard GPS. For road cycling, it doesn’t make a huge difference. Garmin’s GPS performance is already far ahead of competitors — after using Wahoo and Hammerhead devices, you’ll realize their GPS response is a full beat slower; you’ve stopped pedaling, but the computer still shows you moving.
Only Garmin Can Instantly Register a Stop When You Stop Pedaling
That’s something no other brand has quite nailed — when you stop pedaling, the speed reading drops to zero instantly. As for hardware updates, that’s about it — very routine, even a bit dull. The rest of the improvements are all on the software side, much like smartphones today, where everything depends on system updates and added features.
So, what’s new in software then? Honestly, nothing revolutionary — just some nice-to-have refinements.
Smarter Ride Guidance
Garmin first introduced the “Real-Time Stamina” feature on the previous-generation 1040, which allowed riders to dynamically monitor their current endurance and recovery levels. However, the first version only worked in aerobic zones — once you hit anaerobic effort, the reading would collapse completely. On the 850, it’s now noticeably more reliable, and you can genuinely use the data to decide whether it’s time to call a support car — or, as we’d say, summon a Huolala van.
I Figure It Could Probably Handle a 200 km Ride
The “Real-Time Stamina” feature also ties into Power Guidance, another tool introduced in the previous generation. It dynamically adjusts your power targets based on route difficulty and your personal performance capacity, helping you distribute your effort more efficiently — so you don’t blow up on the very first climb.
In the 850, Power Guidance now incorporates real-time stamina data, wind speed, and elevation profiles, making it especially useful for riders competing in demanding events like the Gran Fondo in Yunnan these days. That’s not a ride you can just muscle through — having structured power targets makes things a lot more manageable.
To help prevent complete burnout, the 850 also improves Smart Nutrition Alerts. Instead of relying on fixed timers, it now accounts for your current stamina, route difficulty, and environmental conditions like temperature and humidity to remind you when to drink or refuel.
Experienced cyclists know — if you feel hungry on the bike, it’s already too late. You’re likely dipping into hypoglycemia territory. Perhaps that’s why these new reminders feel a bit aggressive — sometimes it’s telling you to snack before you’ve even broken a sweat. Maybe Garmin is basing this on data from its pro athletes, who admittedly have rather extreme fueling habits that the average rider simply can’t keep up with.
More Ways to Ride Together
When the 1050 launched, Garmin made the Group Ride feature a lot more fun. What used to be a complicated team setup was simplified — now you can just enter a six-digit code on your bike computer to join a group ride. Once in, you can see everyone’s location and speed right on your screen, and even send preset messages to chat with the group.
On the 850, this feature gets another upgrade. Now, you can not only view your teammates’ speed but also their heart rate, power output, and other deeper performance metrics — especially useful for club rides and team training.
The ride leader can easily spot if someone has fallen behind or is about to bonk, and go back to help them out. The only downside is that this full version of the feature is exclusive to the 50-series devices. The 40-series can still form a group, but they won’t see the advanced data.
It’s a bit puzzling, honestly — this kind of social riding feature only gets better the more people use it. So why limit it?
Haven’t Found Any 850 Buddies Yet, But It’s Definitely Fun
I haven’t had the chance to test the group ride features with any friends who own the 850 yet — but it already seems pretty fun. To help riders avoid getting caught in the rain mid-ride, the 850 adds a weather radar map feature that displays rain clouds and wind direction directly on the device. Unfortunately, it’s not particularly well-designed. The feature isn’t integrated into the main map interface but instead buried deep in the drop-down menu. It loads slowly, and the data has a noticeable delay.
If you just want to check wind direction, it’s honestly better to add Garmin’s official Wind Direction Connect IQ data field — it’s surprisingly accurate. And if you’re looking for rainfall forecasts, in Beijing your best bet is to follow Dragon King on social media; elsewhere, you might as well just pull out your phone and check Windy.
Compared with earlier versions, the new weather view adds both rain probability and cloud cover visualization, which is a nice touch — even if it still feels half-baked.
More Advanced Training Features
You might have noticed that most of the updates — both hardware and software — seem to cater more to beginners and casual riders. So, has Garmin abandoned its pro users?
Not really. On one hand, advanced cyclists tend to rely more on professional training platforms like ICU or WKO, and they don’t need simplified training guidance. On the other hand, Garmin has quietly rolled out quite a few new training tools — they just haven’t made a big deal about them.
For instance, the latest Garmin Coach Program is now nearly on par with TrainerRoad, which I used to pay over 1,000 RMB a year for. You choose your training goal and frequency, and Garmin generates a personalized plan based on your current condition. It’s scientifically sound too — for anyone under 4 watts/kg, following this plan is absolutely enough.
There’s also the increasingly accurate training status analysis. My training this year has been pretty inconsistent, yet Garmin correctly analyzed my condition and gave me precise advice on when to rest or push harder. Even the much-criticized FTP detection now aligns almost perfectly with what ICU gives me.
The 850 also introduces two genuinely useful new training tools. One of them is gear ratio distribution analysis, which shows how long and how often you used each gear during a ride. It’s essentially Garmin’s version of SRAM’s similar feature — a nice “patch” for Shimano users.
There’s also a new feature called Time Gates, which lets you set timing checkpoints along a route — essentially segment timers that work in real time. It’s a bit like having multiple live segments, allowing you to compare your performance on each section across different rides. It’s especially useful for loop training or those “Ten Commandments” riders chasing consistent lap improvements. Unfortunately, I haven’t been able to get this feature to work yet. Maybe it’s because I’m using a test unit, or perhaps I haven’t found the right way to enable it — or maybe it’s another casualty of the official map limitations. Either way, I still don’t know how it performs in actual use.
Conclusion
Overall, the Garmin 850 feels more like a mid-cycle refresh — its shortcomings are obvious, but it’s still the most well-rounded head unit on the market. As an industry leader, Garmin seems a bit conservative in terms of true innovation or breakthroughs. The LCD screen upgrade undeniably improves user experience, but the significant drop in battery life is disappointing. Both hardware and software updates are modest, yet Garmin still manages to deliver the best overall execution — and with Connect IQ, any missing feature can be easily filled by third-party apps.
Garmin is increasingly resembling Apple — not just in product planning but also in its cautious, incremental innovation. It continues to lead the industry even while taking small, steady steps. You might complain about the lack of surprises, but when it’s time to buy, it’s still the safest, most reliable choice.
As the cycling tech industry enters a downturn, we may have to get used to these incremental updates. Apple has already set the precedent — two, three, or even four generations between major overhauls might become the norm. Hopefully, the next 60 series brings some real excitement. And perhaps competitors can step up their game a bit too — to push Garmin forward, and keep it from getting too comfortable on its throne.
Multiple departments Issue notice on scientifically protecting children’s hyperopia reserve
FBI investigates the identity of archive.today’s operator
Meta earns 10% of its revenue from scam ads
National health commission issues “negative behavior list” for medical professionals’ online health education
E-commerce sellers use giant tags to prevent “wear-and-return” fraud
Casual rumors worth a glance
Musk’s $1 Trillion Compensation Plan Approved
On November 6, at Tesla’s annual shareholders meeting, 75% of shareholders voted in favor of approving CEO Elon Musk’s compensation package valued at up to $1 trillion. If Musk achieves all the performance targets tied to the plan, his stake in Tesla will increase by 12%, giving him control of roughly one-quarter of the company’s shares.
This compensation plan is linked to Musk’s performance goals for the next decade, during which he will receive no salary or bonuses. To unlock all stock awards, Musk must raise Tesla’s market value sixfold to $8.5 trillion, increase profits by 24 times to $400 billion, and successfully scale up production of robots and autonomous driving subscription services.
The vote was highly controversial. Several shareholder advisory firms had previously recommended voting against the proposal. In response, Tesla’s board launched an active lobbying effort, warning investors that Musk might resign if the plan was rejected. After the result was announced, Musk took the stage to celebrate—dancing alongside the humanoid robot “Optimus.” He reiterated that AI and robotics would significantly boost the global economy, claiming that robots would “eliminate poverty” and describing the Optimus project as a “money printer with no limit.” He also urged shareholders to continue holding Tesla stock.
It is worth noting that Musk did not directly request $1 trillion worth of stock. Instead, he sought 25% of Tesla’s voting rights to maintain his motivation and engagement. However, as Tesla is a publicly traded company, listing rules prevent it from violating the “one share, one vote” principle by granting Musk extra voting power without equivalent economic ownership. Many tech companies have adopted dual-class share structures to consolidate founders’ control, but such frameworks are typically established before going public—something Tesla can no longer emulate. Tesla formed a special committee to design the compensation plan. After careful evaluation, the committee concluded that there was no viable way to grant Musk the level of control he desired without paying an enormous financial cost.
Multiple Departments Issue Notice on Scientifically Protecting Children’s Hyperopia Reserve
Recently, China’s Ministry of Education, the National Health Commission, and the National Disease Control and Prevention Administration jointly issued a notice calling for the scientific protection of children’s hyperopia reserve.
According to the notice, newborns typically have smaller eyeballs and shorter axial lengths, resulting in a physiological hyperopia (farsightedness) of about +2.50 to +3.00 diopters—known as the hyperopia reserve. As children grow and develop, this reserve is gradually consumed, and by around ages 12 to 15, their eyes usually reach an emmetropic (normal vision) state. If a child’s hyperopia reserve falls below the physiological range appropriate for their age, it indicates insufficient hyperopia reserve—an early warning sign for potential myopia.
The notice calls for comprehensive, age-specific measures. For children aged 0–3, the use of electronic devices such as mobile phones and computers should be strictly prohibited. Preschoolers aged 3–6 should avoid exposure to electronic products, and kindergartens must not implement “early primary education” programs. At the primary school level, students should have at least two hours of outdoor activity daily to prevent excessive eye strain. Local health authorities are instructed to guide medical institutions in strengthening public education, promoting appropriate technologies, and providing targeted interventions for children with insufficient hyperopia reserves.
In terms of monitoring and early warning, the notice requires enhanced eye health screenings for children. Refractive screening should be conducted at key ages (e.g., 2, 3, 4 years old) for children aged 0–6 to track hyperopia reserve levels. Primary schools must perform vision screenings twice per semester. For children found to have visual abnormalities or insufficient hyperopia reserves, schools and related institutions must provide early warnings, implement focused interventions, and establish referral mechanisms to guide parents in adopting effective prevention and control measures.
The notice also emphasizes home–school cooperation. Parents are urged to set an example by controlling children’s screen time and ensuring they maintain proper posture while reading and writing.
FBI Investigates the Identity of Archive.today’s Operator
According to a report by 404 Media, the U.S. Federal Bureau of Investigation (FBI) is attempting to uncover the true identity of the operator behind the well-known web archiving site archive.today and its mirror sites. Based on documents published by the site’s official X (Twitter) account, the FBI issued a subpoena on October 30 to the site’s Canadian domain registrar, Tucows, requesting information related to its operator.
The subpoena stated that the request was part of a federal criminal investigation, though it did not specify the alleged offense. The FBI demanded that Tucows provide detailed information about the site’s operator, including the customer’s name, service and billing addresses, payment methods (such as credit card or bank account numbers), IP addresses, internet session logs, and device identifiers (such as IMEI numbers). The subpoena also ordered Tucows not to disclose its existence in order to avoid interfering with the ongoing investigation. A Tucows spokesperson confirmed that the company would comply with lawful procedures but declined to comment further on the specific investigation.
Archive.today, founded in 2012, has saved hundreds of millions of web pages and is widely used to preserve content behind paywalls or pages at risk of being deleted or modified. The site gained prominence during the GamerGate controversy over a decade ago, when users employed it to access and share articles without generating traffic for media outlets targeted by the movement’s boycott. The platform operates in a legal gray area. It uses a modified version of Chrome to capture web pages, automatically bypassing many paywalls on news sites. It employs a large pool of rotating IP addresses, ignores robots.txt restrictions, and refuses deletion requests from original content owners.
Archive.today also functions as a typical “hydra site,” maintaining multiple mirror domains under different top-level domains to evade blocking and censorship.The identity of its operator has long been shrouded in mystery. Many speculate that the site may be run by a highly skilled Russian individual, as its operator once complained in 2022 about a PayPal account closure and mentioned difficulties in receiving payments “through the Iron Curtain.”
Meta Derives 10% of Its Revenue from Scam Ads
According to a Reutersreport citing internal Meta documents, the company internally projected late last year that about 10.1% of its total 2024 revenue—approximately $16 billion—would come from scam and prohibited-product advertisements. Across its platforms, including Facebook, Instagram, and WhatsApp, Meta was said to display roughly 15 billion “high-risk” scam ads to users each day.
The documents reveal that Meta only bans advertisers when its automated systems are at least 95% certain they are engaging in fraudulent activity. If the system’s confidence is lower—but still suspects potential scams—Meta does not block those advertisers; instead, it charges them higher advertising rates. Due to Meta’s personalized recommendation system, users who click on one scam ad are likely to be shown even more scam ads. An internal review admitted that “it is easier to run scam ads on Meta than on Google.”
Meta is aware that the U.S. Securities and Exchange Commission (SEC) is investigating its role in hosting financial scam ads and reportedly views a fine as “inevitable.” The company estimated that penalties could reach up to $1 billion. However, Meta internally believes that since it earns $3.5 billion every six months from these “high legal-risk” ads, such profits would “almost certainly” offset the cost of any regulatory settlements. The documents also show that Meta’s leadership decided to take action only when facing imminent regulatory pressure.
In response to Reuters’ report, a Meta spokesperson described the 10.1% figure as a “rough and overly broad estimate,” claiming that the actual number was later determined to be lower, but declined to provide updated data.
National Health Commission Issues “Negative Behavior List” for Medical Professionals’ Online Health Education
On November 7, the General Office of the National Health Commission, together with the Comprehensive Department of the National Administration of Traditional Chinese Medicine and the Comprehensive Department of the National Disease Control and Prevention Administration, issued the Negative Behavior List for Medical Professionals’ Online Health Education (Trial). According to the notice, the move aims to address issues where some medical professionals engage in product promotion, advertising, or unauthorized disclosure of medical information under the guise of health education, damaging the image of the healthcare profession.
The list sets out ten “red lines,” focusing on the following key points: medical professionals must not use health education as a pretext to market or sell pharmaceuticals, health supplements, or wellness courses for profit; must not disclose patients’ personal information or display identifiable images; must not release false or unverified information, exaggerate illnesses or treatment outcomes, or promote so-called “miracle doctors” or “miracle cures.” The list also prohibits misuse of AI, as well as the publication of vulgar, suggestive, or sensational content aimed at generating traffic.
The notice also clarifies the management responsibilities of medical institutions, requiring the establishment of a registration system for health-related online accounts run by medical staff. Medical professionals—including interns and trainees—who operate accounts in an official capacity must report them to their affiliated institutions. Institutions are instructed to maintain records, conduct dynamic supervision, and regularly review posted content.
For any negative behavior discovered, disciplinary action should be taken according to the severity of the violation, and in serious cases, the institution may order the suspension of the account’s operations.
E-Commerce Merchants Use Giant Tags to Prevent “Wear-and-Return” Abuse
According to a report from Sixth Tone, during the 2025 Double 11 shopping festival, many Chinese e-commerce retailers began attaching A4-sized giant tags to clothing items in an effort to reduce the industry’s high return rates—particularly targeting malicious “wear-and-return” behavior.
These oversized tags are typically made of stiff cardboard, with exaggerated dimensions and bright colors. They are often printed with prominent messages such as “No Returns or Exchanges After Removal.” The design ensures that the tag is too large to conceal or tuck away while wearing, effectively discouraging customers from wearing the clothes for photos or outings before returning them. A hangtag manufacturer in Sichuan told local media that the giant tags first appeared in March this year and became widely adopted by clothing companies ahead of Double 11. Some models have already sold out. Last week, the hashtag “Giant Tags to Prevent Returns” trended on Weibo.
Industry estimates suggest that return rates in China’s online apparel sector remain among the highest in e-commerce, with women’s clothing return rates reaching as high as 60% to 80%. In recent years, retailers have voiced growing frustration over shrinking profit margins, noting that they must not only cover return shipping but also bear the costs of logistics, cleaning, and restocking. Merchants have also complained about customers who exploit the system by purchasing clothes for short-term use and returning them immediately afterward. Such returned items often come back with sweat stains, makeup residue, or odors, rendering them unsellable.
Casual Rumors Worth a Glance
According to CNBC, citing insiders, Moonshot AI’s newly released Kimi K2 Thinking model, unveiled on November 6, cost $4.6 million to train. The company claims that the model surpasses GPT-5 and Sonnet 4.5 Thinking in certain benchmark tests. For comparison, DeepSeek V3 officially reported a training cost of $5.6 million, while GPT’s training costs are estimated to be in the billion-dollar range.
According to Wired, Meta CEO Mark Zuckerberg has allegedly been operating an unlicensed private school on the grounds of his Palo Alto estate for several years. The school reportedly began operating around 2021, officially registering for 14 students, but neighbors observed more than 30 students attending regularly. Neighbors have repeatedly filed complaints with local authorities over noise, traffic congestion, and intrusive security patrols. Eventually, the city ordered the school to shut down. A spokesperson for the Zuckerberg family stated that the school had not closed but rather relocated to a new site, without disclosing its location.
According to China Tax News, on November 7, 22 leading organizations in the micro-drama industry, including iQIYI, Kuaishou, and Douyin, jointly signed the “Micro-Drama Industry Lawful Tax Compliance Initiative” in Beijing. The document urges practitioners to abide by tax laws and fair competition principles, starting with every business transaction. It explicitly prohibits actors and creators from shifting tax obligations through “after-tax pay” or “after-tax revenue share” schemes, requires companies to fulfill withholding responsibilities, and denounces illegal practices such as “dual contracts” and private account payments.
According to a post by Weibo tech blogger @Digital Chat Station, as of November 2, Apple’s iPhone 17 series had reached over 8.25 million activations in China. Of these, approximately 3.957 million were iPhone 17 Pro Max, 2.462 million were iPhone 17 Pro, 1.728 million were iPhone 17, and 107,000 were iPhone Air. Based on the current pace, total activations are expected to exceed 10 million by the week of November 16.
Apple is reportedly planning a major expansion of its satellite capabilities, which will include an API for third-party apps, satellite-based navigation in Apple Maps, photo messaging via satellite, and maintaining connectivity even without a direct line of sight to the sky. These upgrades are made possible by infrastructure improvements from Apple’s satellite partner, Globalstar.
Apple is also said to be finalizing a $1 billion-per-year agreement to license a custom 1.2-trillion-parameter Gemini model to power its enhanced Siri assistant. Internally, this model is referred to as AFM v10, a codename designed to obscure its connection to Google. However, Apple’s long-term goal remains to transition to its own in-house AI models.
In addition, Apple is reportedly developing a low-cost MacBook, codenamed J700, set for release in 2026. The device is aimed squarely at Chromebooks and budget Windows PCs, with a particular focus on the education market.
Apple is also preparing to introduce a new Health+ subscription service within the Health app as part of iOS 26.4. Health+ will use an AI assistant to help users manage their personal health. Meanwhile, due to high churn rates and limited revenue from Fitness+, Apple is reassessing the service’s future and has begun reshuffling its management team. However, because Fitness+ maintains a dedicated core user base and has low operational costs, Apple is unlikely to shut it down entirely to avoid negative publicity.
Welcome to this issue of App Picks. You can use the article’s table of contents to quickly jump to the sections that interest you most. If you discover other apps or topics you’d like to discuss, feel free to share them with us in the comments section.
New Apps Worth Your Attention
While SSPAI has always been dedicated to discovering and introducing high-quality apps across different platforms, there are still many apps with outstanding design, functionality, interaction, and overall user experience that we haven’t yet featured. Some may be long-standing hidden gems, while others are brand-new releases. Here, we bring them to your attention.
Hurricane Camera: Lowering the Barrier for Video Creation, Making iPhone Filmmaking Easier
Platform: iOS
Keywords: Mobile Imaging, LUT
@Vanilla: This year, Apple has once again strengthened its dominance in mobile videography with the iPhone 17 Pro series. In addition to hardware upgrades, Apple introduced professional-grade features like OpenGate, Genlock, support for ProRes RAW video recording, and the new Apple Log 2 format.
Shortly after the iPhone 17’s release, Hurricane Studio launched Hurricane Camera, a third-party video app for iPhone—something that sounds perfectly reasonable at first. But with Apple’s own Final Cut Camera, its “godson” Blackmagic Camera, and a lineup of other third-party apps already targeting advanced mobile videography, one might wonder—is there really room for another one? With that question in mind, I decided to give Hurricane Camera a try. After using it for a while, here’s what I found.
When you open Hurricane Camera, it defaults to video shooting mode. You can switch to Dynamic Image (Log) mode via the top tab, though this feature requires a paid upgrade. In the video mode, the top-left corner of the viewfinder displays input levels for the left and right microphones, while the top-right corner houses the video format selector. Tap it to choose among different formats, resolutions, and frame rates.
Inside the format menu, Hurricane Camera clearly labels and explains options like sRGB, HDR, Log, and Log 2—a friendly touch for users who aren’t professional cinematographers. At the bottom of the viewfinder, there’s a row of controls for front/rear camera switching, focus, white balance, ISO (sensitivity), shutter speed, exposure compensation, and settings. From focus to exposure compensation, each parameter can be fine-tuned with a slider or left on Auto. However, it’s worth noting that focus and exposure compensation use circular sliders, while the other three use horizontal ones—this small inconsistency in UI design can feel a bit confusing at first glance.
The lens switch module and the storage information panel are hidden by default, but you can swipe up on the viewfinder to bring them out, or swipe down to hide them again. Hurricane Camera even adds an animation when switching lenses, though the transition isn’t entirely smooth—it’s unclear whether that’s an intentional design choice or a technical limitation. One thing to note: lens switching is disabled once recording starts, meaning you can’t change lenses mid-shot.
To the left of the record button is the media library, where you can edit your footage—apply LUTs, make simple cuts, and render the final result for export. You can also export a clip as a dynamic image, though that feature is reserved for Pro members.
To the right of the record button lies the LUT button. Hurricane Camera offers a selection of built-in LUTs you can apply instantly, with real-time previews displayed directly in the viewfinder.
In the settings menu, Hurricane Camera provides a variety of practical options. For example, under performance settings, you can limit preview frame rates, enable system overload protection, and toggle LUT preview—all of which can noticeably improve the app’s smoothness. In the recording settings, you can choose to record either the raw footage only or include LUT-applied video simultaneously.
To me, Hurricane Camera strikes an excellent balance between ease of use and professional-level functionality. It’s powerful enough to handle most shooting needs while remaining approachable for casual users. To reinforce that accessibility, the app even includes a “Simple Mode” toggle in the settings menu, which retains only the core shooting features—further lowering the barrier for everyday creators.
Hurricane Camera is available for free on the App Store, with a ¥69 Pro membership unlocking features such as dynamic image recording and export. Relation article.
Wins 3: Efficient Multi-Window Management
Platform: macOS
Keywords: window management
@Snow: Earlier this year, I recommended two macOS window management apps—TabTab, known for its minimalism and efficiency, and DockDoor, praised for its gorgeous visual effects. The app I’m introducing today, Wins, feels like a perfect blend of the two while also incorporating some of Magnet’s strengths. With deep system-level integration, Wins helps you manage multiple windows more effectively.
Like DockDoor, Wins provides multi-window previews for both the App Switcher and the Dock, designed with macOS’s translucent “liquid glass” aesthetic. Animations are fluid, and users can quickly close windows directly from their previews. Wins also enhances the App Switcher with its “Cmd-Tab Plus” feature—after pressing Command + Tab to activate the switcher, you can hold Command and use the arrow keys, or press W or Q, to swiftly switch, close, or quit apps.
Wins also brings a Windows-like window toggling logic to the Dock: when enabled, clicking the same Dock icon twice automatically minimizes its corresponding window. Combined with the macOS option “Minimize windows into application icon” and multi-window previews, this feature keeps your Dock neat and uncluttered.
In addition, Wins offers Magnet-level window snapping and split-screen options. You can drag a window to the screen’s edge to snap it to the left, right, or full screen. When dragging a window to the top of the screen, Wins presents four preset split layouts in a floating overlay—just drag the window onto your desired layout to instantly organize your workspace. The app also includes handy shortcuts like hiding all windows, hiding others, and centering windows, all of which can be customized in System Settings > Wins.
Wins further supports features like shake-to-hide other windows, multi-monitor quick switching, and closing windows from the Mission Control view. However, during testing, I encountered a few issues affecting usability—for example, certain apps like One Markdown failed to display previews, and the integrated settings panel occasionally glitched when switching between light and dark modes.Wins offers a one-day free trial, and it’s best to test it before purchasing.
A personal license (for one device) costs ¥139, but during the SSPAI App Store Double 11 promotion, you can get it at a 40% discount via the purchase link.
Hungry: If You Feel Hungry, Go Cook
Platform: Android
Keywords: recipes
@Peggy_: I have to start with a confession. During the height of the food delivery boom, I practically lived on hamburgers, barbecue, spicy hot pot, milk tea, beer, and iced Americanos—never leaving home, barely touching my kitchen. Unsurprisingly, I eventually earned myself a bout of gastritis. It’s not that eating delivery food will definitely make you sick, but compared to constantly consuming takeout with questionable hygiene, taking the time to visit a local market and cook something with your own hands is not only healthier, but also a great way to rediscover the joy of everyday life.
Hungry is a beautifully designed recipe app that helps you organize the dishes you want to cook. As you use it over time and add more content, it gradually solves that eternal dilemma—“What should I eat today?” Let’s walk through the process of creating a recipe to get familiar with how it works.
Tap the “Add” button in the lower-right corner of the app. You can take a photo of the finished dish or the prepared ingredients to make your recipe look more appealing, then enter the recipe name. In the description field, you can add personal notes or comments about how much you like the dish. If the recipe comes from a creator or YouTuber you follow, you can credit them as the author—or if it’s your own creation, even better; nothing beats the satisfaction of cooking your own recipe. You can also set an estimated cooking time (in minutes by default), though that might be a bit limiting for Chinese dishes that require longer steaming or simmering. Before finishing this setup, you can tag your dish with labels such as “Healthy Meal” or “Vegetarian.”
Next comes the real work: adding ingredients one by one, including their names and quantities. To keep your prep organized and avoid chaos, Hungry allows you to group ingredients, add dividers between sections, or even use emojis to make ingredients easier to identify—and to add a bit of fun to recipe editing. The app even tries to automatically suggest emojis for each ingredient, but in Chinese, the results are often hilariously off. For example, it once matched “lamb” with “green tea,” which clearly required manual correction. If you’re copying an existing recipe from elsewhere, Hungry also includes a convenient “Paste” button so you can quickly drop in all the ingredient names at once.
After that, you can begin adding cooking steps. Hungry lets you list each step in order, complete with descriptions, duration, and optional tips. You can even bulk paste instructions if your content matches the app’s formatting requirements. Overall, Hungry has done a good job minimizing the friction of recipe creation—after all, if maintaining your recipe collection is harder than cooking itself, who would bother?
MagicFX Wallpaper: Bringing Pixel’s Exclusive Wallpaper Magic to Everyone
Platform: Android
Keywords: wallpaper
@大大大K: On Pixel devices running Android 16, users can create wallpapers with a “Magic Portrait” effect—where the subject of a photo appears to extend beyond its frame. Samsung has introduced a similar feature in newer versions of One UI, but for most other Android devices or older systems, this option simply doesn’t exist.
To change that, an independent developer created MagicFX Wallpaper, an app that brings the same subject-pop-out effect to any Android phone. The app automatically separates the subject from the background of a photo and lets you export it as a wallpaper with that signature layered look.
Using it is simple: just select a photo, and the app will automatically handle the background and subject separation. The extracted subject is positioned relative to its base, creating the illusion that it’s “standing inside the frame, with its head popping out.” However, depending on the photo’s composition—such as subject position, size, or angle—the pop-out effect may not always look perfect. In such cases, you can fine-tune the boundaries of the subject under the “Subject” option, cropping out unwanted areas to improve the final result.
Once you’re done editing, MagicFX Wallpaper’s preview tool allows you to see how the wallpaper transitions from lock screen to home screen. By adjusting the home screen wallpaper’s position and scale, you can achieve a smooth, visually cohesive unlock animation.
MagicFX Wallpaper supports separating people, pets, and distinct objects from photos as subjects. For more complex images, the developer has promised ongoing algorithm improvements. Some of the frame styles in the editing page require an in-app purchase to unlock, but more designs are already planned for future updates.If you’re curious to try it, MagicFX Wallpaper is available for free on Google Play.
AutoSnore: Intelligent Snore Tracking
Platform: iOS
Keywords: Snore Monitoring
@Snow: When iOS 26 introduced the new sleep score system, many users thought that sleep-tracking apps like AutoSleep were about to become obsolete. But the AutoSleep team clearly had no plans to retire. Last week, they launched AutoSnore, a new app designed to help users understand how snoring affects their health. Unlike other solutions, AutoSnore doesn’t require external devices such as the Apple Watch — simply place your iPhone by your bedside before sleeping, and the app will automatically track and analyze your snoring throughout the night, adding a new dimension to your sleep insights.
Using AutoSnore is remarkably straightforward. Upon the first launch, you just need to enter your nickname, then before going to sleep, position your iPhone’s microphone toward yourself and tap the Start button. In the morning, tap Stop, and AutoSnore will automatically process your data. It presents your snoring patterns in a visual “Snore Cloud,” where white dots indicate snoring events, categorized by frequency and intensity. Beyond analyzing a single night, AutoSnore also compares your current session with past records, giving you a broader view of your sleep quality over time.
Within the Snore Cloud view, you can replay recorded sound snippets from your sleep. Thanks to its built-in algorithms, AutoSnore isolates snoring segments and highlights the “Top 10 Snore Moments,” helping you identify periods of severe breathing irregularity so you can take corrective action. The app also tags other detected sounds — such as voices, musical instruments, ambient noise, or natural sounds — allowing you to revisit specific moments and even discover who (or what) you might have “talked to” in your dreams.
Scrolling down to the main screen, AutoSnore also provides a manual tagging feature. You can log factors that might affect your snoring, such as whether you have a cold, are overly fatigued, switched pillows, or took medication — all of which help refine your personal sleep optimization strategy.
However, as a newly released app, AutoSnore still suffers from several bugs that affect the overall user experience. The sound analysis algorithm, for example, occasionally misclassifies alarm tones as high-intensity snores. Since there’s currently no way to exclude alarms from detection or manually correct false positives, the analysis results can be significantly skewed. Additionally, due to its strict privacy policy, AutoSnore cannot yet distinguish between different voices. If you share a bed with someone or fall asleep with the TV or a podcast on, your only workaround is to reposition your iPhone or tweak the Sound Threshold setting under Options > Configure My AutoSnore to filter out external noise. Users have also reported playback issues such as overlapping soundtracks and UI glitches with mislabeled tags.
AutoSnore is now available on the App Store for an introductory price of ¥38. Given the current technical issues affecting its daily usability, it might be wise to wait for a few updates before purchasing.
Can’t-Miss App Updates
Besides brand-new apps, many long-standing names on the App Store continue to evolve with fresh, useful features. Here at SSPAI, we aim to help you keep up with the latest updates worth your attention—so you can quickly discover what developers have been up to.
XMind: AI-Powered Mind Mapping and Brainstorming
Platform: iOS / iPadOS / macOS / Android / Windows / Web
Keywords: Mind Mapping, Brainstorming
@ElijahLee: Recently, the veteran mind mapping app XMind rolled out a major update, introducing a suite of AI-powered creative tools. With these new features, users can now leverage AI to automatically generate mind maps, break down projects into tasks, assist in brainstorming sessions, and even spark new ideas.
In the updated XMind interface, you’ll find a new “One-Click Generate” button in the sidebar—this is the entry point to the AI creation tools. In the pop-up window, you can transform virtually any content—an article, document, website, or even a webpage video—into a structured mind map. This makes the process of mind map creation faster and significantly less tedious.
In my own quick test, I found XMind’s AI assistance dramatically reduces the manual labor involved in organizing and formatting maps. For instance, I was reading Satantango and asked XMind to create a mind map summarizing each chapter and its main characters. The resulting map looked impressively polished: chapter titles, plot outlines, and character listings were all logically arranged and visually cohesive. The only issue? The AI had completely made up the story—none of the plot points or characters matched the book. Clearly, XMind’s AI had a “hallucination moment.”
XMind’s AI toolset is surprisingly comprehensive. Within the “One-Click Generate” window, you can upload files like PDFs, Word documents, PowerPoint slides, plain text, or Markdown files. You can also select from multiple diagram types—mind maps, logic charts, organizational charts, timelines, and fishbone diagrams. The system supports multiple languages, including English, Japanese, Simplified Chinese, and Traditional Chinese.
The AI Work Breakdown feature automatically decomposes projects into executable tasks, assigning timelines and priorities. You can use it when first generating a map or later, by right-clicking on any node and selecting “AI Work Breakdown.” It effectively transforms a conceptual mind map into a practical action plan.
The web version of XMind currently offers even more AI-powered features, which will gradually roll out to desktop and mobile platforms. One standout is Brainstorming, which provides five AI-assisted creative modes: Direct, Associative, Analogical, Synthetic, and Exploratory. Essentially, this is an AI chatbot for idea generation—just describe your topic, select a brainstorming style, and the system will generate idea cards and automatically arrange them into an elegant mind map.
Another feature, Grow Ideas, allows AI to expand on any topic or subtopic within an existing map. The tool icon sits at the far right of the toolbar. You can choose between on-demand or automatic generation, letting the AI analyze the current structure and create new branches of thought in real time.
You can download XMind from the official website. The AI functions use “AI Points,” with each task consuming a different amount depending on complexity. Free users get 10 AI Points, while upgrading to the Premium plan ($99/year, with a 7-day free trial) grants 500 points per month, unlimited cloud mind maps, AI summaries, Gantt charts, and more.
DEVONthink 4.1: Expanded AI Model Support and Natural Language Task Creation
Platform: macOS
Keywords: Knowledge Management
@化学心情下2: As one of the most established file management tools on macOS, DEVONthink has maintained a steady pace of major version updates. The release of version 4.0 in July 2025 marked a major milestone, introducing support for AI-powered large language models. Now, just a few months later, the 4.x series receives its first minor update—version 4.1—bringing with it a series of meaningful improvements and expanded AI integration.
Compared with version 4.0, where AI was first introduced, version 4.1’s biggest change is its enhanced openness and flexibility in connecting to AI services. Previously, users were limited to specific AI providers; now, you can connect to your preferred models through OpenRouter or OpenAI (Compatible) endpoints. This means you can integrate models from providers like xAI, Baidu, and Alibaba’s Qwen. On the native side, DEVONthink 4.1 adds support for Claude 4.1 Opus, Claude 4.5 Sonnet, Gemini 2.5 Flash Lite, OpenAI GPT-5, Google Imagen 4, Mistral, Google Nano Banana, and Ollama Cloud. All Perplexity Sonar models now include vision capabilities, giving users the option to work with visual input when needed.
With these AI integrations, DEVONthink takes automation even further. Users can now use natural language in the Script Assistant to generate executable AppleScript or JavaScript for Automation code. This makes it much easier to automate workflows without manually writing lengthy scripts, reducing syntax errors and improving productivity.
AI also extends to image generation and editing. You can now adjust or create images through prompt-based editing, using AI to refine visual details or produce entirely new images according to your description. The same principle applies to editing—simply tell the AI to remove unwanted objects or insert new subjects into your scene, and DEVONthink handles the rest.
Beyond AI, version 4.1 also introduces a Quick Look extension that allows users to preview Spotlight search results directly in macOS. Large Markdown files have also been optimized for better performance and faster editing speeds. If you use DEVONthink for document or note management, this update is worth exploring—it makes organizing, automating, and editing your files more intuitive than ever.
The App Store has officially launched its full web version, expanding access beyond the visionOS-specific web interface previously available.
Meanwhile, rumors suggest that WeChat is testing a new feature that would allow users to log into the same account on multiple smartphones simultaneously.